90 Chapter 4
Field Replaceable Units
FRU Removal and Replacement
Power Switch/LCD Assembly
This section explains how to remove and replace the power switch/LCD assembly, which is
located on the front panel of the B2000 workstation.
Removing the Power Switch/LCD Assembly
Perform the following steps to remove the power switch/LCD assembly:
1. Open the workstation’s front panel as shown in the section “Opening the Front Panel.”
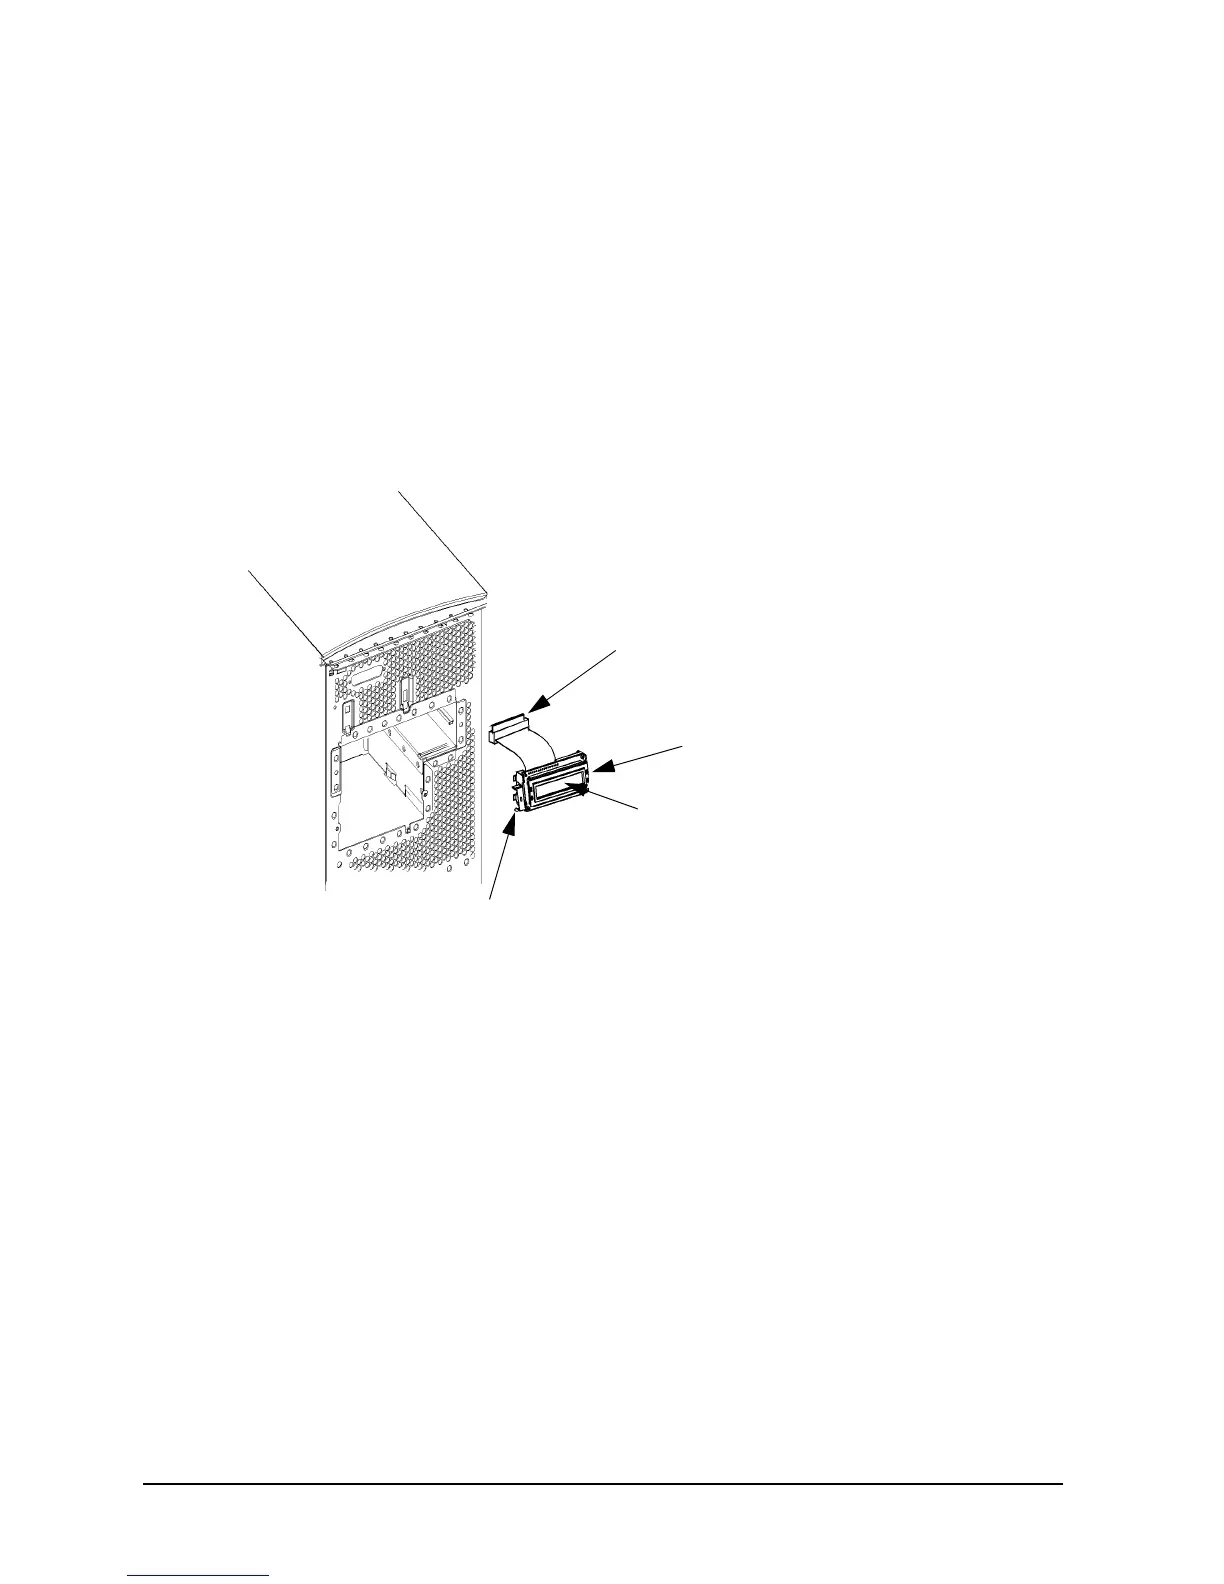
2. Unplug the power switch/LCD assembly’s connector as shown in Figure 4-4.
Figure 4-4. Removing the Power Switch/LCD Assembly
3. Press inward on the mounting clip located on the right side of the power switch/LCD
assembly and pull the right side of the assembly outward in a clockwise motion. See
Figure 4-4. This action releases the mounting clips on the left side of the power
switch/LCD assembly.
Replacing the Power Switch/LCD Assembly
Perform the following steps to replace the power switch/LCD assembly:
1. Open the workstation’s front panel as shown in the section “Opening the Front Panel.”
2. Insert the mounting clips on the left side of the power switch/LCD assembly into the
slots on the workstation chassis. See Figure 4-4.
3. Press inward on the mount clip located on the right side of the power switch/LCD
assembly and insert this clip into the hole provided for it on the workstation chassis.
4. Plug in the power switch/LCD assembly’s connector.
5. Close the workstation’s front panel as shown in the section “Closing the Front Panel.”
Assembly Connector
Power Switch/LCD
Right Side
Left Side
Power Switch/LCD
Assembly
Mounting Clip
Mounting Clips