Chapter 4 125
Field Replaceable Units
FRU Removal and Replacement
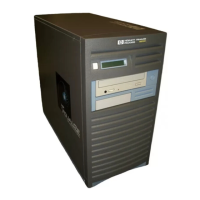
3. Unscrew the two T-15 Torx screws that hold the workstation’s air divider in place, as
shown in Figure 4-51. Then grasp the edge of the air divider and pull it towards you to
remove it from the workstation.
Figure 4-51. Removing the Air Divider
4. Disconnect the I/O fan and speaker cables from the system board.
5. Lift up on the fan/speaker mounting bracket tab from the hole in the drive bay housing.
Then rotate the mounting bracket toward the chassis wall and rotate the fan/speaker
mounting bracket out of the chassis.
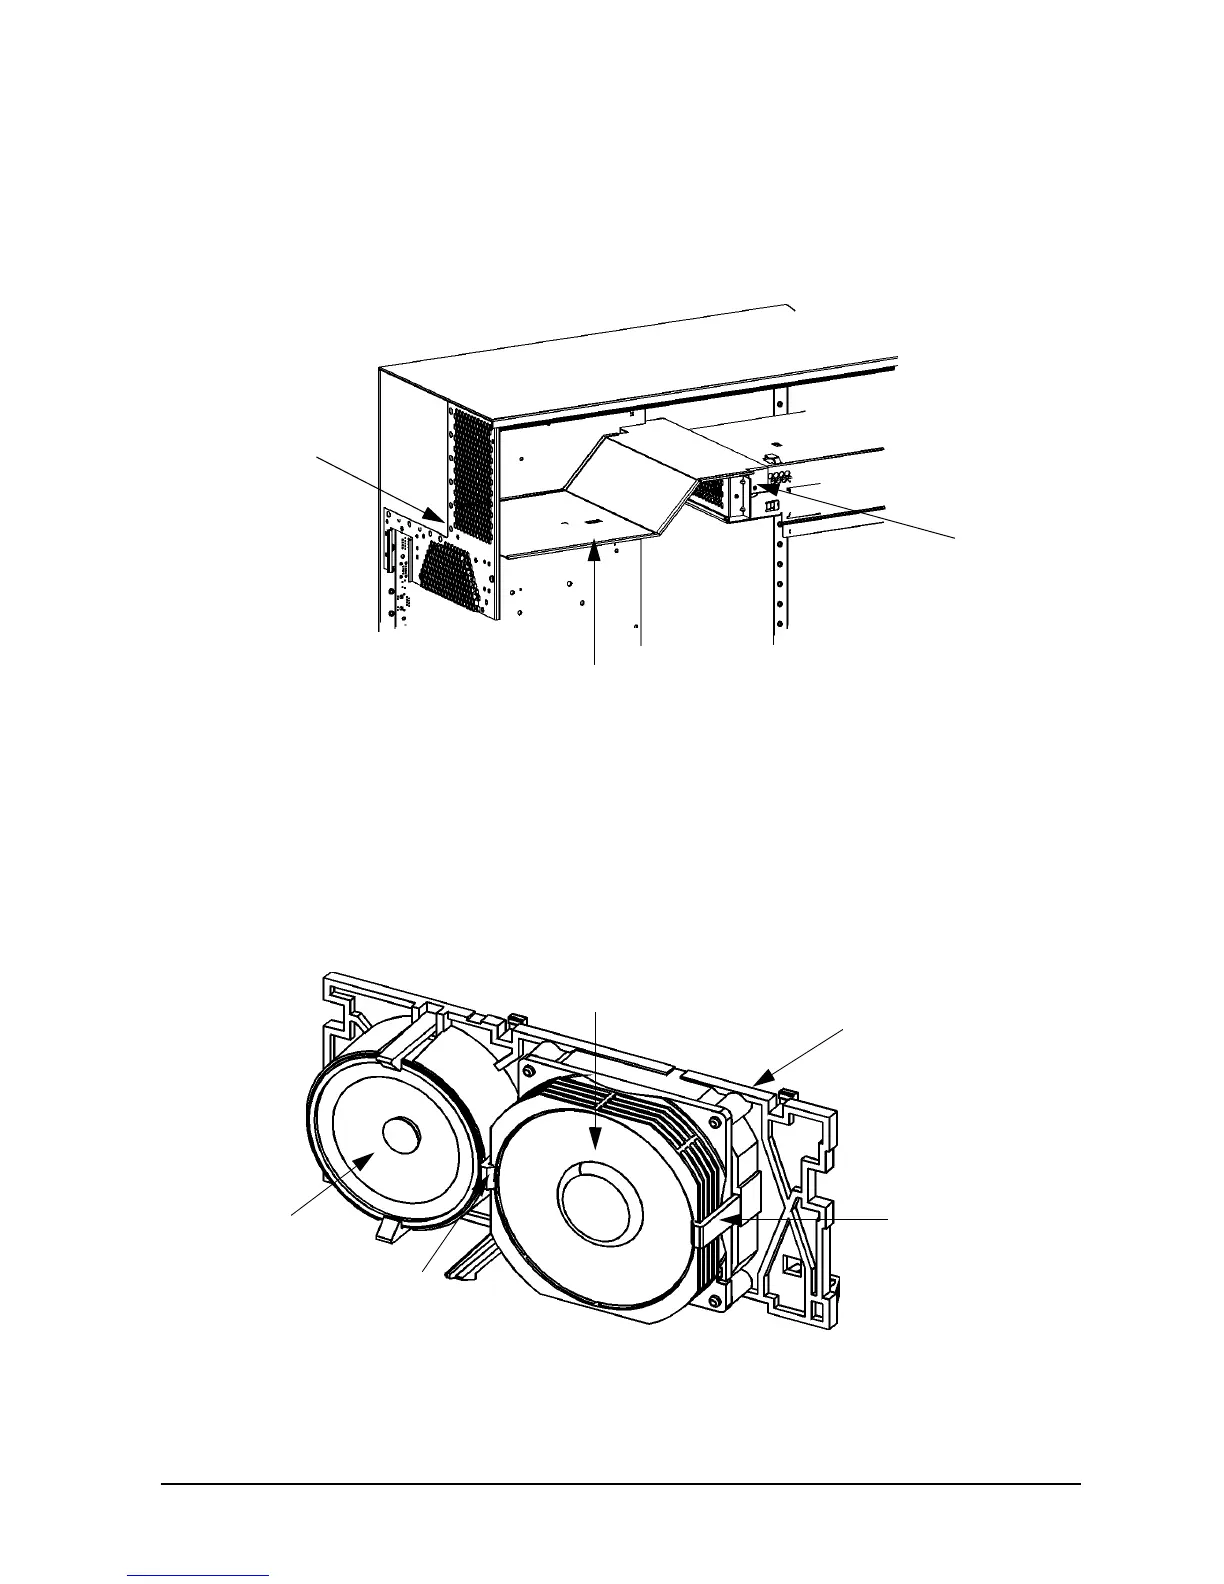
6. Remove the I/O fan from the mounting bracket by slightly pulling the left and right fan
mounting clips away from the fan, and then pulling the fan outward. See Figure 4-52.
Figure 4-52. Removing the I/O Fan from the Bracket
T-15 Torx
T-15 Torx
Air Divider
Screw
Screw
Speaker
Fan
Mounting
I/O Fan
I/O Fan/Speaker
Mounting Bracket
Clip
Fan
Mounting
Clip