98 Chapter 4
Field Replaceable Units
FRU Removal and Replacement
If you will replace the floppy disk drive with a blank, continue on with step 7 below.
However, if you will replace it with a new floppy disk drive, go to step 6 in the section
“Replacing or Installing a Floppy Disk Drive” on page 101.
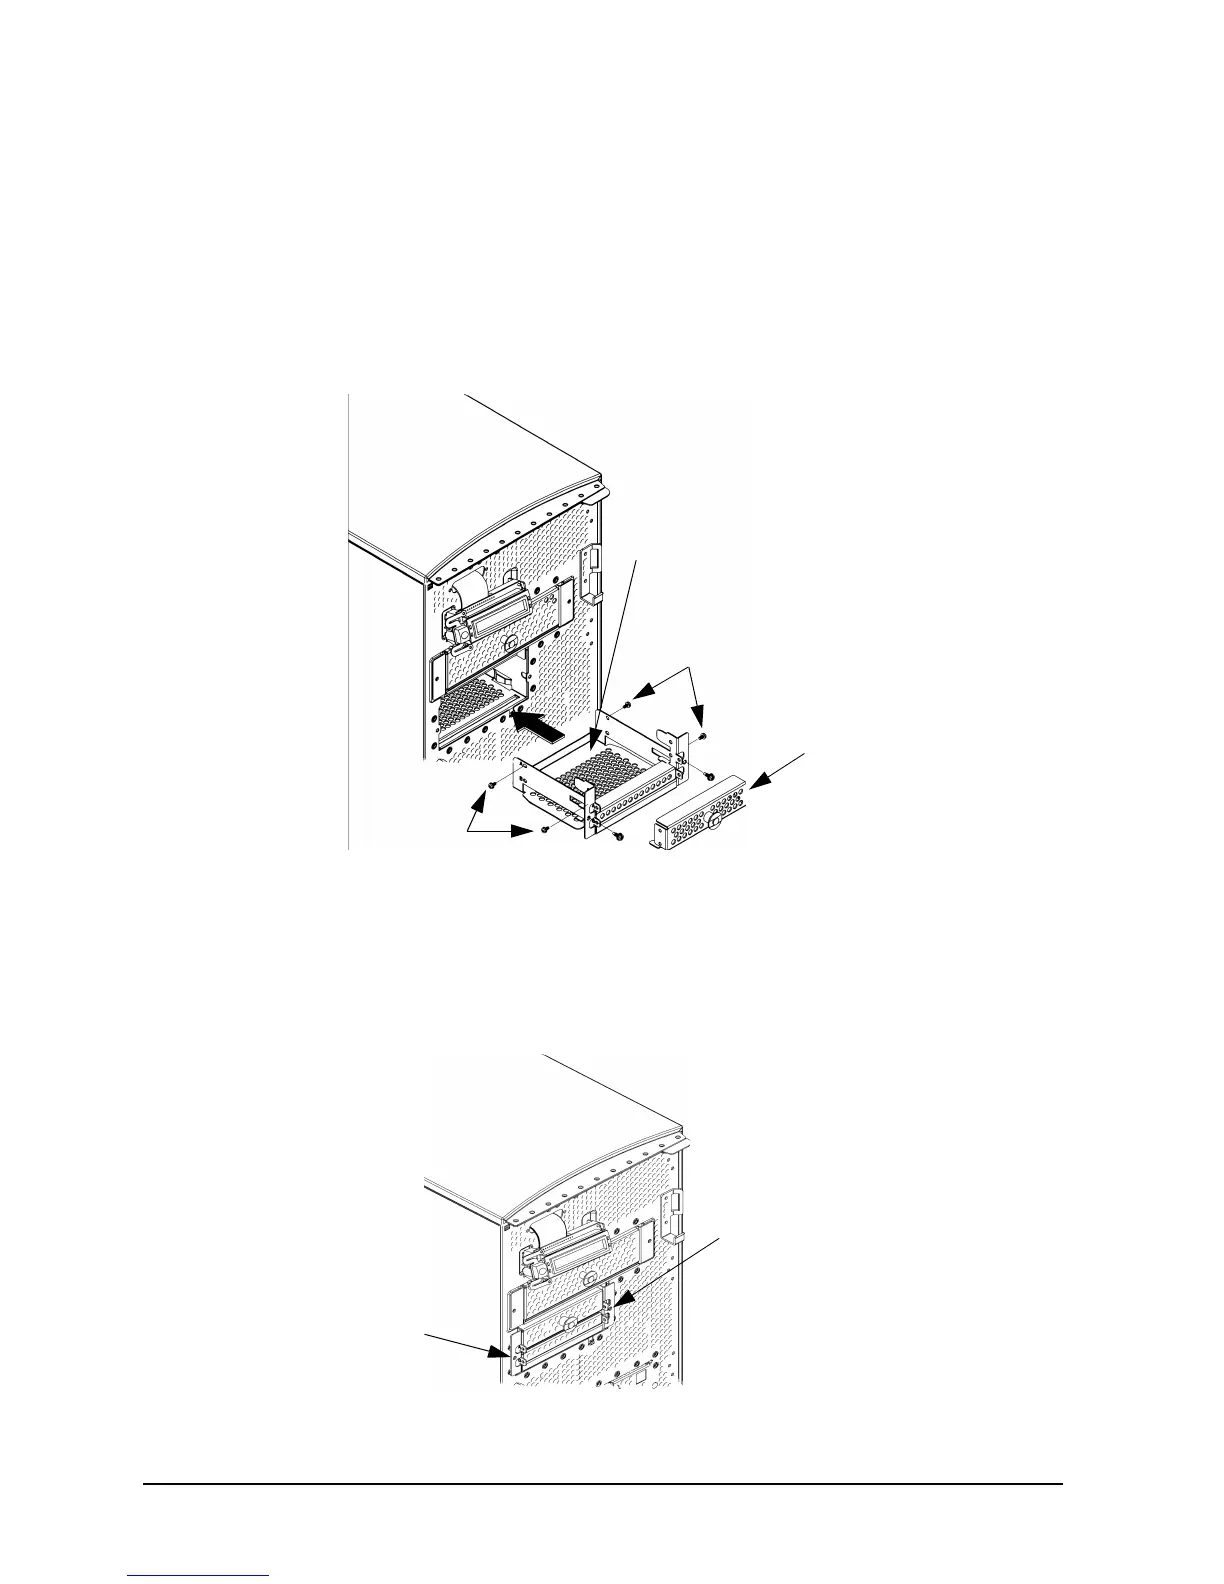
7. Place the floppy disk drive blank in the floppy disk drive bracket and tighten the four
floppy disk drive mounting screws (T-15 Torx/slotted screws) into the bracket. See
Figure 4-15.
Figure 4-15. Installing the Floppy Disk Drive Blank and Bracket
8. Slide the floppy disk drive blank and its bracket into the workstation chassis as shown
in Figure 4-15.
9. Tighten the two floppy disk drive bracket screws as shown in Figure 4-16.
Figure 4-16. Tightening the Bracket Screws
Floppy Disk Drive
Mounting Screws
Floppy Disk
Floppy Disk Drive
Mounting Screws
Drive Blank
Floppy Disk
Drive Bracket
Bracket Screw
Bracket Screw