• Serial console cables that came with your array. The cables arrive affixed to the power supply handle.
• Laptop computer or workstation
• Null-modem cable with DB9-female connector at one end and the appropriate connector on the other to mate with the
serial interface on the laptop computer or workstation
Procedure
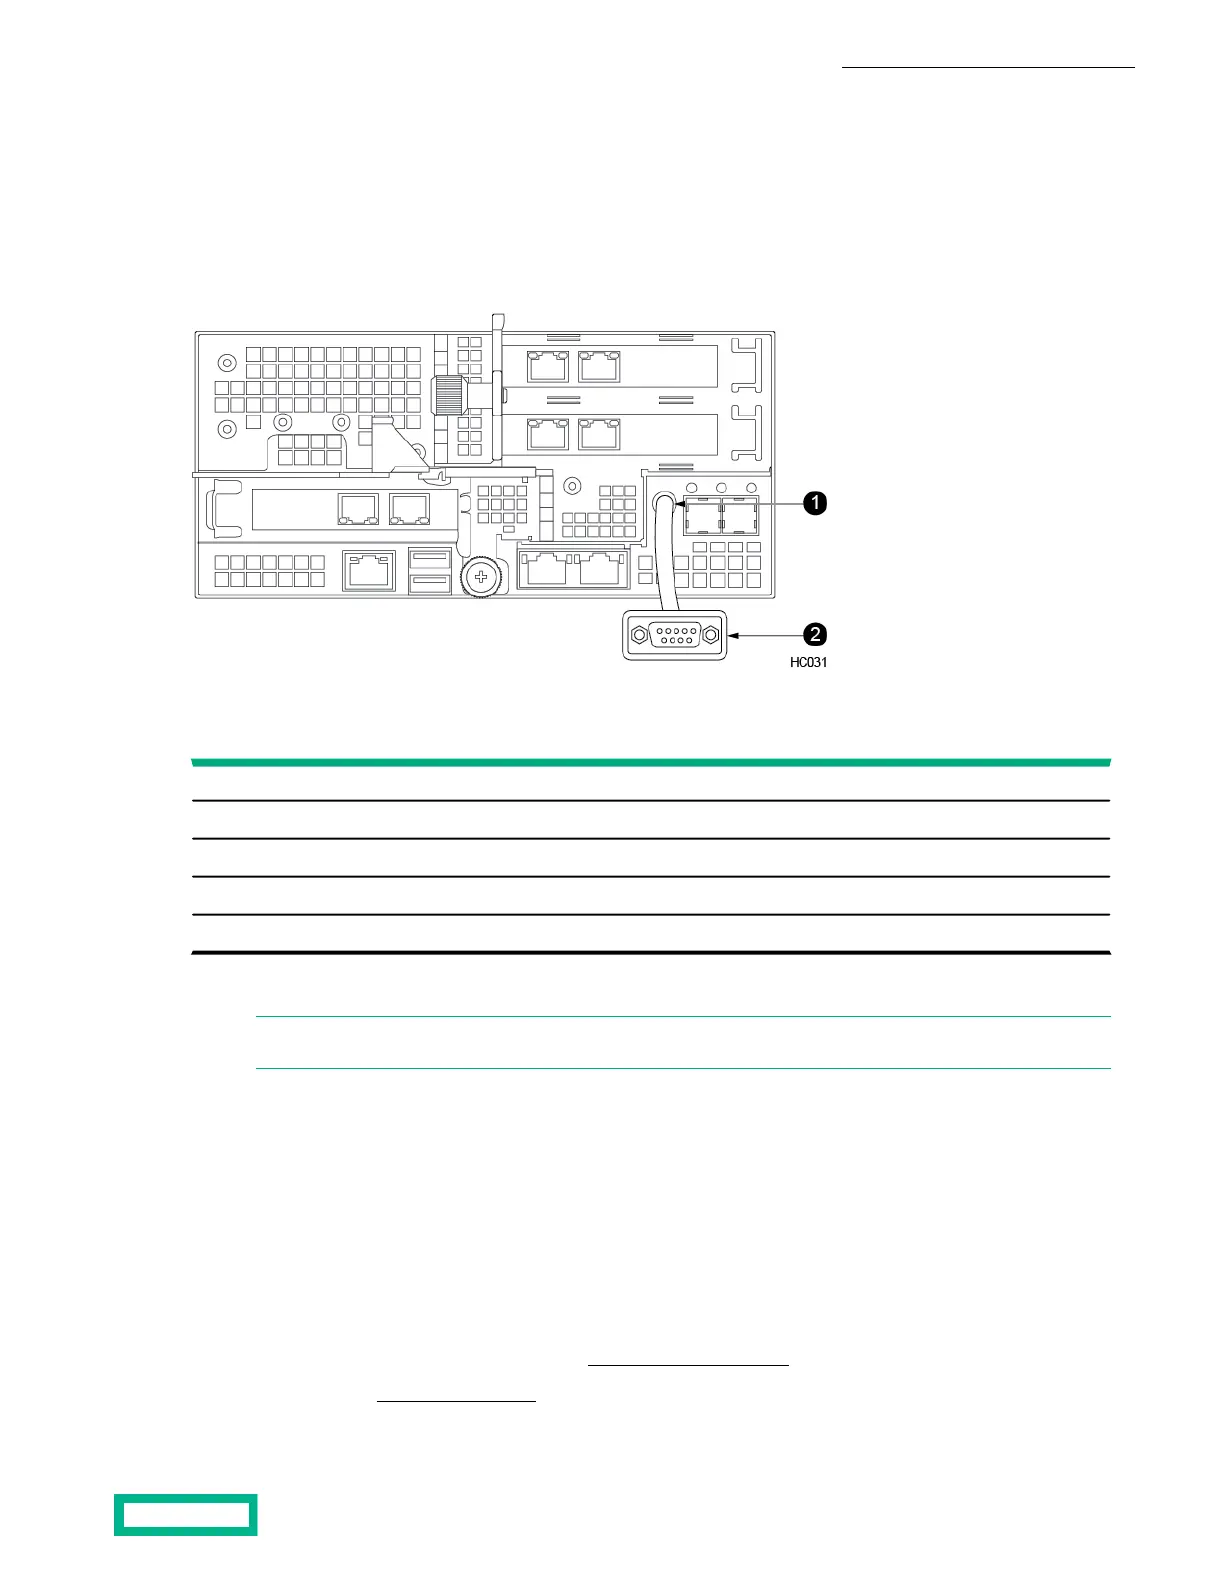
1. Connect the serial port on your laptop computer or workstation to the serial port on the controller.
21 Serial connectorSerial port
2. Run the serial console software with the following settings:
8Data bits
NoneParity
1Stop bits
115.2KbpsSpeed
NoneFlow control
3. Log in as user admin with the password admin.
Note: You can only log into the active controller. If you cannot log in, move the laptop computer or workstation
connection to the other controller and try to log in again.
After you have logged in, the CLI is ready to accept commands.
What to do next
Type ? to see a list of commands.
Type the command followed by --help to see the usage information for that command.
Complete the Initial Setup Using the CLI
Before you begin
The CLI requires a serial connection with the array. See Set up a Serial Connection on page 46.
Before you start, fill out the Installation Checklist on page 19. You need the information from the checklist to perform the
initial CLI setup.
Install the HPE Storage Array 47
Documentation Feedback: doc-feedback-hpe-storage@hpe.com
 Loading...