FusionModule800 Smart Small Data Center
Maintenance Guide
Huawei Proprietary and Confidential
Copyright © Huawei Technologies Co., Ltd.
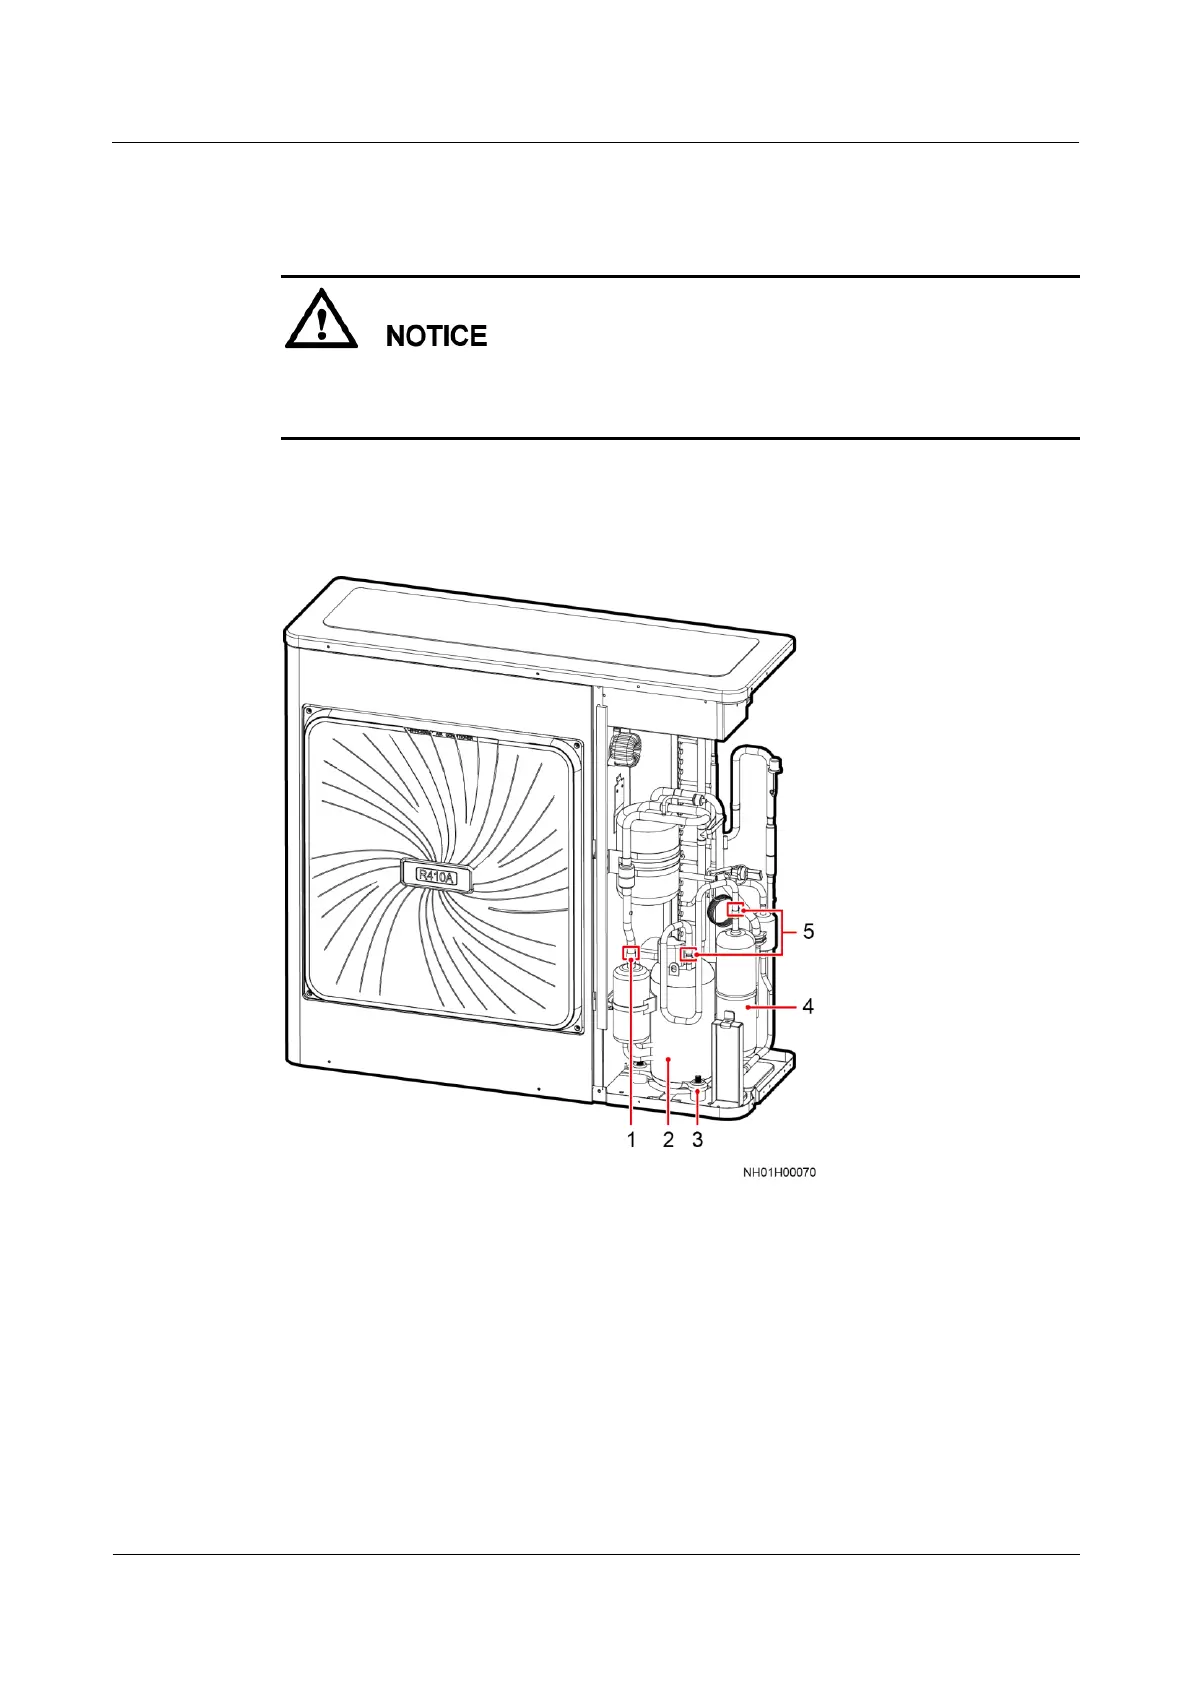
Step 7 Weld from the two welding points shown by (1) and (5) in Figure 5-42. Remove the discharge
pipe that connects the compressor to the oil separator, and then remove the suction pipe.
To avoid burning the internal components, other pipes, thermal insulation foam, power cables,
and labels, take protective measures, such as spreading wet cloth, around the welding
position.
Step 8 Remove the three nuts (shown by [3] in Figure 5-42) from the compressor base using a 13
mm socket wrench, and remove the compressor.
Figure 5-42 Compressor position
(1) Welding point for the
suction pipe
(3) Nuts on the
compressor base
(5) Welding point for the
discharge pipe
Step 9 Remove the rubber plugs from the suction and discharge pipes of the new compressor, and
screw the new compressor bound with an oil heating belt to the base using a 13 mm socket
wrench.