INSTALLATION
8
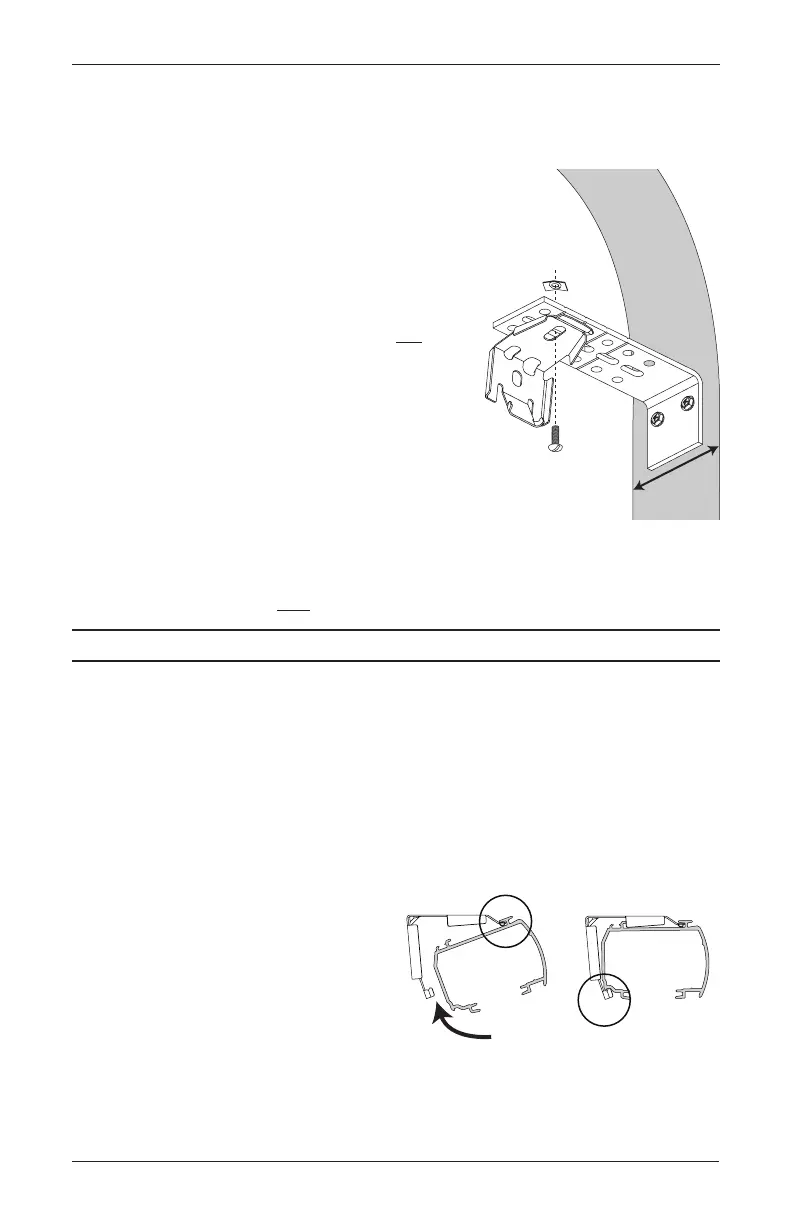
Mount the Installation Brackets — EndMount
End mount the headrail when conventional mounting techniques will not work — for example,
in an arched window. Allow for rear fabric clearance.
■ Mount the extension brackets on a surface at least 1
1
/
2
" wide.
➤ The top of the extension brackets should be at the
desired shade height. The brackets should be level
and aligned.
CAUTION: The rear of the extension brackets must
be flush against a flat mounting surface. Do not
mount the extension brackets onthe curved surface
of the arch opening.
■ Mark two screw holes per bracket.
■ Attach the extension brackets using the screwsprovided.
IMPORTANT: Use a level to check that the mounting
surface is level. Shim the brackets if necessary.
■ Attach the installation brackets to the underside of the extension brackets using the
provided screws and speednuts.
CAUTION: Both brackets must be installed at the same depth and height.
Proceed to “Install the Shade” below.
Install the Shade
■ Peel back the top edge of the protective covering from the top of the headrail.
■ Lower the fabric about 6" before installing the shade.
IMPORTANT: To avoid damage to the fabric, make sure the fabric is not caught between
the headrail and the installation bracket.
■ Position the shade so that the front faces you.
■ Slip the headrail into the installation
brackets so the front of the bracket slides
under the front groove on the top of
theheadrail.
■ Gently roll the back of the headrail up and
push back to snap it into the bracket.
■ Remove the protective covering from the
headrail.
Speed
Nut
Screw
1
1
/
2
"
Minimum
Headrail
Bracket
fits under groove.
Back of the
headrail snaps

 Loading...


