INSTALLATION — Outside Mount
6
OUTSIDE MOUNT PROCEDURES
Mount the Installation Brackets
■ Add
1
/
2
" to the ordered height (found on the label
inside the headrail), and measure that total distance
from the floor.
➤ Position the top of the brackets at this height for
the minimum recommended
1
/
2
" floor clearance.
➤ Add more to the ordered height if more floor
clearance is desired.
■ Center the headrail over the window opening at the marked height. Use a pencil to lightly
mark each end of the headrail.
➤ Alternatively, measure the width of the headrail. Use this width to mark the headrail end
points over the window opening.
➤ If a side stack shade was measured to accommodate for the stackback, position the
headrail so that the window remains completely uncovered when the shade is in the fully
opened position.
NOTE: Be sure that when the shade is drawn fully closed, the window is completely
covered.
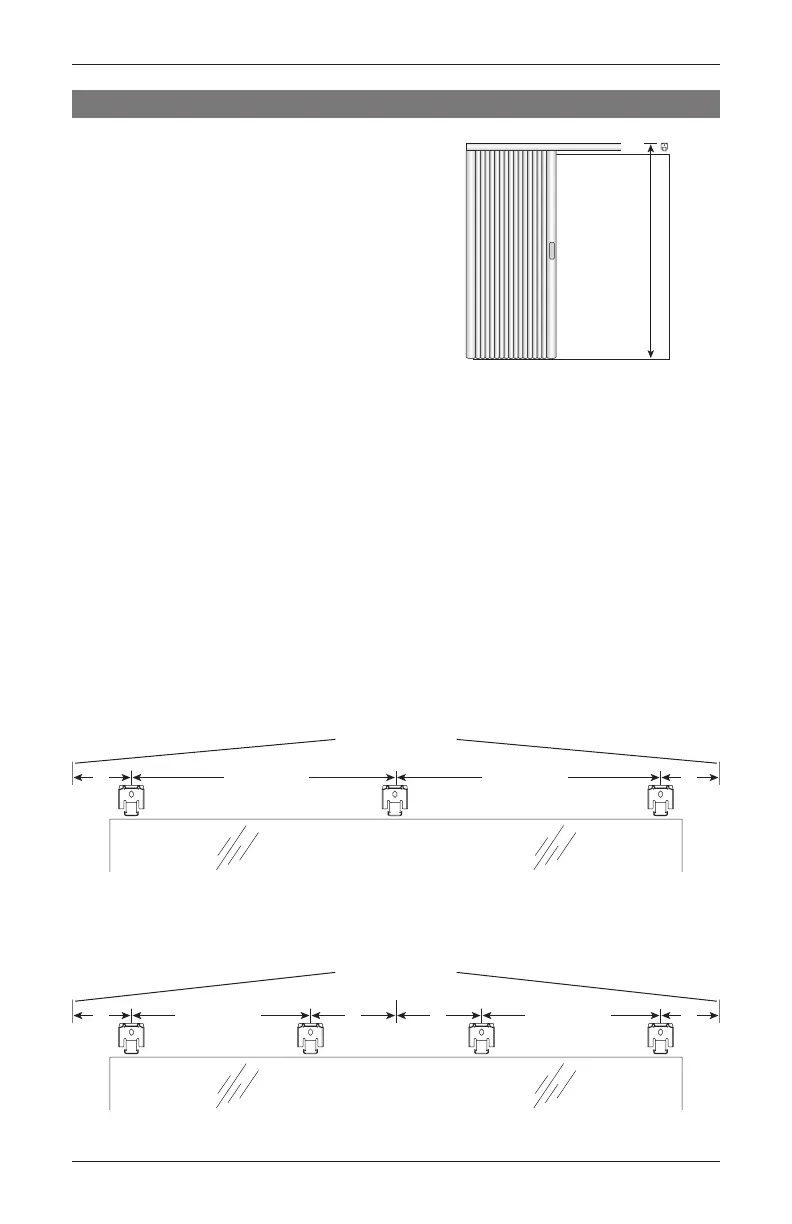
■ Mark 2" from each end of the headrail.
➤ If more than two installation brackets came with your order, space additional bracket(s)
evenly (or at least every 36") and mark their locations.
➤ Two-piece headrails: Place a bracket 4" from the center on both sides. Space
additional bracket(s) evenly (or at least every 36") and mark their locations.
Window Opening
2" 2"
Space Evenly Space Evenly
Two-Piece Headrails
Headrail End Marks
Split
Window Opening
2" 4" 2"
Space EvenlySpace Evenly
4"
Bracket
Ordered
Height
+
1
/
2
"
 Loading...


