INSTALLATION — Outside Mount
7
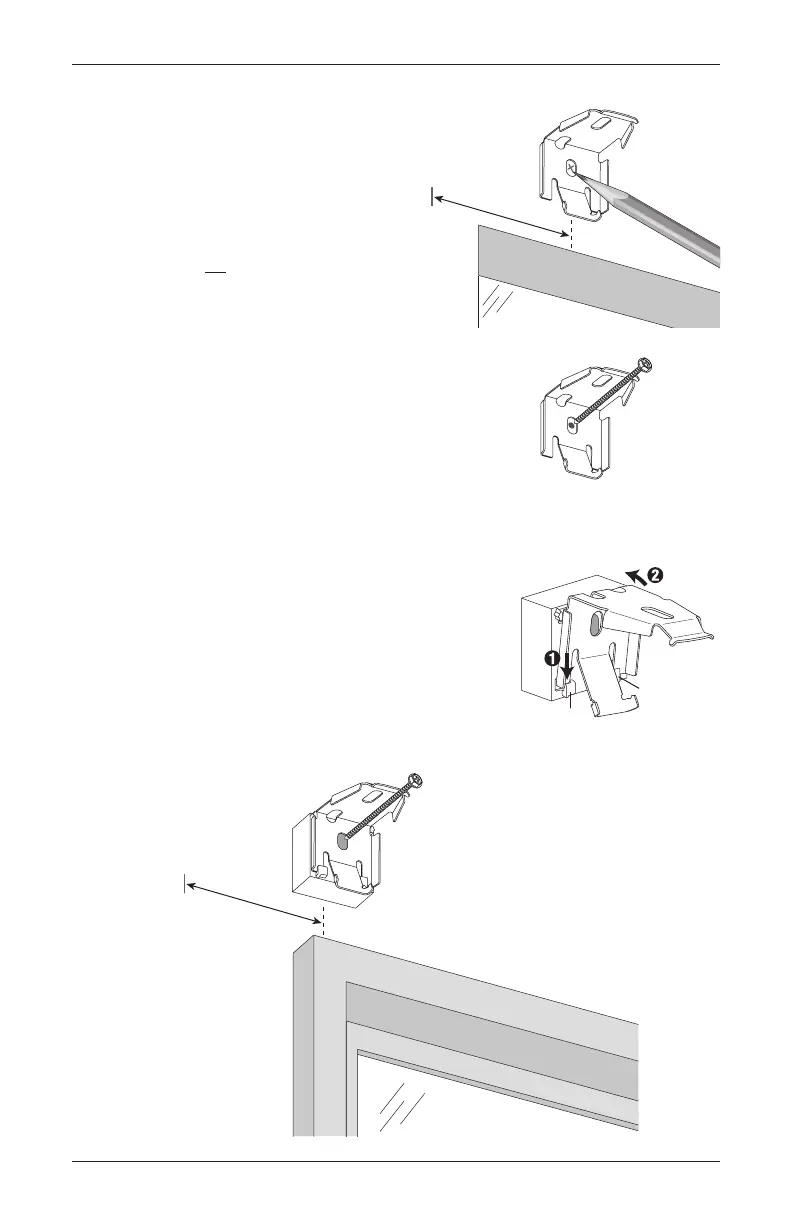
■ Center the brackets on your marks and mark the screw holes.
➤ A minimum of 1
1
/
4
" flat vertical
surface is required to mount the
brackets.
CAUTION: The rear of the brackets
must be flush against a flat mounting
surface. Do not mount brackets
oncurved molding.
■ Drill the screw holes using a
3
/
32
" drill bit.
CAUTION: Use drywall anchors when mounting into drywall.
■ Attach the installation brackets to the mounting surface using
the 2" screws provided.
IMPORTANT: The tops of the brackets must be level with
their front edges aligned.
■ If using spacer blocks, attach them to the installation brackets (if not already attached).
IMPORTANT: A maximum of one
1
/
2
" spacer block can be used per installation bracket.
➤ Break off and discard the
1
/
8
" shim, if attached to the
spacer block.
➤ Insert the legs of the installation bracket into the tabs
on the spacer block.
➤ Then rotate the installation bracket back to snap it in
place.
■ Attach the installation brackets and spacer blocks using the 2" mounting screws provided.
Headrail
End Mark
2"
Tab
Spacer
Block
Headrail
End Mark
2"
 Loading...


