INSTALLATION — Outside Mount
9
Install the Shade into the Headrail
Prepare the Optional Return(s)
■ If you ordered optional return(s), insert the
return(s) into the bottom of the secondary rail(s).
➤ Slide the return into the channel on the
secondary rail until it is flush with the
bottom end cap.
➤ The entire return is illustrated in the
“Product Views” on pages 1 and 2.
■ Insert the stabilizer plate and snaplock into the bottom of
the secondary rail(s).
➤ Slide the stabilizer plate into the channel on the
secondary rail as shown.
➤ Install the snaplock into the channel under the stabilizer
plate to hold the stabilizer plate in place.
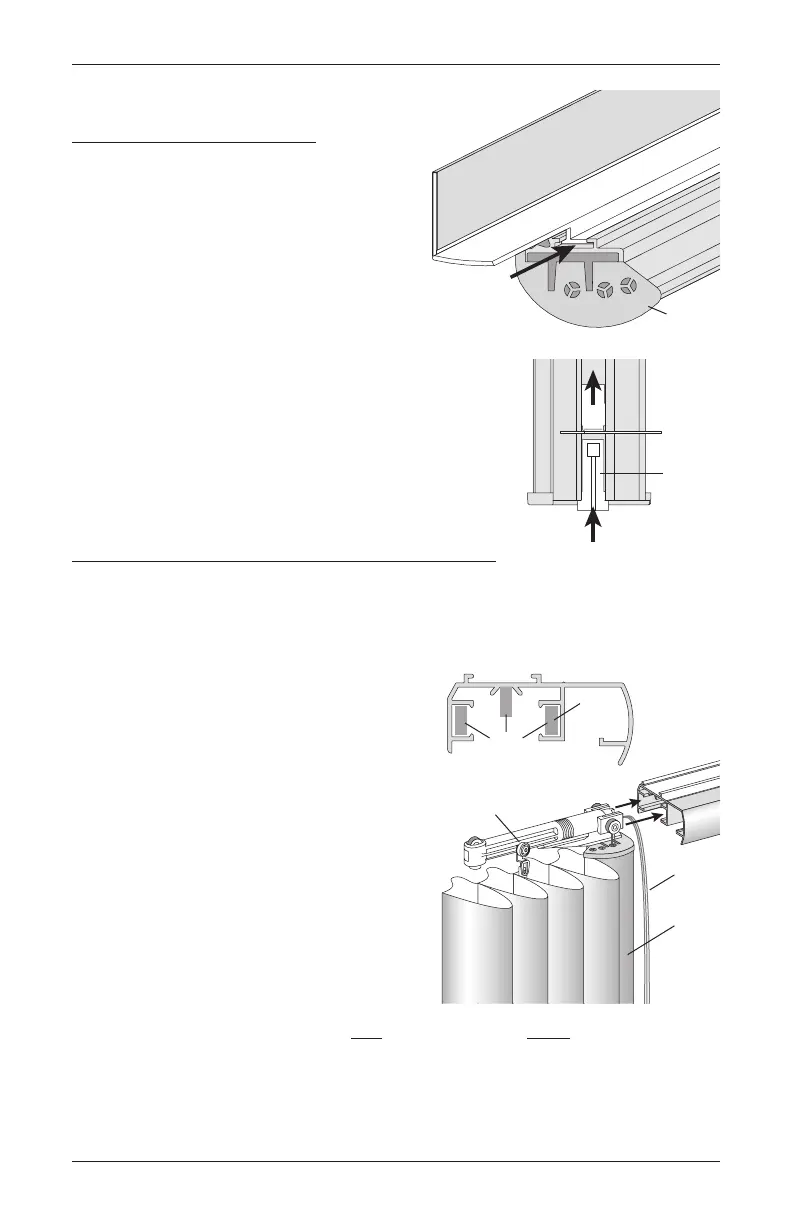
Insert the Primary Moving Rail Trike into the Headrail
NOTE: With split stack designs, fully complete the installation of one shade panel before
starting the second panel.
■ Review the illustration showing the channels where the trike rollers and fabric carrier rollers
fit into the headrail.
■ With the front of the fabric facing you, locate the
primary moving rail trike.
➤ Insert the trike’s side rollers into the
headrail, as illustrated.
IMPORTANT: Be sure the cords are routed
to the outside of the trike before sliding the
trike side rollers into the headrail. Be careful
not to pinch the cords.
NOTE: One cord anchor is attached to each
of the three cords. With side stack designs,
the cords are routed through the headrail
end cap.
➤ Install the first fabric carrier roller after the trike side rollers, before sliding on the top
roller on the end of the trike.
➤ After installing the first fabric carrier roller, continue sliding the trike into the headrail
until the top roller on the end of the trike fits under the center channel.
n
Bottom
n
Trike
First Fabric
Carrier Roller
Trike
Rollers
Fabric
Carrier
Rollers
Front of
Headrail
Cords
Moving
Rail
Back of
Secondary
Rail
Plate
 Loading...


