


S
spencer58Jul 31, 2025
What to do if the fault LED blinks on my Hypertherm Cutter?
- LLarry SmithJul 31, 2025
A blinking fault LED indicates a major fault with the system. A qualified service technician must service the system.
What to do if the fault LED blinks on my Hypertherm Cutter?
A blinking fault LED indicates a major fault with the system. A qualified service technician must service the system.
What to do if the power ON LED is illuminated and the gas pressure LED is illuminated yellow on my Hypertherm Cutter?
First, turn the amperage knob to the gas test position, then unlock the pressure regulator by pulling up on the knob. Turn it to adjust the pressure, and push it down to lock it. Also, verify that the gas supply line is connected to the power supply and the gas is turned on. Finally, inspect the gas supply line for leaks and verify the incoming gas pressure.
What to do if the power ON LED is illuminated and the torch cap LED is illuminated on Hypertherm Cutter?
Turn OFF the power supply and verify that there are consumables installed. If you have just installed the consumables, verify that the consumables are only finger-tight; loosen them 1/8th of a turn and then restart the power supply. If the consumables appear to be installed correctly, the torch may be damaged.
What does it mean if the power ON LED is blinking on my Hypertherm Cutter?
A blinking power ON LED indicates that the input line voltage is either too high or too low, specifically a variance greater than ±15% of the rated voltage. Have an electrical technician check the incoming power.
What to do if the power ON LED is illuminated and the torch cap LED blinks on Hypertherm Cutter?
If the consumables became loose or were removed while the power supply is ON, turn OFF the power supply, correct the problem, and then turn ON the power supply to clear this fault. If the consumables appear to be installed correctly, the torch may be damaged.
Why is the power ON LED not illuminated on my Hypertherm Cutter?
Verify that the power cord is plugged into the receptacle, that the power is ON at the main power panel or at the line-disconnect switch box, and that the line voltage is not too low (more than 15% below the rated voltage).
Why is the yellow temperature LED illuminated on my Hypertherm Cutter?
The yellow temperature LED illuminates when the internal temperature of the power supply approaches -22° F (?30° C). Leave the power supply on to allow the fan to cool it, or move the power supply to a warmer location.
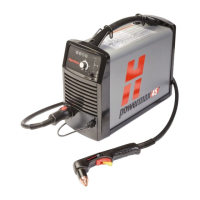
A detailed overview of the Powermax45 plasma cutting system.
Physical dimensions and weight specifications for the power supply unit.
Electrical ratings including input voltage, output current, and duty cycle.
Performance data and capabilities for handheld and machine torches.
Explanation of safety and compliance markings on the equipment.
Definitions of standard symbols used on the power supply and controls.
Steps for safely unpacking the equipment and verifying contents.
Guidance on connecting the system to appropriate electrical sources.
Instructions for installing a safety disconnect switch.
Essential safety guidelines for proper equipment grounding.
Overview of available torches and the FastConnect system.
Factors affecting the lifespan of torch consumables.
Procedure for installing consumables on the handheld torch.
Steps for mounting and connecting the machine torch.
Description of front panel controls, LEDs, and indicators.
Step-by-step guide to powering on and basic operation.
Techniques for safe and effective handheld torch operation.
Guidance for optimizing cut quality with the machine torch.
Functional descriptions of the power supply circuits.
Essential steps and safety precautions before troubleshooting.
Common problems, their causes, and solutions.
Detailed diagnostic procedures for system components.
Procedure for accessing internal components.
Instructions for replacing the power supply cord.
Steps for replacing the cooling fan assembly.
Procedure for replacing the main control board.
List and diagrams of power supply external and internal components.
Diagrams and part numbers for handheld and machine torches.
Part numbers for torch consumables for different applications.
List of commonly needed parts for service.
Schematic for the control board connections and signals.
Schematics illustrating power board internal connections.
| Brand | Hypertherm |
|---|---|
| Model | powermax45 |
| Category | Welding System |
| Language | English |


