MX3657-01 Rev. D ©2020
40 hysecurity.com | 800-321-9947 StrongArm Programming and Operations
stronGarM CounterWeiGhts installation
NOTE: Maintain tagged service nut on breakaway king pin during installation. Remove service nut after
installation is complete and breakaway bracket is fully secure.
1. If necessary, reposition operator side arm mounts on arm height adjustment legs to adjust operator arm
height. See StrongArm CounterWeight Installation, A, on the next page.
2. See Arm Length and Counterweights table below for operator arm length and counterweight options
for ideal operator performance.
3. Using a socket and ratchet, secure conversion bracket to two Gate Saver Yokes using four bolts, eight
at washers, four lock washers, and four nuts. See StrongArm CounterWeight Installation, B, on the
next page.
4. Using an open-ended wrench, remove the bolt, lock washer, and at washer from the breakaway king pin
head attached to the cast adapter. See Figure 1, C.
5. Rotate breakaway king pin so alignment pin aligns with cast adapter shear brass bolt mounting locations
(3). See Figure 1, C.
6. Align cast adapter and breakaway king pin with the forward panel of the conversion bracket. Use an
open-ended wrench to resecure bolt, lock washer, and at washer to breakaway king pin head. See
Figure 1, C.
7. Using a socket and ratchet, secure three brass shear bolts, lock washers, and hex nuts to the cast
adapter and conversion bracket. See Figure 1, D.
NOTE: For initial installation, install two brass shear bolts and hardware. Number of brass shear bolts used is
dependent upon arm length and anticipated wind load. Shorter arms may require one brass shear bolt. Longer
arms in windy areas may require three brass shear bolts.
8. Using a socket and ratchet, secure the gate saver sleeve arm to cast adapter, and gate saver barrier arm
to gate saver sleeve arm using six bolts, at washers, and nylon locknuts. See Figure 1, E.
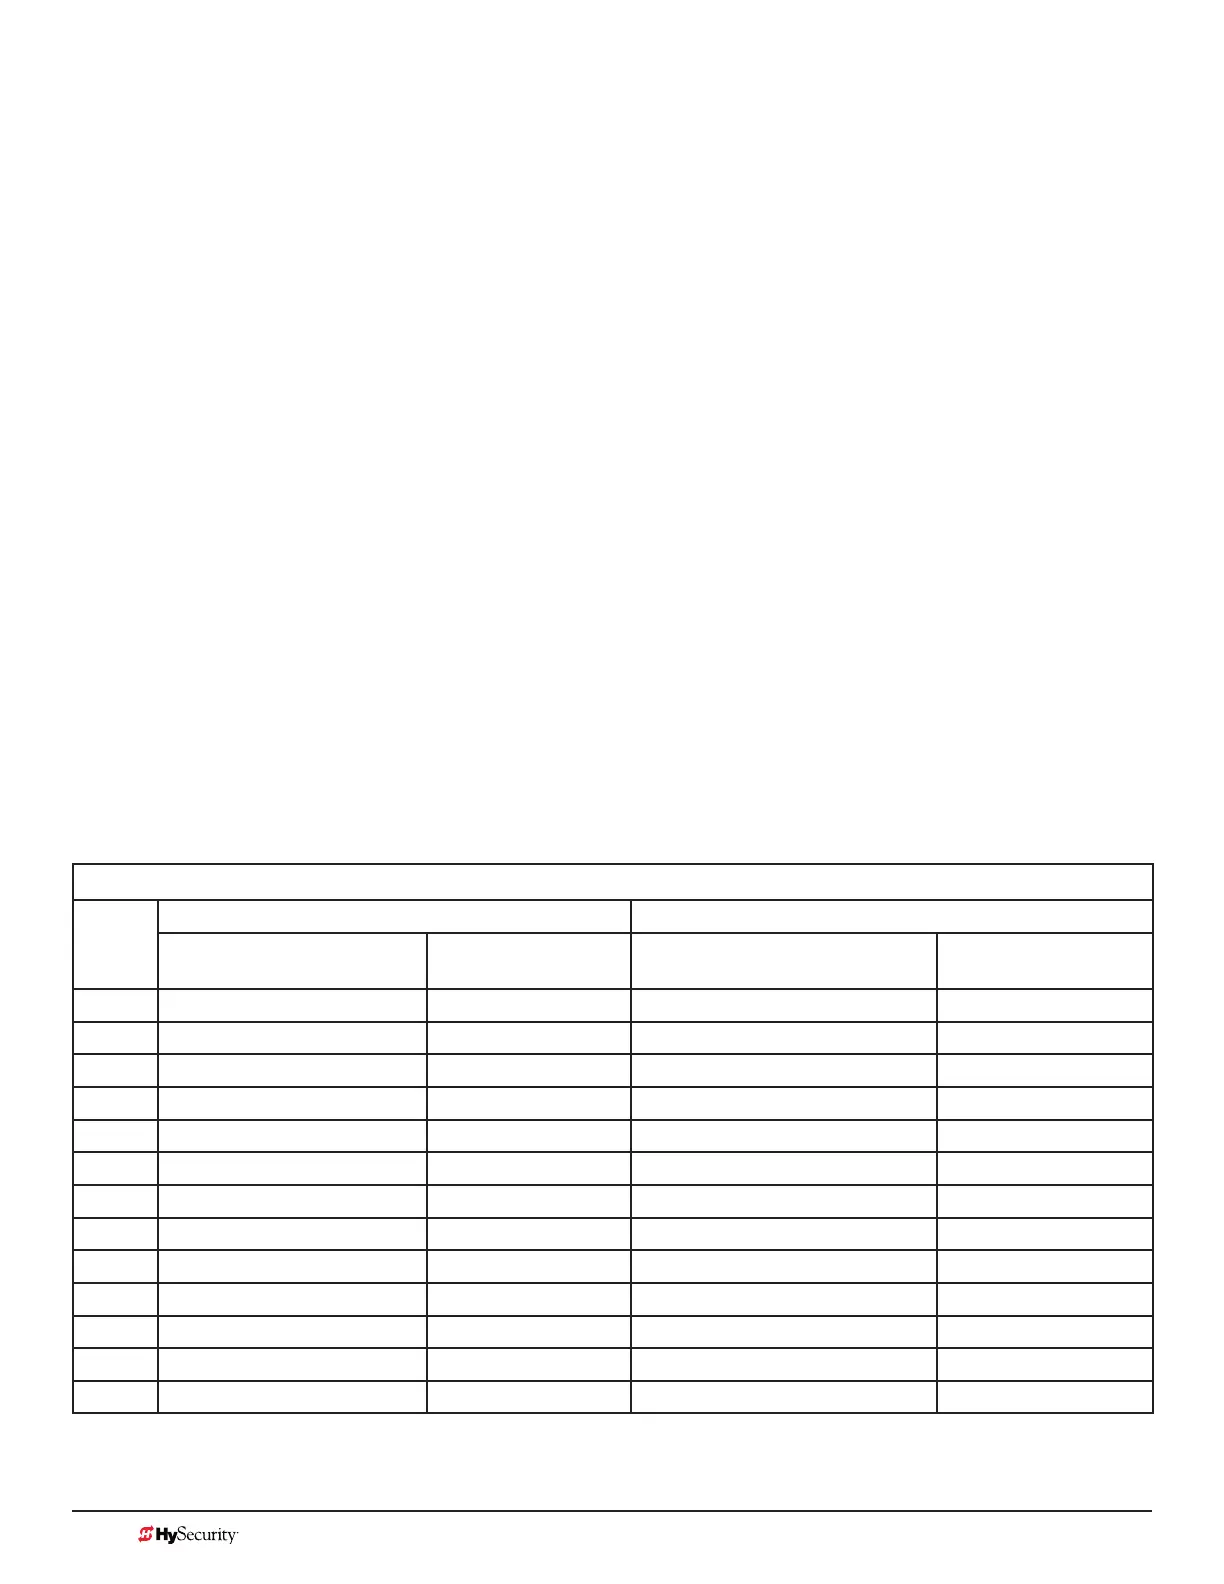
Arm Length and Counterweights
Arm
Length
(feet)
Standard StrongArm StrongArm DOT
No. of Counterweights
per side
Stud Length
(inches)
No. of Counterweights per
side
Stud Length (inches)
12 0 2.5” 1 2.5”
14 0 2.5” 1 2.5”
16 0 2.5” 1 2.5”
18 0 2.5” 1 2.5”
20 1 2.5” 2 2.5”
22 2 2.5” 3 2.5”
24 3 3.5” 4 3.5”
26 5 3.5” 6 5.0”
28 6 5.0” 7 6.0”
30 8 6.0” - -
32 9 7.5” - -
34 11 7.5” - -
36 12 7.5” - -