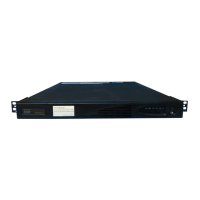
If there are any devices directly above and below the master console server
unit, it might be very difficult to reach in and connect the cables to the back of
the server after it is placed in the rack. If that is the only slot available, connect
the keyboard, mouse, monitor, and Ethernet cables at the back of the master
console server before installing it in the rack. Leave the other end of the
Ethernet cable disconnected from the network until you are directed to connect
it.
Important:
Do not follow any software installation procedures in the xSeries
Installation Guide.
2. Ensure that no cables are connected to the Ethernet ports.
3. Turn on the master console.
a. Type administrator in the User ID field.
b. Type passw0rd in the password field; this password applies to all required
password fields. The master console continues to start.
Note: This process can take several minutes before all services are started
and operations are completely responsive.
c. Click OK if you receive any messages that a network interface card port is
offline.
4. Check that the reference identification tag is securely fastened to the front panel
of the master console. The tag indicates the machine type 2145 and the serial
number of the SAN Volume Controller node that is being installed with the
master console.
5. IMPORTANT: This step must be the last step that you perform on the master
console before you hand over the machine to the user. It sets up the master
console so that it presents a Windows license agreement screen at the next
power on and then shuts down the master console.
a. Select Start → Run
b. Type c:\sysprep\sysprep.exe
c. Click OK. The System Preparation Tool panel is displayed.
d. Select Don’t re-generate security ID.
e. Select Reboot from the Shutdown Mode list.
f. Click Reseal.
Note:
It is important that you do this step; otherwise, the user is not presented
later with the choice to accept or decline Windows registration
conditions.
6. Connect the master console to the Ethernet port that is designated in the Cable
connection table.
Appendix A. SAN Volume Controller 2145-8F4 and SAN Volume Controller 2145-8F2 99
|
|
|
|
|
|
|
|
|

 Loading...