Verifying the SAN Volume Controller 2145-4F2 installation
You must verify the SAN Volume Controller installation after the installation has
completed.
This task shows you how to verify the installation after you install the SAN
Volume Controller in the rack and connect it to the uninterruptible power supply,
the storage area network (SAN), and the Ethernet.
Note: If at any point the SAN Volume Controller does not operate as described,
see “MAP 5000: Start” in the IBM System Storage SAN Volume Controller:
Service Guide, unless a different maintenance analysis procedure (MAP) is
specified.
Perform the following steps to verify installation:
1. Press the SAN Volume Controller power switch. Verify that the green power
light is on. If the light is not on, see “MAP 5000: Start” in the IBM System
Storage SAN Volume Controller: Service Guide to repair the problem.
Note: You do not need to install any software. The node boots automatically.
Verify that the node is booting without error. If it boots without error, either
the Charging message or Cluster: is displayed in the first line of the
front-panel display.
In most cases, the battery is delivered charged, so you do not see the Charging
message. If the Charging message is displayed, you will also see a progress
bar on the second line. Battery charging can take up to three hours to
complete. In the meantime, if you press any navigation buttons, the battery
charging menu is replaced, but battery charging continues. (You can re-enter
the menu system to view the charging progress, as described in step 4.) When
the battery is charged enough, Cluster: is displayed on the first line of the
front-panel display. The second line is left blank.
2. Press and hold the select button for five seconds. The check light comes on
and a display test is performed. When the display test is complete, the check
light goes off and a button test is started.
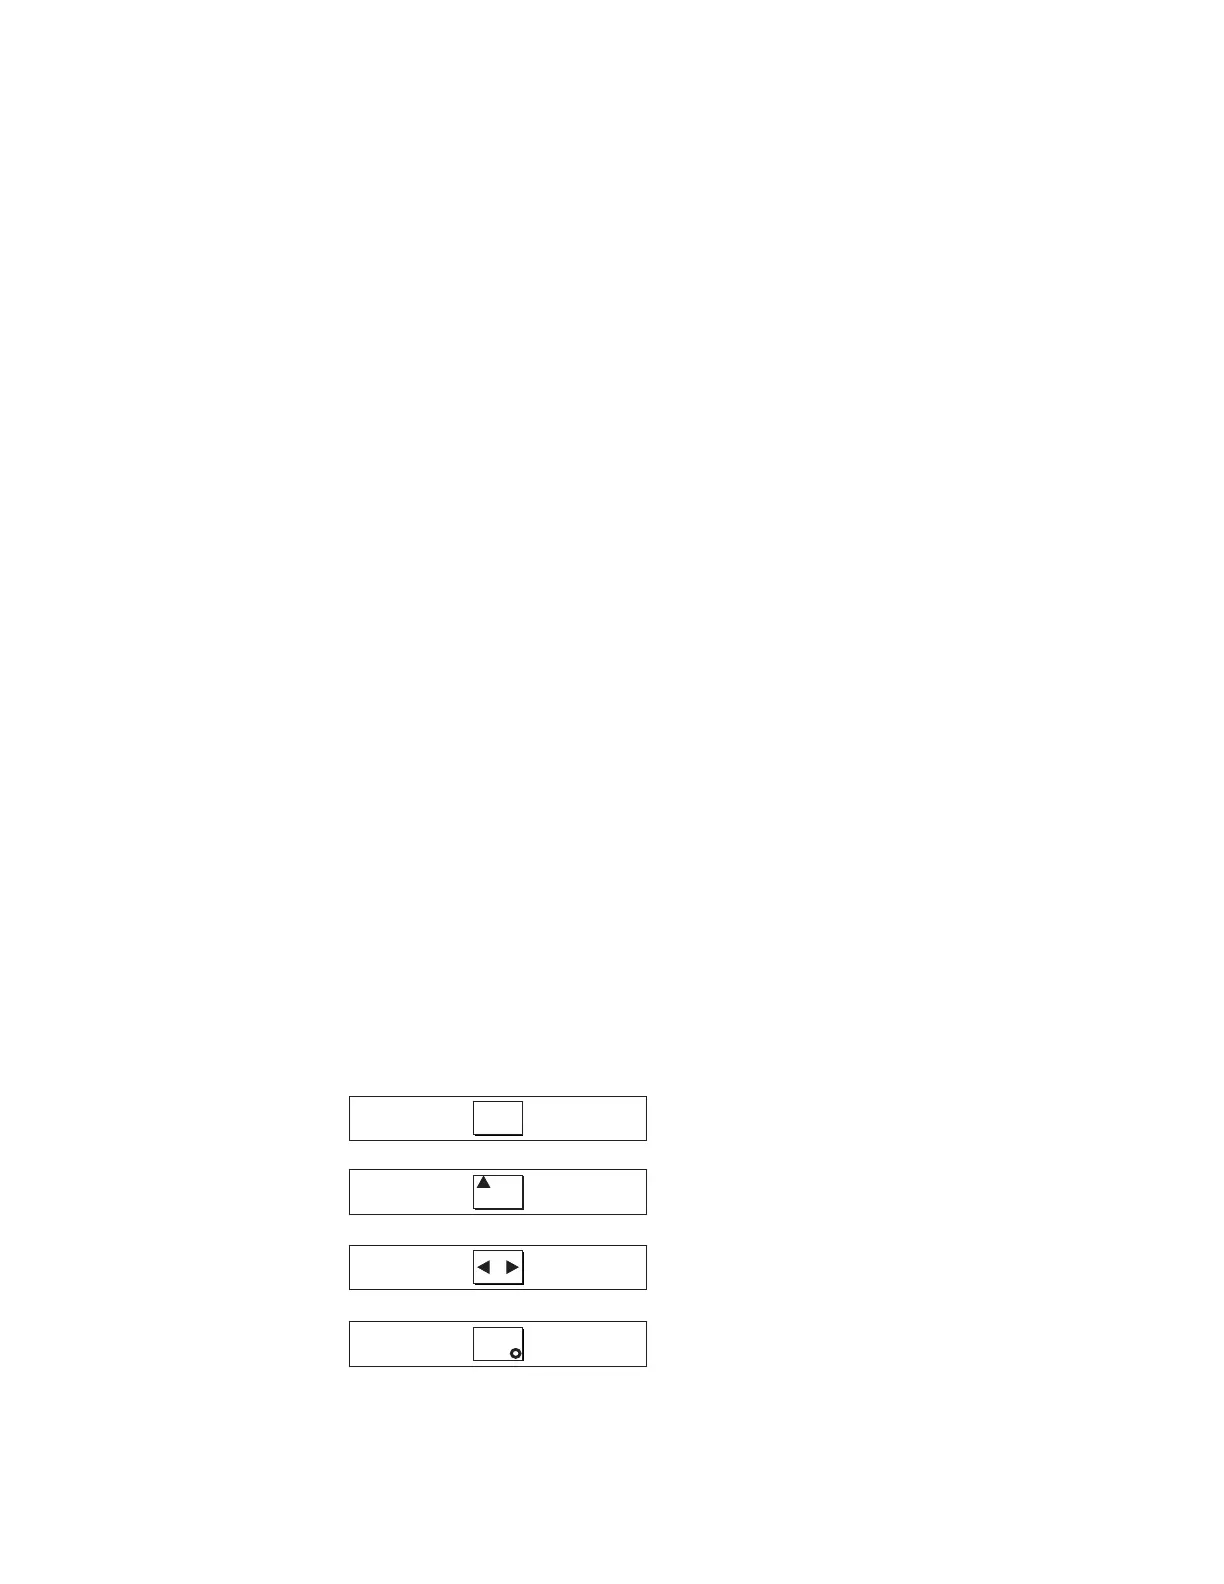
3. Press the up, down, left, and right buttons to verify that they are working.
Figure 100 shows four examples of what the front panel should display when
you press the buttons. When you have finished testing the buttons, press and
hold the select button for five seconds in order to exit the test.
4. If the Charging message is displayed on the front panel display, press the
select button to switch to the menu. The menu continues to be displayed
No button pressed (border only)
Up button pressed
Left and Right button pressed
Select button pressed
Figure 100. Front panel display when push buttons are pressed
Appendix B. SAN Volume Controller 2145-4F2 137
|
|
|
 Loading...