344 IBM Midrange System Storage Hardware Guide
Proceed with running the DbFix Utility
Installing the DbFix tool
First, extract DBFix_v24.zip into a temporary folder on a Windows host with network access
to both controllers on the DS4000/DS5000 storage subsystem. The main utility is normally
run on the workstation with Storage Manager already installed and configured to manage the
DS4000/DS5000 storage subsystem that needs to be checked. However, there is also a
separate stand-alone utility provided for those customers that normally run the Storage
Manager client on a non-Windows host.
The DbFix utility can take several minutes to complete on larger configurations. It can be run
concurrently, but might cause some performance degradation. Therefore, this should be
scheduled to be run during off-peak hours.
The DbFix utility cannot be run through an in-band connection. An Ethernet connection to
both controllers is required.
Any firewall between the DbFix utility and the DS4000/DS5000 controllers must allow both
telnet and FTP traffic to pass.
Any FTP Server service running on the Windows workstation must be stopped before starting
the DbFix procedure.
Running the DbFix tool
Use Windows Explorer to navigate into the DbFix subdirectory and perform the following
steps:
1. Start the ftp server by double-clicking the startftpserver.bat icon. A command-line interface
appears and displays the following message:
Using XML configuration file bin/arraycheck.xml...
FtpServer started
Leave this window running. It can be minimized, but do not close it until the DbFix utility
has completed.
2. If you are using the Windows workstation with Storage Manager client already configured,
then launch the DbFix utility by double-clicking the SMdbCk.bat icon; otherwise, select the
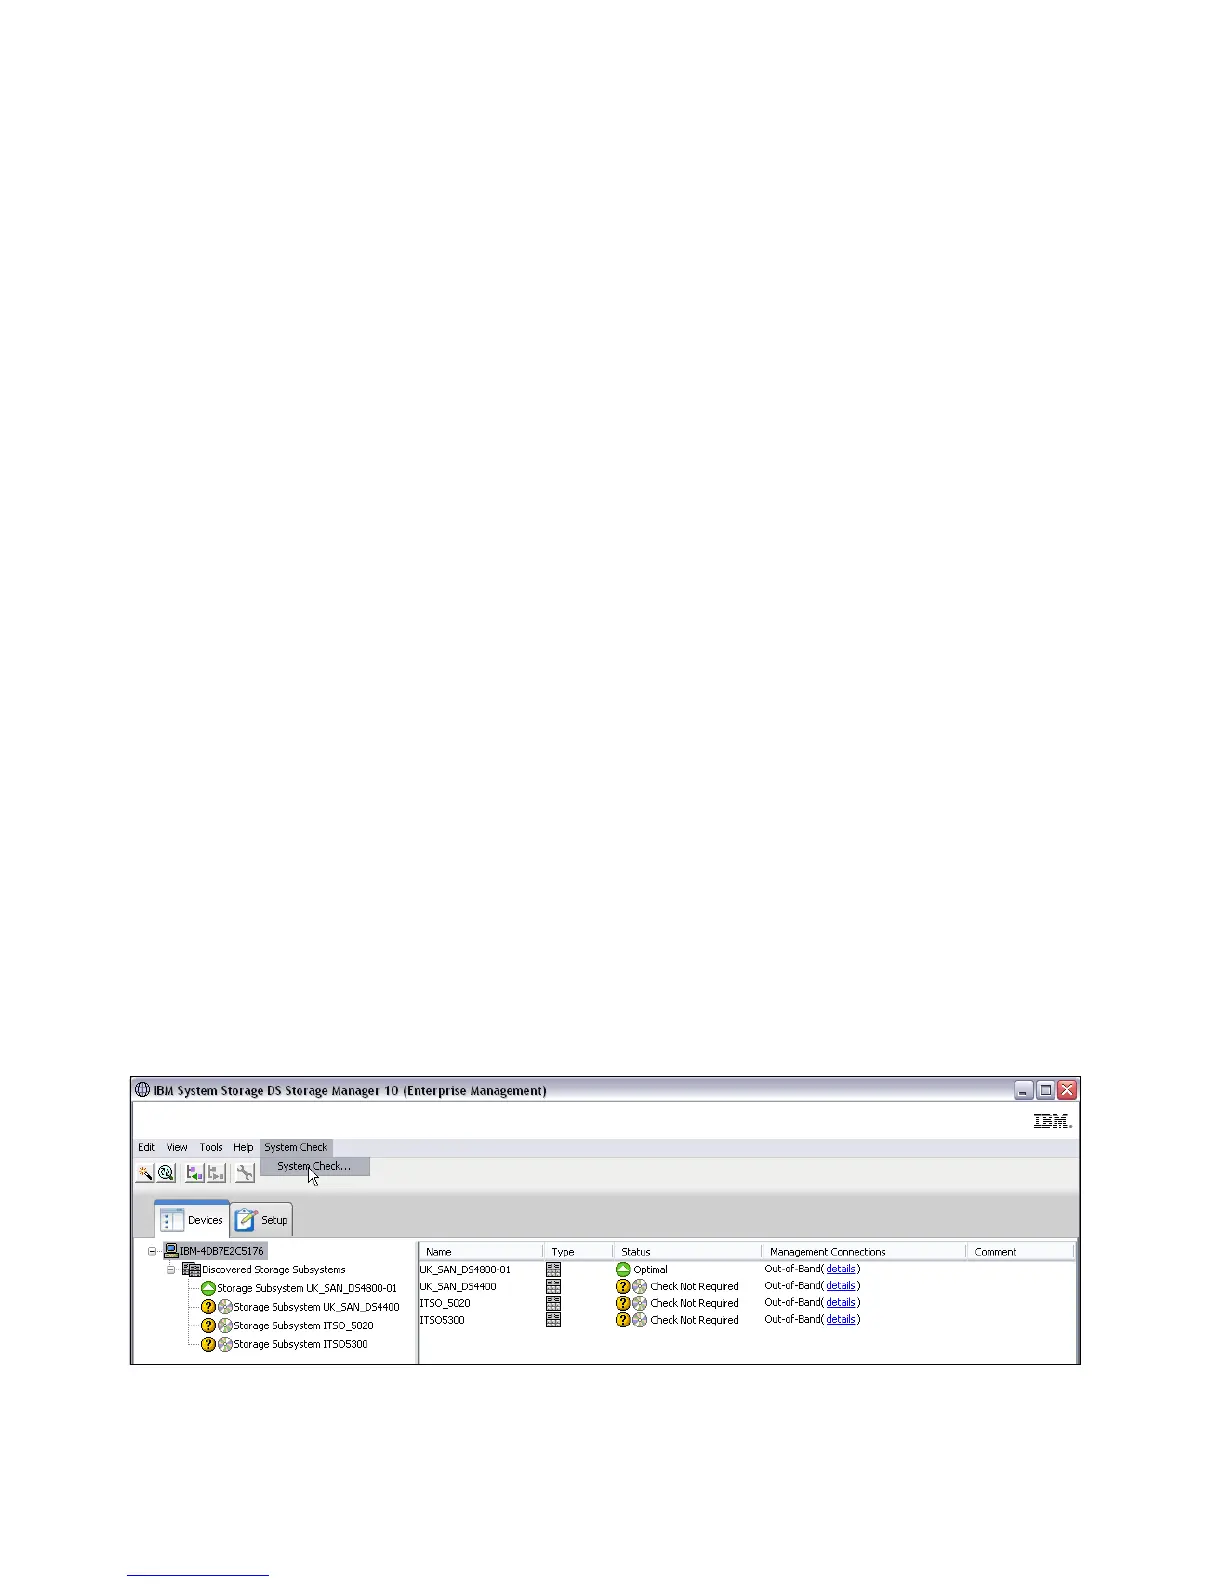
SMdbCkStandalone.bat icon. The first window looks very similar to the normal Storage
Manager Enterprise Management window, as shown in Figure 7-15.
Figure 7-15 DbFix first window
 Loading...


