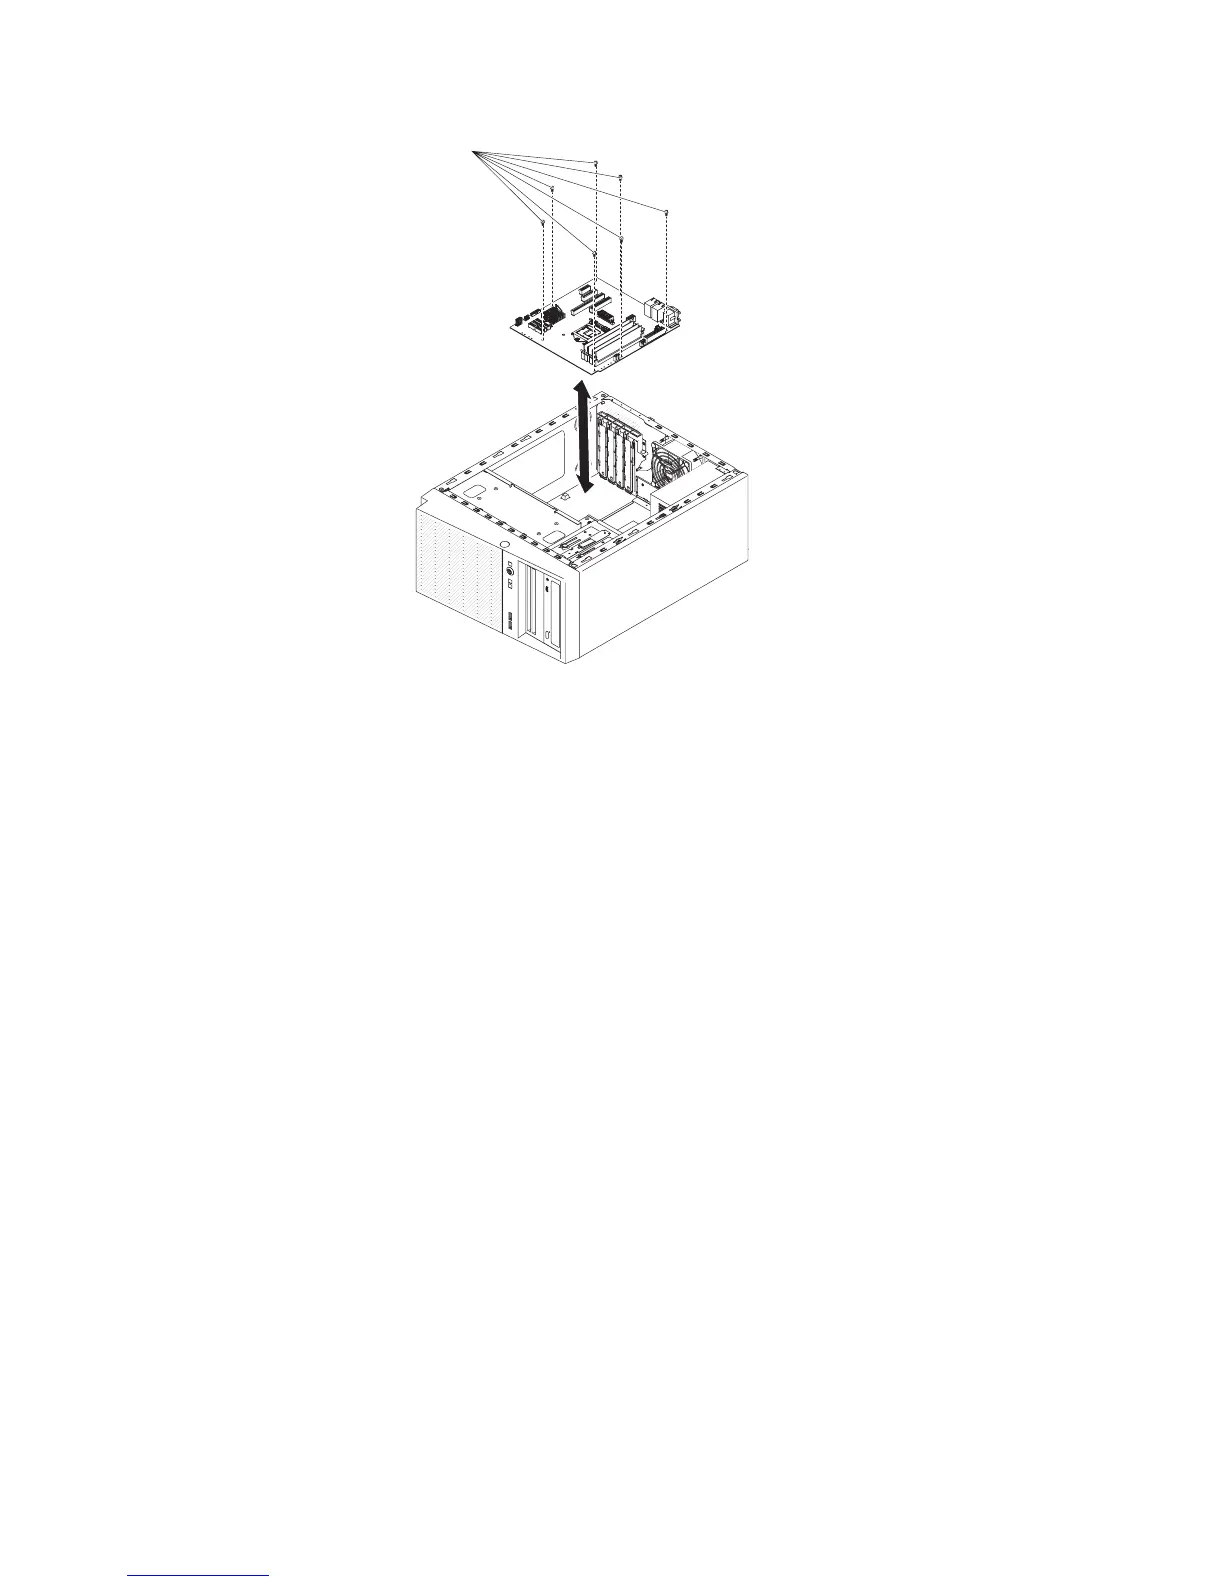
System board
(7 screws)
12. Carefully lift the system board out of the server.
13. If you are instructed to return the system board, follow all packaging
instructions, and use any packaging materials for shipping that are supplied to
you.
Attention: Make sure to place the socket covers for the microprocessor
sockets on the system board before returning the system board.
To remove the system board on the 5U server model with hot-swap power supplies
(Model name: 2582-F4x), complete the following steps. For 4U server models with
non-hot-swap power supplies, please see the above sub-section.
1. Read the safety information that begins on page vii and “Installation guidelines”
on page 163.
2. Turn off the server and all attached devices; then, disconnect all power cords
and external cables.
3. Unlock and remove the side cover (see “Removing the side cover” on page
166).
4. Carefully turn the server on its side so that it is lying flat, with the system
board facing up.
Attention: Do not allow the server to fall over.
5. Rotate the rear adapter-retention bracket to the open (unlocked) position.
6. Remove the hard disk drive fan duct (see “Removing the hard disk drive fan
duct” on page 214).
7. Remove the microprocessor and heat sink (see “Removing the microprocessor
and heat sink” on page 250).
Attention: Remove the socket covers from the microprocessor sockets on
the new system board and place them on the microprocessor sockets of the
system board you are removing.
8. Disengage the cables from any retention-clips.
9. Note where each cable is connected; then, disconnect all cables from the
system board.
260 IBM System x3100 M4 Type 2582: Problem Determination and Service Guide

 Loading...


