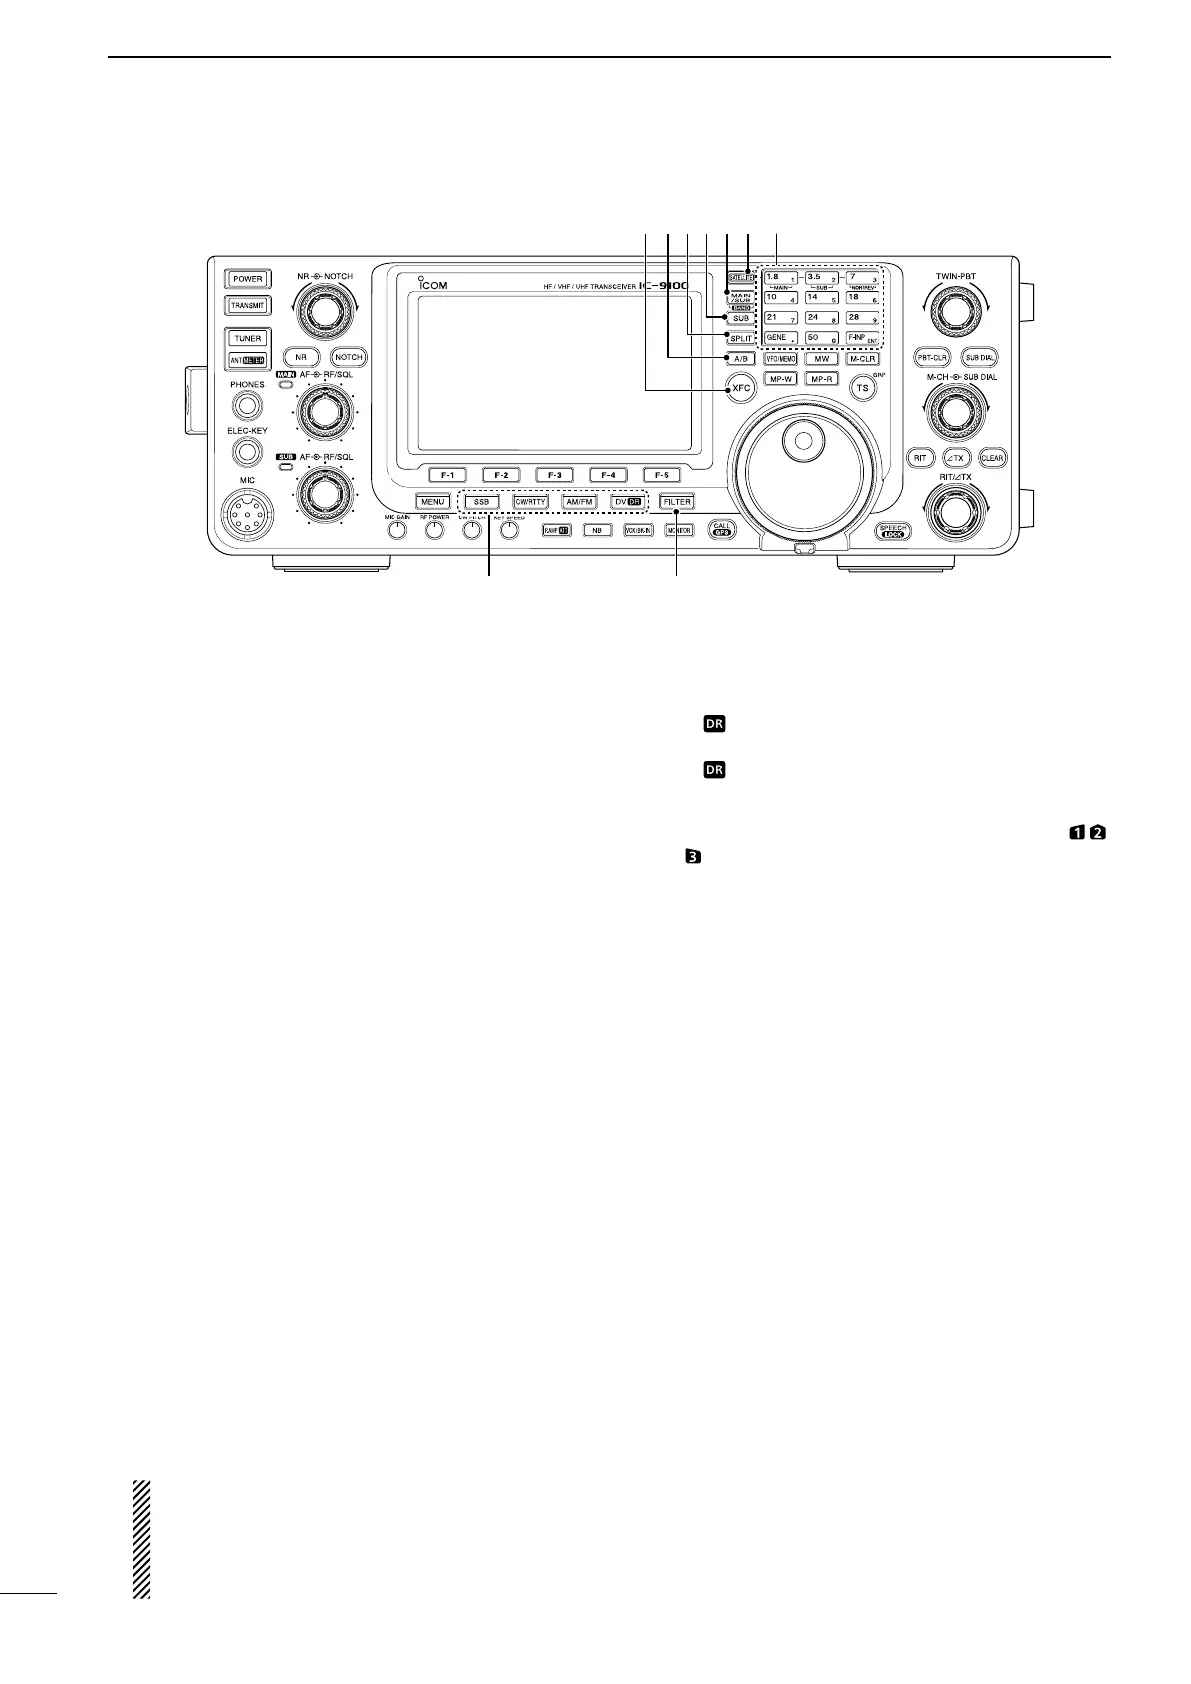
@9 MODE SWITCHES
Push to select your desired operating mode. (p. 43)
•Thebuilt-inspeechsynthesizerannouncestheselected
mode when the “SPEECH [MODE] SW” item is set to
“ON” in the Set mode. (p. 164)
[SSB] (p. 47)
➥
Push to alternately select the USB or LSB modes.
•“USB”or“LSB”appears.
➥
In the SSB mode,
hold down for 1 second to s
e-
lect the SSB data mode (USB-D, LSB-D).
•“D” appears in addition to “USB” or “LSB.”
➥
In the SSB data mode, push to return to the normal
SSB mode.
[CW/RTTY] (pp. 48, 56)
➥Push to alternately select the CW or RTTY
modes.
•“CW”or“RTTY”appears.
➥ Hold down for 1 second to switch between the
CW and CW-R (CW reverse) modes, in the CW
mode.
•“CW-R”appearswhentheCWreversemodeis
selected.
➥ Hold down for 1 second to switch between the
RTTYand RTTY-R (RTTYreverse)modesin
theRTTYmode.
•“RTTY-R”appearswhentheRTTYreversemodeis
selected.
[AM/FM] (p. 61)
➥
Push to alternately select the AM or FM modes.
•“AM”or“FM”appears.
➥ Hold down for 1 second to select the AM or FM
data mode (AM-D/FM-D).
•“D” appears in addition to “AM” or “FM.”
➥ In the data mode, push to return to the normal
AM or FM mode.
NOTE:
•IntheAMmode,youcantransmitononlythe
HF/50MHz frequency bands.
•TheAMmodecannotbeselectedonthe1200
MHz frequency band.
[DV•DR] (p. 85)
➥ Push to select the DV mode.
•“DV”appears.
➥ Hold down for 1 second to select the DR mode.
•“ ” appears.
➥ In the DR mode, push to cancel it.
•“ ” disappears.
#0 FILTER SWITCH [FILTER] (p. 73)
➥ Push to select one of three IF filter settings ( / /
).
•Theselectedlterpassbandwidthandshiftingvalue
are displayed for 2 seconds on the LCD display.
➥ Hold down for 1 second to display the “FIL”
screen (Filter) to set the filter passband width.
➥
When the “FIL” screen is displayed, hold down for
1 second to return to the previous screen display.
#1
TRANSMIT FREQUENCY CHECK SWITCH [XFC]
➥ During split frequency or repeater operation, hold
down to listen to the transmit frequency. (p. 82)
•While holding down this switch, the transmitfre-
quency can be changed with the main dial, keypad
or memo pad.
•When the split lock function is turned ON, push
[XFC] to cancel the dial lock function. (pp. 82, 162)
➥ When the RIT function is turned ON, hold
down to listen to the receive frequency. (RIT is
temporarily cancelled.) (p. 69)
➥ When the ∂TX function is turned ON, hold down
to listen to the transmit frequency (including ∂TX
frequency offset). (p. 81)
➥ In the simplex operation, hold down to listen to
the receive frequency.
•Thesquelchisclosedand theinterference reject
function is temporary OFF while holding down this
switch.
➥ In the DV mode, the RX monitoring mode is se-
lected by holding down this switch. (p. 118)
■ Front panel (continued)
5
1
PANEL DESCRIPTION
@9 #0
#2
#3#4#5 #6 #7#1
 Loading...