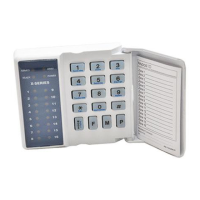
Section: 10
IDS X64 User Manual 700-398-01D Issued August 2010
System Time and Date options
Refer to Table 7 for system options. This is where you can change the time and date settings.
Table 7: System Programming Options
Summary of Programmable Optionss
Allows for the editing of the time.
Allows for the editing of the date.
1. Ensure that the panel is not armed.
2. Hold down the [*] key until the keypad buzzer sounds.
3. The ARM and READY LEDs will alternate flashing.
4. Enter a [MASTER USER CODE]. The factory default is 1234. Should the [MASTER USER
CODE] be defaulted to 6 digits, it will be 123456. Press the [*] key. A valid entry will be
confirmed by a long beep.
5. If steps 1 to 4 are performed correctly, the READY LED will flash. If an invalid code was entered,
the keypad buzzer will give an error beep. (3 short beeps). If the error beep occurs, press the [#]
key (this clears all previous entries) and repeat steps 2-4.
6. Select a programmable option from Table 5.
EXAMPLE:
To add a new user code, enter the User Program Mode by completing steps 1 - 4 as listed above.
To access Option 0, enter a value of [0] (See Table 5) followed by the [*] key.
Enter a [NEW USER CODE] followed by the [*] key. Once the user code is programmed, enter the next
code followed by the [*] key. To exit user program mode press the [#] key.
Explanation of Programmable Options
Add a New User Code – Option 0
Hold down the [*] key until the beep,
then enter [MASTER CODE] [*] [0] [*] [NEW USER CODE] [*]
1. Enter the User Program Mode as per steps 1 to 4 in section 11.
2. Press the [0] key followed by the [*] key to select the programmable option 0 (zero).
3. The READY and ARM LEDs flash simultaneously.
4. Enter the [NEW USER CODE] followed by the [*] key.
5. The READY and ARM LEDs flash simultaneously.
6. Further codes may be added by repeating step 4.
7. Press the [#] key to exit the current option.
8. Press the [OPTION NUMBER] followed by the [*] key for the next option, or the [#] key again
to exit user programming.