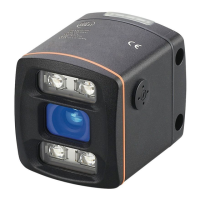
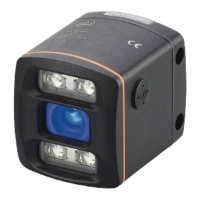
3D sensor
2
Contents
1. Preliminary note...................................................................4
1.1 Symbols used .................................................................4
1.2 Warnings used ................................................................4
2. Safety instructions .................................................................4
2.1 General ......................................................................4
2.2 Target group ..................................................................4
2.3 Electrical connection............................................................4
2.4 Tampering with the device .......................................................4
3. Functions and features .............................................................5
4. Items supplied ....................................................................5
5. Accessories . . . . . . . . . . . . . . . . . . . . . . . . . . . . . . . . . . . . . . . . . . . . . . . . . . . . . . . . . . . . . . . . . . . . . .5
6. Installation ......................................................................6
6.1 Select installation location .......................................................6
6.2 Additional sensor installation guidance..............................................7
6.2.1 Typical warning limits for O3D300 / O3D302 .....................................7
6.2.2 Typical warning limits for O3D310 / O3D312 .....................................8
6.2.3 Reduce surface temperature .................................................8
6.3 Install sensor..................................................................9
6.4 Mounting accessories ...........................................................9
7. Electrical connection ..............................................................10
7.1 Wiring .....................................................................10
7.1.1 Pin 1 / 3 (24 V / GND)......................................................11
7.1.2 Pin 2 (trigger input) ........................................................11
7.1.3 Pin 4 / 5 / 6 (switching outputs)...............................................11
7.1.4 Pin 4 (analogue output) ....................................................12
7.1.5 Pin 7 / 8 (switching inputs) ..................................................12
7.2 Wiring examples ..............................................................13
7.2.1 Trigger image capture with proximity sensor ....................................13
7.2.2 Install several sensors next to each other ......................................14
7.3 Static selection of the application .................................................15
7.4 Pulse-controlled selection of the application.........................................16
8. Indicators .....................................................................17
9. Set-up .....................................................................18
9.1 Set parameters of the device ....................................................18
9.2 Detect object.................................................................18
9.3 Transmit process values ........................................................19
9.3.1 Transmit process values of the completeness monitoring via EtherNet/IP..............19
9.3.2 Transmit process values of the completeness monitoring via PROFINET ..............21
9.3.3 Transmit process values of the completeness monitoring via TCP/IP .................23
9.3.4 Transmit process values of the dimensioning of the object via EtherNet/IP.............24
9.3.5 Transmit process values of the dimensioning of the object via PROFINET .............26
9.3.6 Transmit process values of the dimensioning of the object via TCP/IP ................28
9.3.7 Transmit process values of the level measurement via EtherNet/IP ..................29
9.3.8 Transmit process values of the level measurement via PROFINET...................30