Do you have a question about the ikeGPS IKE 4 and is the answer not in the manual?
Lists available guides: Setup, User Manual, Fieldcraft, Tripod.
Mentions supported web browsers and Google Earth integration.
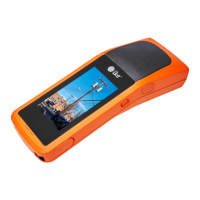
Describes the IKE 4 as an evolution in pole measurements.
Lists all components of the IKE 4 product package.
Highlights key hardware and software features of the IKE 4 system.
Outlines the workflow from planning to data output.
Details OS, Camera, Display, Battery, Connectivity, Laser, Processor, GPS.
Android app for field data collection and measurements.
Platform for form creation, data management, and quality assurance.
Output options for reports and integration with third-party systems.
Lists KML, JSON, PDF, and direct integration options.
Step-by-step guide for setting up the IKE 4 device.
Instructions for setting up the IKE 4 tripod.
Procedure for calibrating the IKE 4 device.
Identifies device parts and highlights laser safety warnings.
Identifies tripod parts and lists package contents.
Adjusts unit height and device positioning using adjustment rings and levers.
Secures tripod legs and provides an attachment point for the carry strap.
Instructions for changing the lever position for left-handed operation.
Guidance on storing the tripod in its carry bag after use.
Details materials, maximum height, weight, and magnetic signature.
Monthly, after flights, or long distance changes in location.
Step-by-step guide for rotating the device for calibration.
Overview of IKE Office's role in planning data collection workflows.
Tool for creating custom data collection forms.
Template for collecting utility pole information from different positions.
Create forms, upload/download data, measure pole heights.
Initial login procedure using provided admin credentials.
Overview of menu tabs: Summary, Jobs, Forms, Accounts, Settings.
List of all users visible when logged in as an administrator.
Steps to add new users using the orange 'Add' button.
Access 'Delete User' or 'Reset Password' via the 'More' button.
Change date format and measurement units.
Defines field data collection forms using drag-and-drop elements.
Steps to create a form by adding elements.
Input dates; format configurable in Settings.
Numeric input using the keypad.
Alphanumeric input via keypad or microphone.
Simple 'yes' or 'no' response option.
Ensures single selection from a list for coded value output.
Demonstrates how a select list appears and is used in IKE Field.
Up to 3-level deep lists where selections determine next level options.
Shows Usage Group, Size, and Tension Group for wire data.
How a defined nested list appears and functions in IKE Field.
Step-by-step process for selecting values from nested lists.
Tools for capturing GPS locations (Remote/Local) of targets.
Dedicated tool for capturing images of field objects.
Captures images with angles for height calibration.
Captures height measurements above ground, such as wire mid-span height.
Measures azimuth and distance between two points.
Groups common fields or creates parent-child relationships.
Allows collecting multiple instances of objects using a '+' sign.
Lists tools like Image, Photo Measure, Height, Vector, and Subform.
Use field values to label photo measurements.
Pole ID for height; wire details for attachment height.
Template for At Pole, Proximity, and Distance data collection.
Collects specific information while at the pole.
Collects data best gathered when close to the pole.
Captures relationships: Span, Circuit, Wire.
Focuses on Foreward and Backward Span collection.
A group of wires of the same usage.
Construction and Configuration of wires within a circuit.
Collecting wires of different sizes and heights.
Collecting multiple wires at different heights using the Wire subform.
Size, Owner, Attachment Height, Configuration.
Wire, End Point, Length, Owner, Quantity, Note.
Overview of the IKE Field application for data capture.
Step-by-step guide for collecting data in the field.
Set screen orientation, brightness, and enable location services.
Set location mode to 'Device only' for sub-meter GPS accuracy.
Use IKE Office credentials for login.
View jobs, check app version, change settings.
Steps to create a new job and attach a form.
Update forms by downloading the latest versions.
Choose the form to be used for the job.
Tap 'CREATE' to finalize the job.
Choose the desired job from the 'My Jobs' screen.
Tap the 'Add' button to start collecting data.
Enter data directly into fields and use tools for measurements.
Fields marked with '+' can be repeated for multiple instances.
Tap the 'Save' button on any form screen.
Shows job collections in List or Map; down arrow shows summary.
Choose Target Position (GPS+laser) or Local Position (GPS Only).
Shows current accuracy and averages GPS data for 30 seconds.
Indicates the remaining time during GPS data averaging.
Displays captured location (green pin) and current location (blue dot).
Aim at target; ensure crosshair turns green for GPS, Compass, Laser readiness.
Tap the blue Capture button to take a picture and record location.
Tips on using zoom slider and screen tapping for focus/brightness.
Aim, capture, and review calculated distance and bearing.
Option to 'RETAKE' if results are unsatisfactory.
Aim at the wire and capture when crosshair turns green.
Use guide arrows to find the position directly below the wire.
Capture when crosshair and height area turn green.
Displays wire height and photo with crosshair.
Overview of collected subforms within a job.
Displays job collections on a map; navigate to collections via location balloons.
Re-establish Wi-Fi, return to jobs list, select job.
Touch upload arrow; circle turns gray showing selected files.
Dialog shows status; job paired with orange circle. View in IKE Office.
Shows recently uploaded collections from jobs.
Lists all uploaded jobs chronologically.
Provides detailed view of specific collections.
Access summaries via the 'Summary' menu option.
Lists all uploaded jobs chronologically by collection date.
Select job, click 'arrow' icon for specific collection data.
Mouse over photo, click 'View' for pole's location map.
Overview of the Photo Measure tool within IKE Office.
Connects photo measurements with field data.
Steps for measuring objects in photos using the tool.
Use navigation panel to move between different pole photos.
Click 'Set base'; then click on the pole bottom in the photo.
Utilize the zoom window to accurately adjust height.
Used for covered bases; methods include moving base or entering offset.
Tools: Height Marker, Width Marker, Select, Delete, Save.
Use Height Marker; double-click label to edit text.
Fields highlighted with orange 'Link' button after setting base.
Click link button to change it to 'Measure Height'.
Click attachment for height; use 'Delete' to remove link.
Available formats: KML, JSON, Print, SPIDACalc.
Select 'Download' arrow, choose KML for Google Earth.
Select 'Download' arrow, choose JSON for data analysis.
Select 'Download' arrow, choose Print option for reports.
Creates SPIDACalc project JSON for pole loading analysis.
FCC Part 15 compliance and Bluetooth FCC/IC IDs.
Class 1M Laser compliance and safety precautions.
Modifications, interference, and general precautions.
Provides phone, toll-free, email, and operating hours for assistance.
| Weight | 0.85 kg (1.87 lb) |
|---|---|
| Battery Life | Up to 10 hours (continuous use) |
| Operating System | Android |
| Storage | 16 GB |
| Wireless Communication | Wi-Fi, Bluetooth |
| Laser Class | Class 2 |
| Operating Temperature | -10°C to 50°C |
| Storage Temperature | -20°C to 60°C |
| Water Resistance | IP54 |
| Connectivity | Wi-Fi, Bluetooth |