Page 32 Setup and Assembly Manual
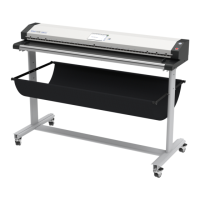
B.3.1.1 IP Configuration Method
Picture 22: IP Configuration Method
Click on the link
IP Configuration Method.
The screen shows the current setting.
Click on t he selection arrow to select
between DHCP and Manual.
Manual: Enter all network parameters
corresponding to the network,
where the scanner is used.
DHCP:
The network parameters will
be set automatically by using a
DHCP server. Contact your local
network administrator for specific
information.
If selecting DHCP the connection to
the scanner gets lost.
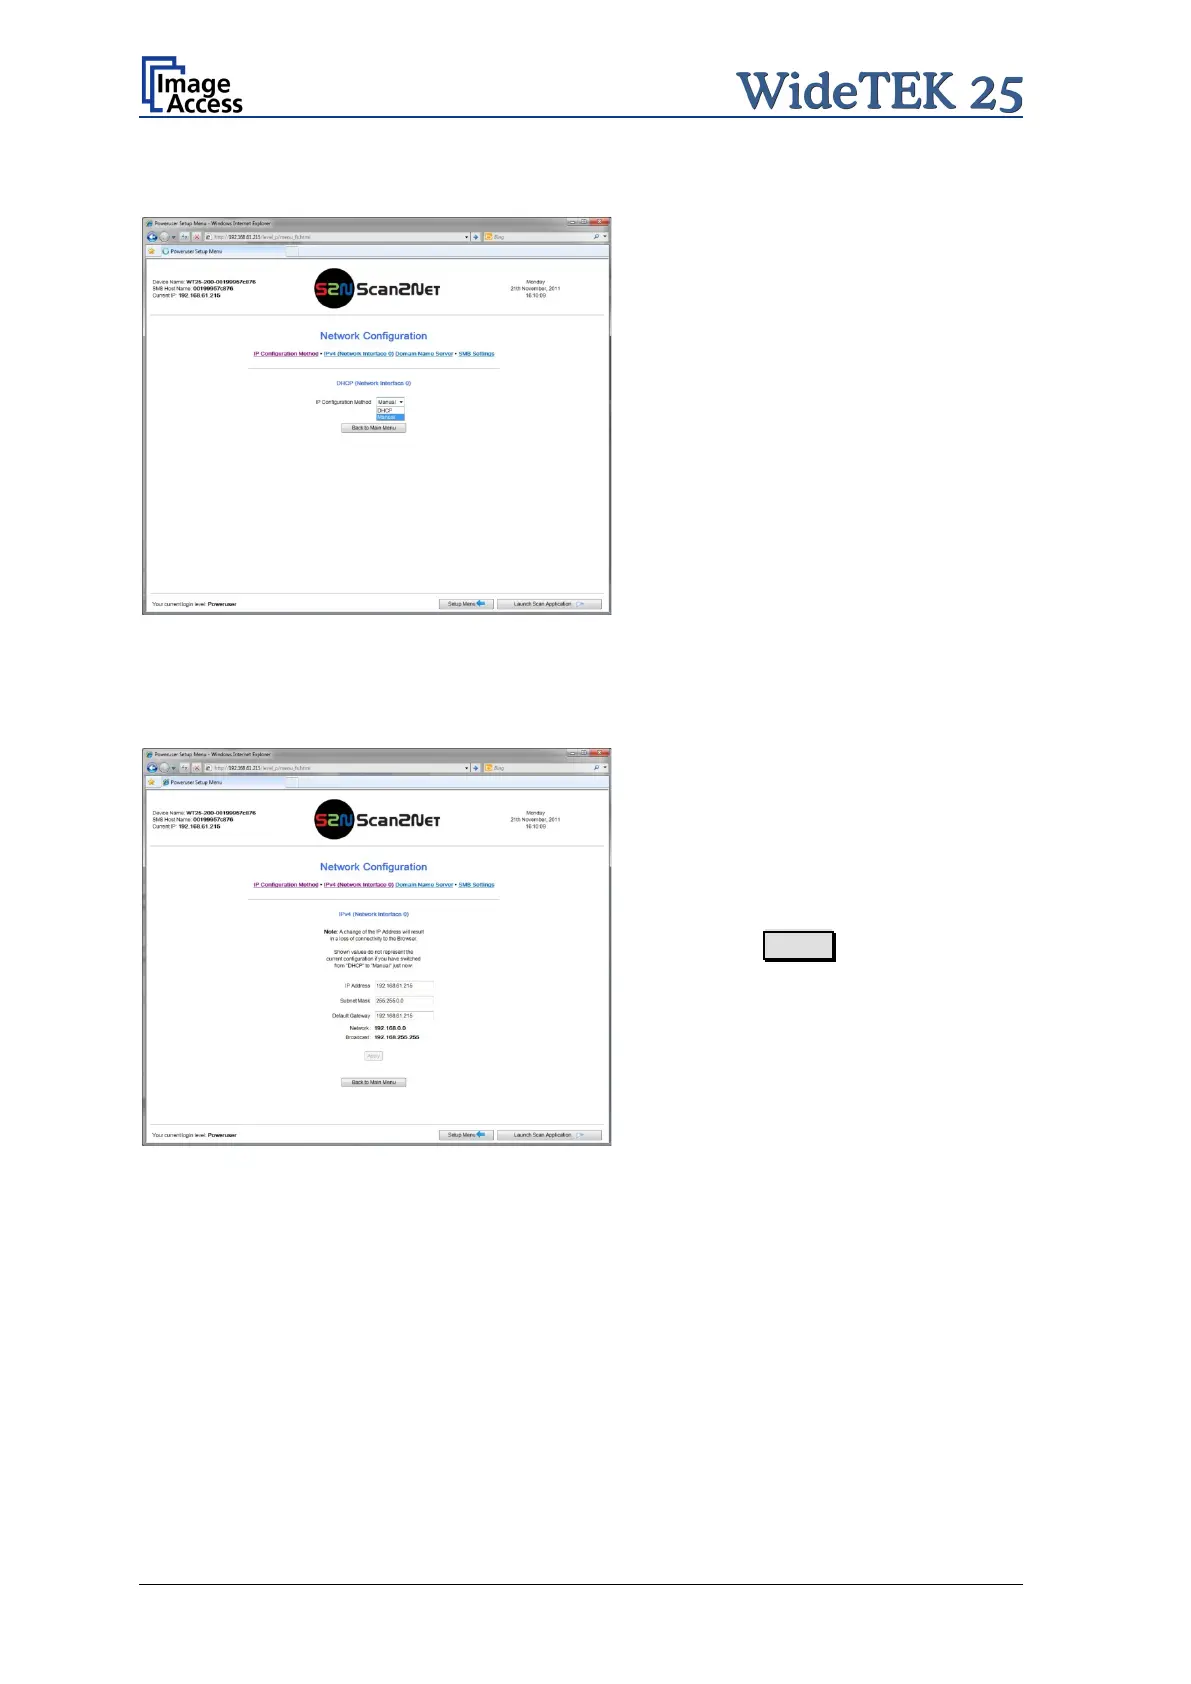
B.3.1.2 IPv4 (Network Interface 0)
Picture 23: Values for IPv4 network
• IP Address
• Subnet Mask
• Default Gateway
After modifying the network parameters
click on the Apply button to transfer
the new settings to the scanner. The
scanner is now accessible with its new
IP address.
Important for the next steps:
Enter the new IP
scanner and again open the
Poweruser main menu
described.
Note: Depending on the used browser, it is necessary to delete the cache of the
browser before the scanner is accessible.

 Loading...