User’s manual of CLEO Patient Monitor
- 13 -
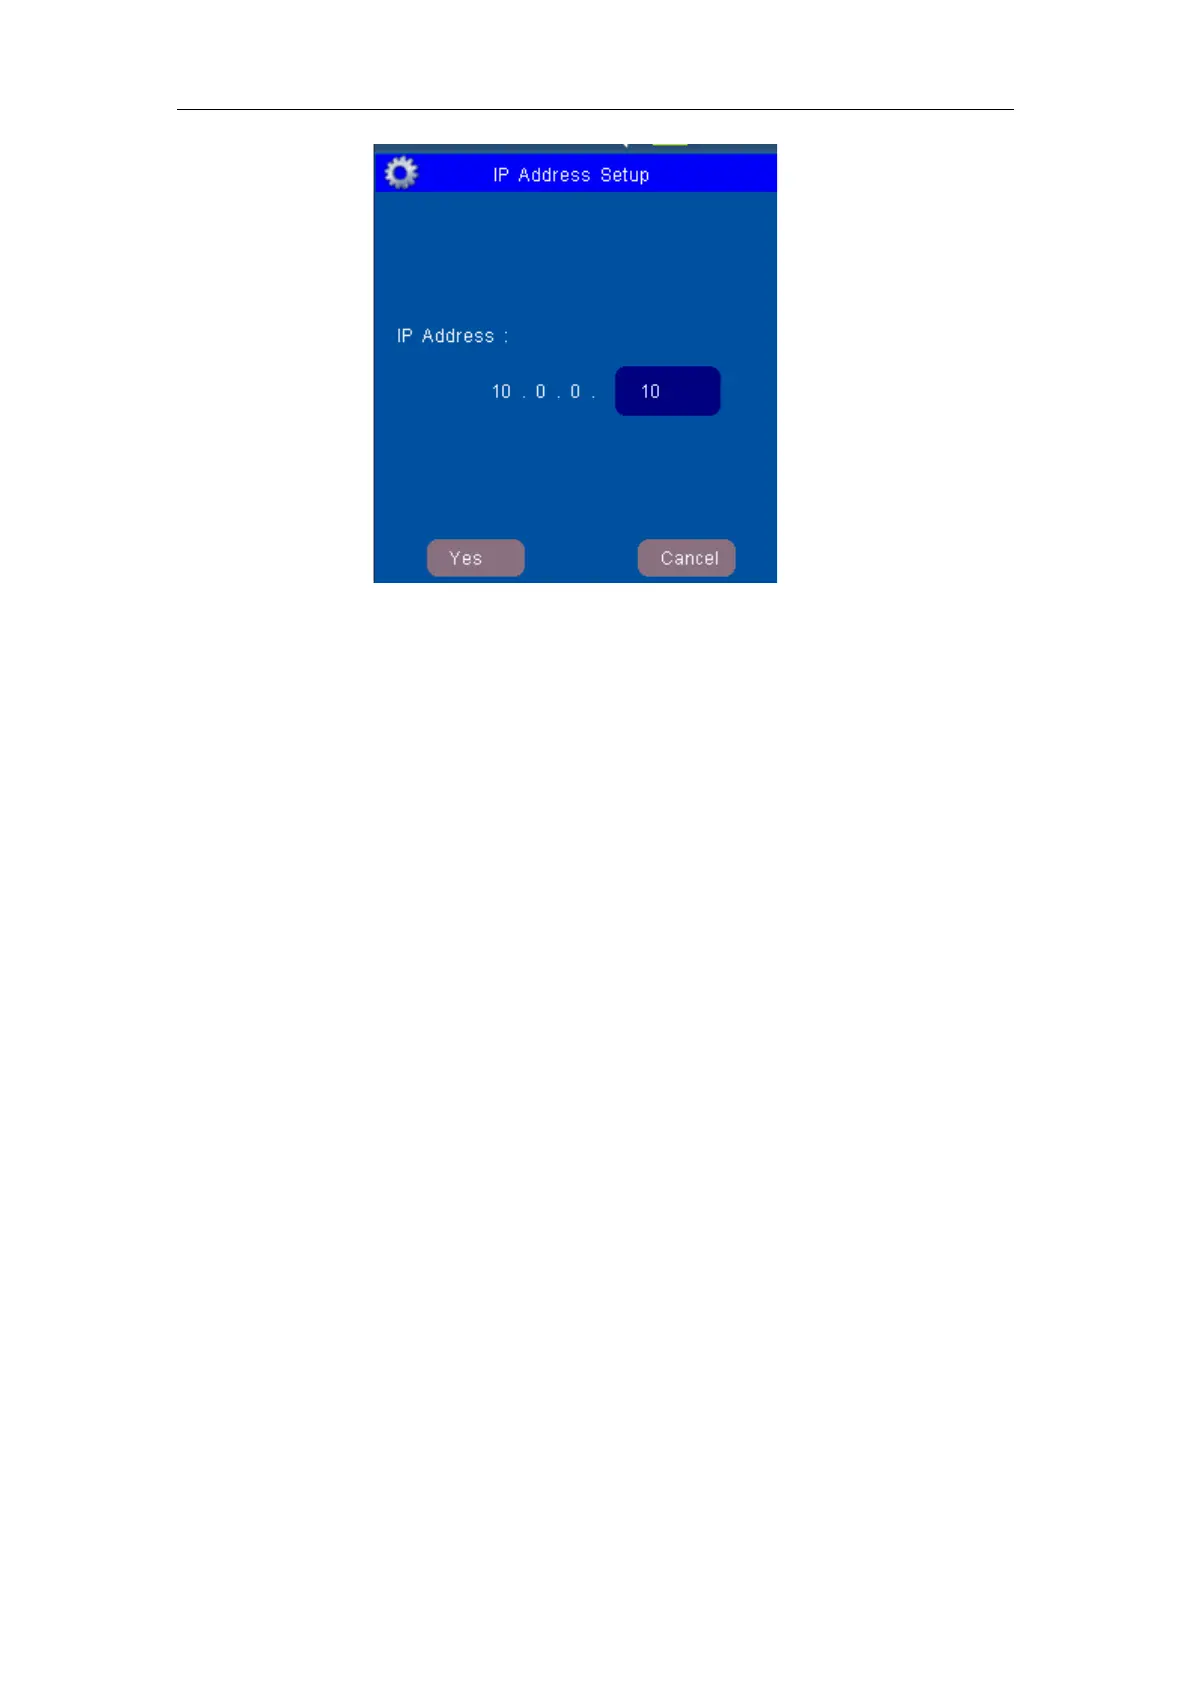
Figure 4: Window for Ethernet IP Address Setup
If click OK item, the Ethernet IP address setup of the Patient Monitor is set and saved.
This IP address is available only when the patient monitor is re-powered on.
2. If you input “DEMO.…” for the password and then open the Demo Switch, you will
see the simulation measurement.
The Demo mode is for demonstration purpose only. To avoid that the simulated data
are mistaken for the monitored patient’s data, you must not change into demo mode
during monitoring, otherwise, improper patient monitoring and delayed treatment
could result.
3. If you input “SCREEN..” for the password, the “Screen Calibration” menu item will be
activated. Enter the menu; you could calibration the monitor touch-screen.
4. If you input “UPGRADE.” for the password, the Upgrade Setup Menu will be enabled.
This function is for servicing engineer only.
SOUND VOLUME
Mainly use to adjust the sound to four levels, separately they are: Ⅰ, Ⅱ, Ⅲ and Ⅳ. Ⅳ is
the loudest and Ⅰis the lowest. Also it can be set to OFF.
BRIGHTNESS
Select the appropriate setting for the screen brightness. Ⅳ is the brightest, and Ⅰis the
least bright.
If the patient monitor operates on battery power, you can set a less bright screen to
prolong the operating time of the battery.
ALARM SWITCH
It could be choose ON or OFF. When it is ON, the alarm is enabled, and then you should
set the each parameter’s alarm switch in the Parameter Setup. When it is OFF, the alarm
is disabled which means all alarm is closed.
DISPLAY MODE
There are nine groups for module combination in all. Choose which module combination