D-0120794-C – 2019/11
Orion Rotary Chair Installation Instructions Page 15
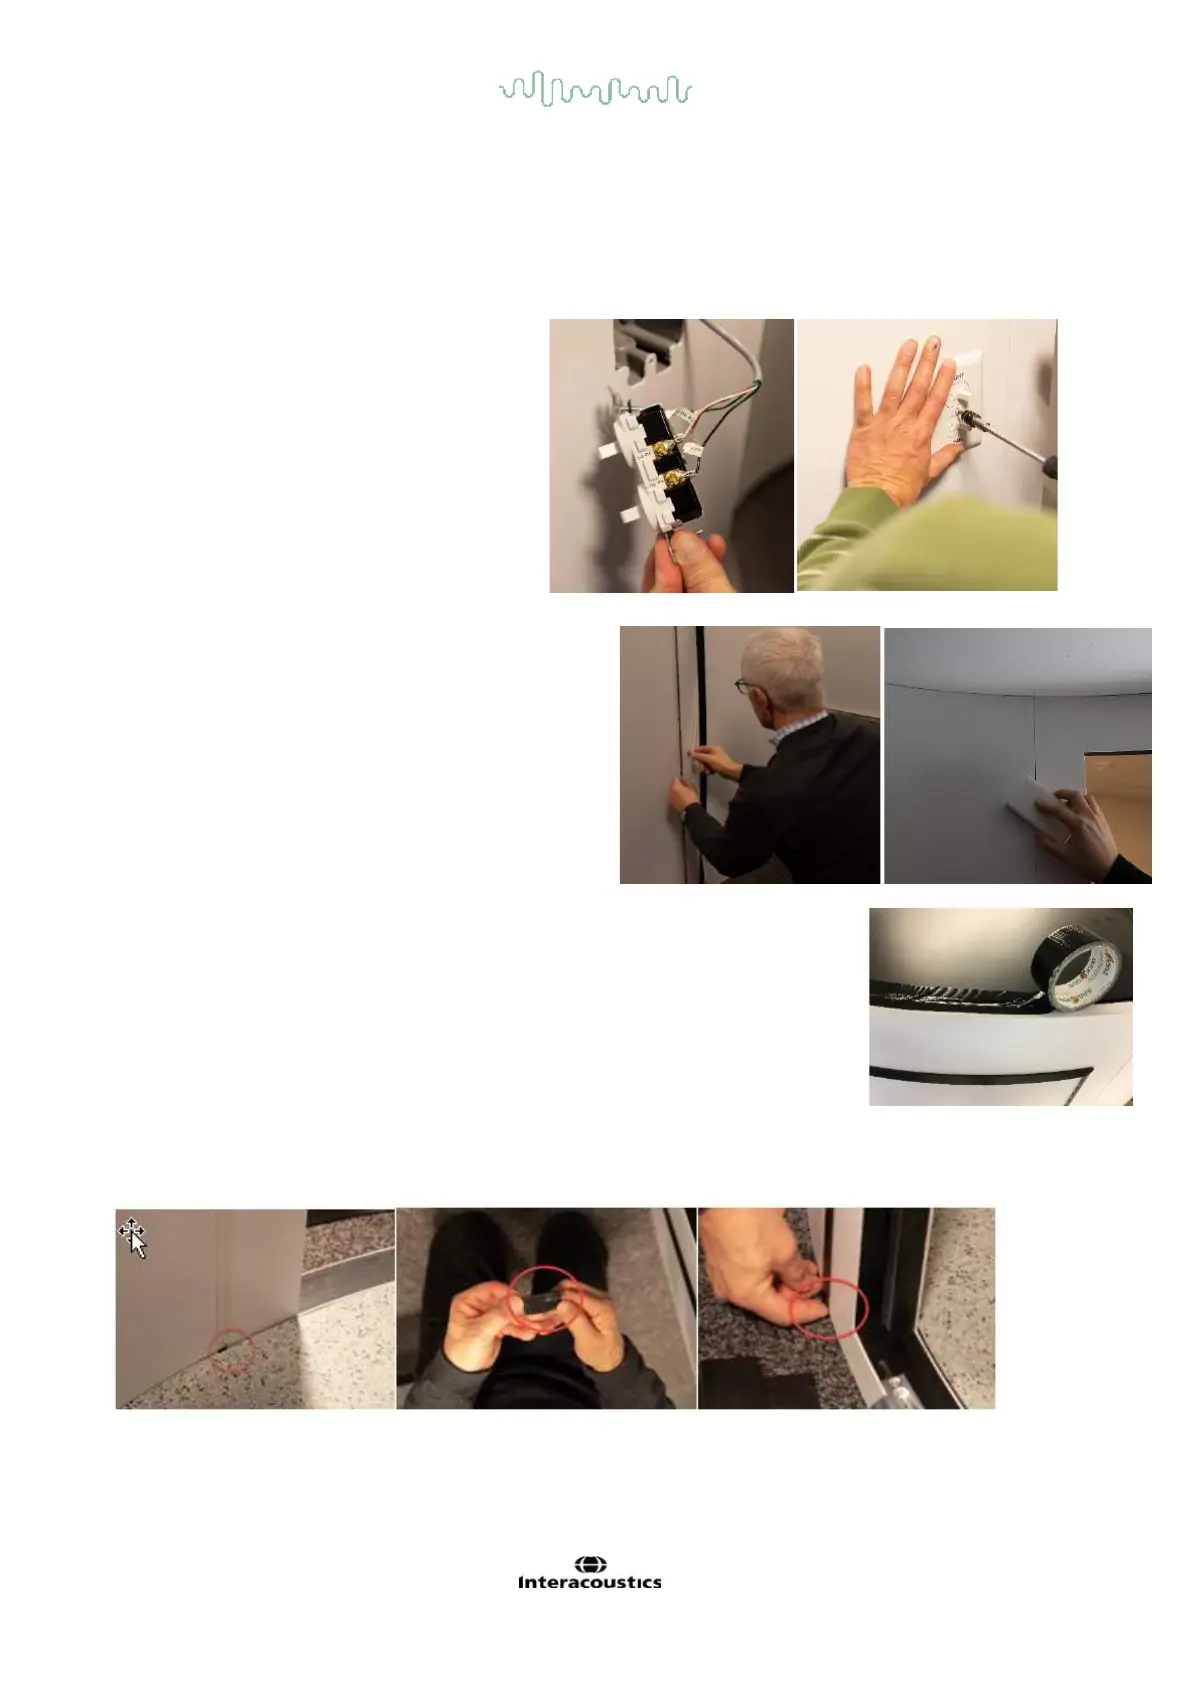
Attach the fan and light switches to the wires in the outlet box. Put the switches into the box and place the
cover plate over the switches. The light and fan are 24vdc. This power is supplied by the electronics in the
chair base, thus there will not be light or fans until the chair base is powered on.
Important: The booth fans are very quiet and you must listen carefully or observe them running from the roof.
Fixing the fan and light switches in the figure.
There are 6 black strips that cover the wall joints on
the outside of the booth. These strips block light from
entering the booth. Each strip has tape along its
length. Remove the protective covering on each tape
strip. It is important to wipe the wall (both inside and
outside) with foam cleaner to remove dirt at the wall
joint. Starting flush with the top of the booth, press the
black strip onto the wall and continue to the floor to
cover the crack. Continue this for all six joints. Remove
the panel # labels from the top of each panel.
From the top using a step ladder, place 2” / 5.08 cm wide black tape all around the
ceiling perimeter at the wall-ceiling gap. This black tape blocks light from entering
from above.
Inside the booth, at the bottom of the door wall, there will be gaps to the right and to the left of the door.
There will be a light leak that must be blocked. Use a 3” / 7.62 cm long section of black tape torn into a 1” /
2.54 cm wide strip. Place the tape at the bottom of the wall
Blocking the light leakage around the booth door using the black tape.