Intermec EasyCoder 501 – Service Manual Ed. 7
52
Chapter 8 Print Unit
8.6 Label Stop Sensor,
cont.
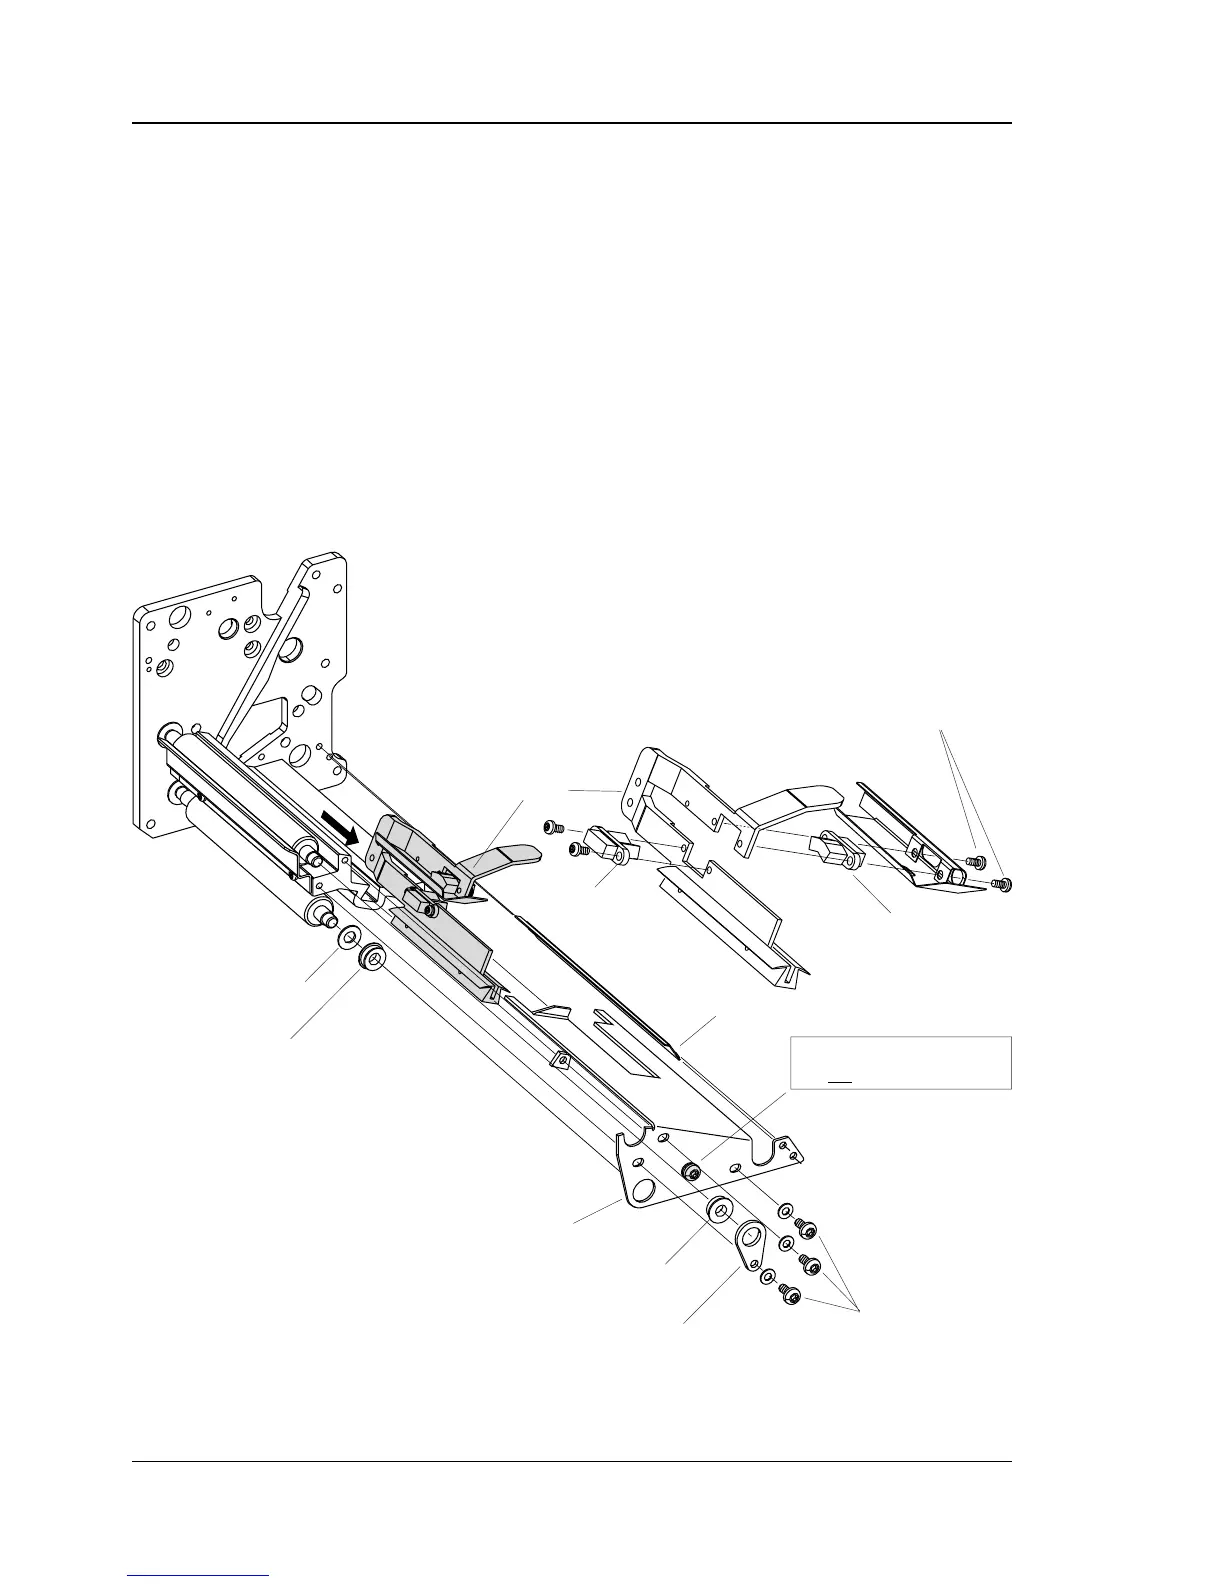
To replace a defective sensor, proceed as follows:
• Disconnect the two cables to the LSS from the CPU board.
• Using a #T20 Torx screwdriver, remove the three screws that
hold the lower gable to the print unit.
CAUTION!
Do not loosen the center screw (marked with a shade of grey
below), or the platen roller alignment will be lost!
• Put the ball bearing and its bracket aside, as well as the rear
guide plate.
• Pull out the lower gable and the LSS assy.
• Remove the two #T8 Torx screws that hold the defective
sensor.
• Cut the cable clip and remove the defective sensor.
• Reassemble in reverse order, replacing the cable clip.
• Connect the cable from the lower sensor to P-600 on the CPU
board and the cable from the upper sensor to P-601.
#T20 Torx Screws
Rear Guide Plate
LSS assy.
Lower Sensor
Upper Sensor
Lower Gable
IMPORTANT!
Do not
loosen this screw!
Bracket
Ball Bearing
Ball Bearing
Washer
#T8 Torx Screws
Note. The liner drive roller with its washer and ball bearing is
omitted in EasyCoder 501 LinerLess.