38
Option 4: With Ethernet
• Connect an ethernet cable from your desktop/laptop ethernet port to the ethernet port (port 3)
on your Iridium GO! exec.
• The Iridium GO! exec ethernet port can easily be identified by the network icon on the
product surface.
(Be sure to lift the rubber flap over the Iridium GO! exec ethernet port before attempting to
connect the ethernet cable)
• On your desktop/laptop, select the Network icon on the taskbar at the bottom right of your
screen. Then select the Network & Internet settings to show the ethernet connection from the
list with the left mouse button (there should only be one).
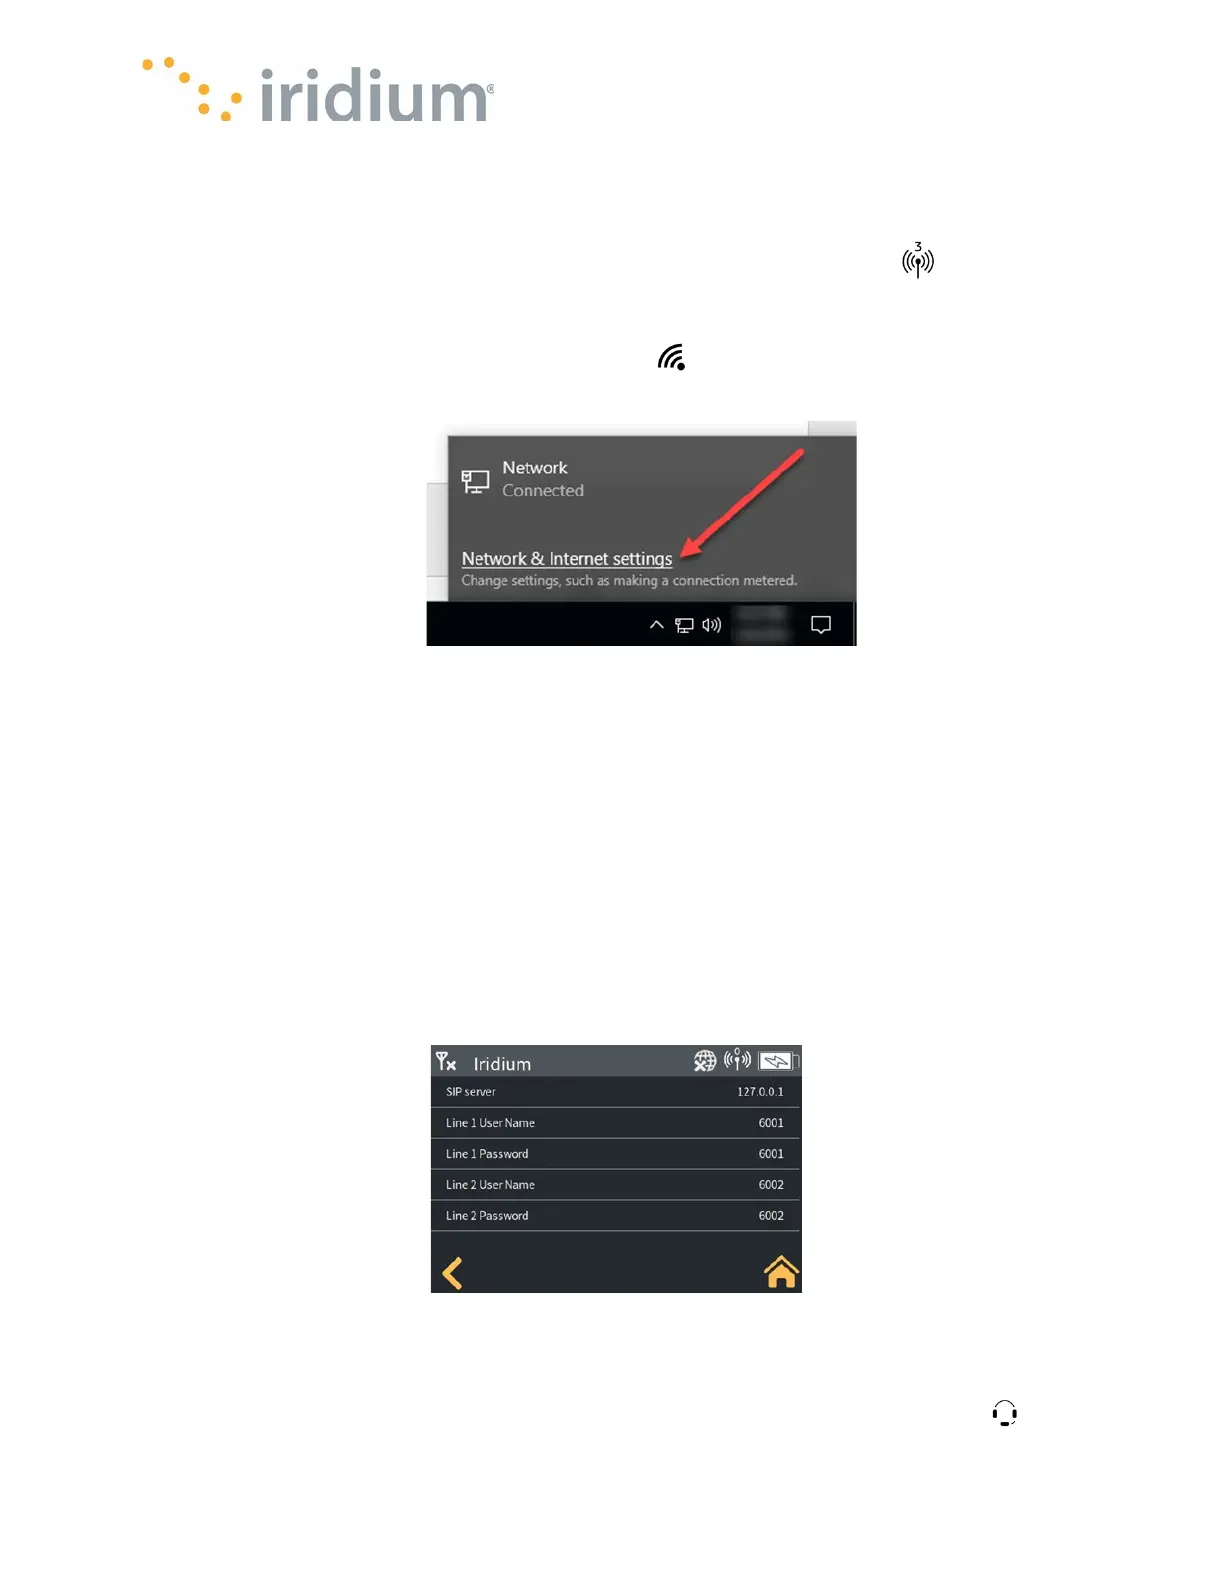
Network Settings
NOTE: This connection should be set as “metered” to minimize the amount of traffic sent to it
from other services running on your computer. To configure as metered, select the Properties
link for the selected network, scroll down to the Metered Connection setting, click the button to
toggle “On”.
Option 5: With SIP Phones
• Plug the Ethernet connection from the SIP phone into the Iridium GO! exec.
• You will need to configure the SIP phone to connect to the SIP server in the Iridium GO! exec.
Please refer to the SIP phone user manual for setting up the SIP phone using the information
provided in the SIP server menu.
• The Server name and credentials are available from the Iridium GO! exec by navigating to the
Settings→ About→ Sip Server menu.
Option 6: Using Headsets
Voice calls can be made and received on the Iridium GO! exec using a USB-C digital headset.
The Iridium GO! exec headset port (port 5) can be easily identified by the headset icon on the