LUBRICATION & PERIODIC MAINTENANCE
65
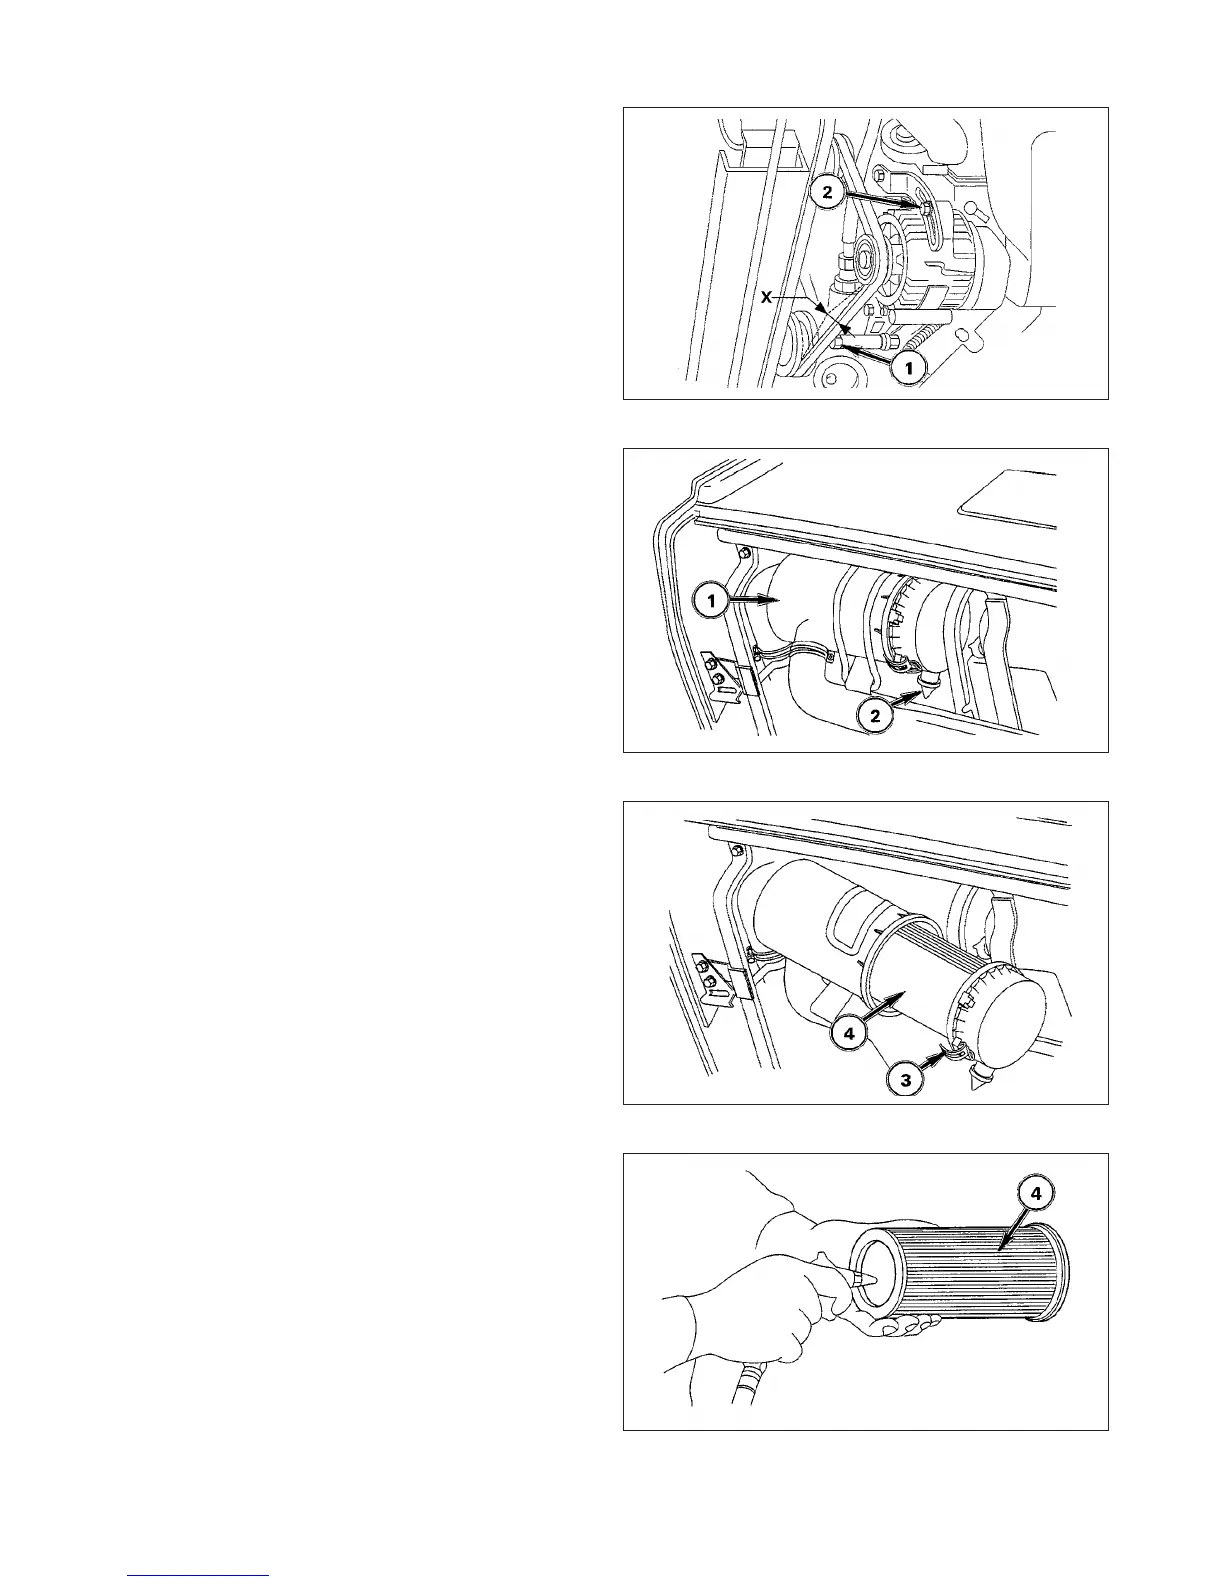
FIG. 6-22: To adjust belt tension, loosen alternator pivot
bolt, 1, and tensioning bracket bolt, 2. Pull out-ward on
top of alternator to correctly tension belt and tighten bolt,
2, first and then tighten pivot bolt, 1.
IMPORTANT: Do not pry against alternator housing or
pulley. Carefully pry against alternator
mounting flange to prevent damage.
ENGINE AIR CLEANER
IMPORTANT: Never operate engine with air filters
removed.
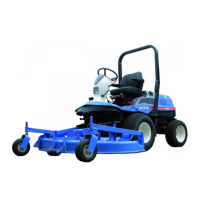
FIG. 6-23: The engine air cleaner, 1, is located above
engine. To gain access remove right side panel.
The dust ejector, 2, should be squeezed to open and
allow dust to drop out daily. This will reduce amount of
material which collects on main filter.
To service main filter, release retaining band over air
cleaner and pull air cleaner inlet tube to rear to release it
from retaining hooks. Then turn the air cleaner out for
servicing.
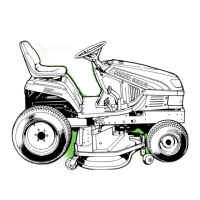
FIG. 6-24: Release clip, 3, and remove element, 4.
Examine element and seals for damage and brittleness. If
element is damaged in any way it must be replaced.
NOTE: Engine air filter has a seal ring. Fit it correctly
when reinstalling.
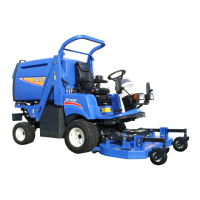
FIG. 6-25: Element, 4, may be cleaned (if in serviceable
condition) using following procedures:
Using compressed air not to exceed 30 psi (200kPa) from
inside element, remove loose dirt, grass, chaff, etc. Be
careful not to damage element pleats with air flow.
If outer element is coated with oil or soot:
1. Prepare solution of warm water and non-foaming
detergent.
2. Soak element for thirty minutes.
3. Agitate element in solution until oil and soot are loos-
ened.
4. Rinse element until rinse water is clear.
5. Allow element to completely dry. Do not dry by using
compressed air or heat.
6. After cleaning (or washing) element examine for pin
holes, punctures, or tears. If element paper, canister
or seal show any signs of physical damage, element
must be replaced.
NOTE: Replace outer element which has already been
washed five times.
FIG. 6-22
FIG. 6-23
FIG. 6-24
FIG. 6-25