18
07610-003-78-18-N
CURTAIN INSTALLATION INSTRUCTIONS
INSTALLATION
The unit has decals marking the curtain locations inside the machine, starting at the load end and ending at the unload
end. The illustrations below indicate the size of the curtain to be placed on the curtain hooks
provided. If any curtain components are missing, these must be obtained and installed before operation.
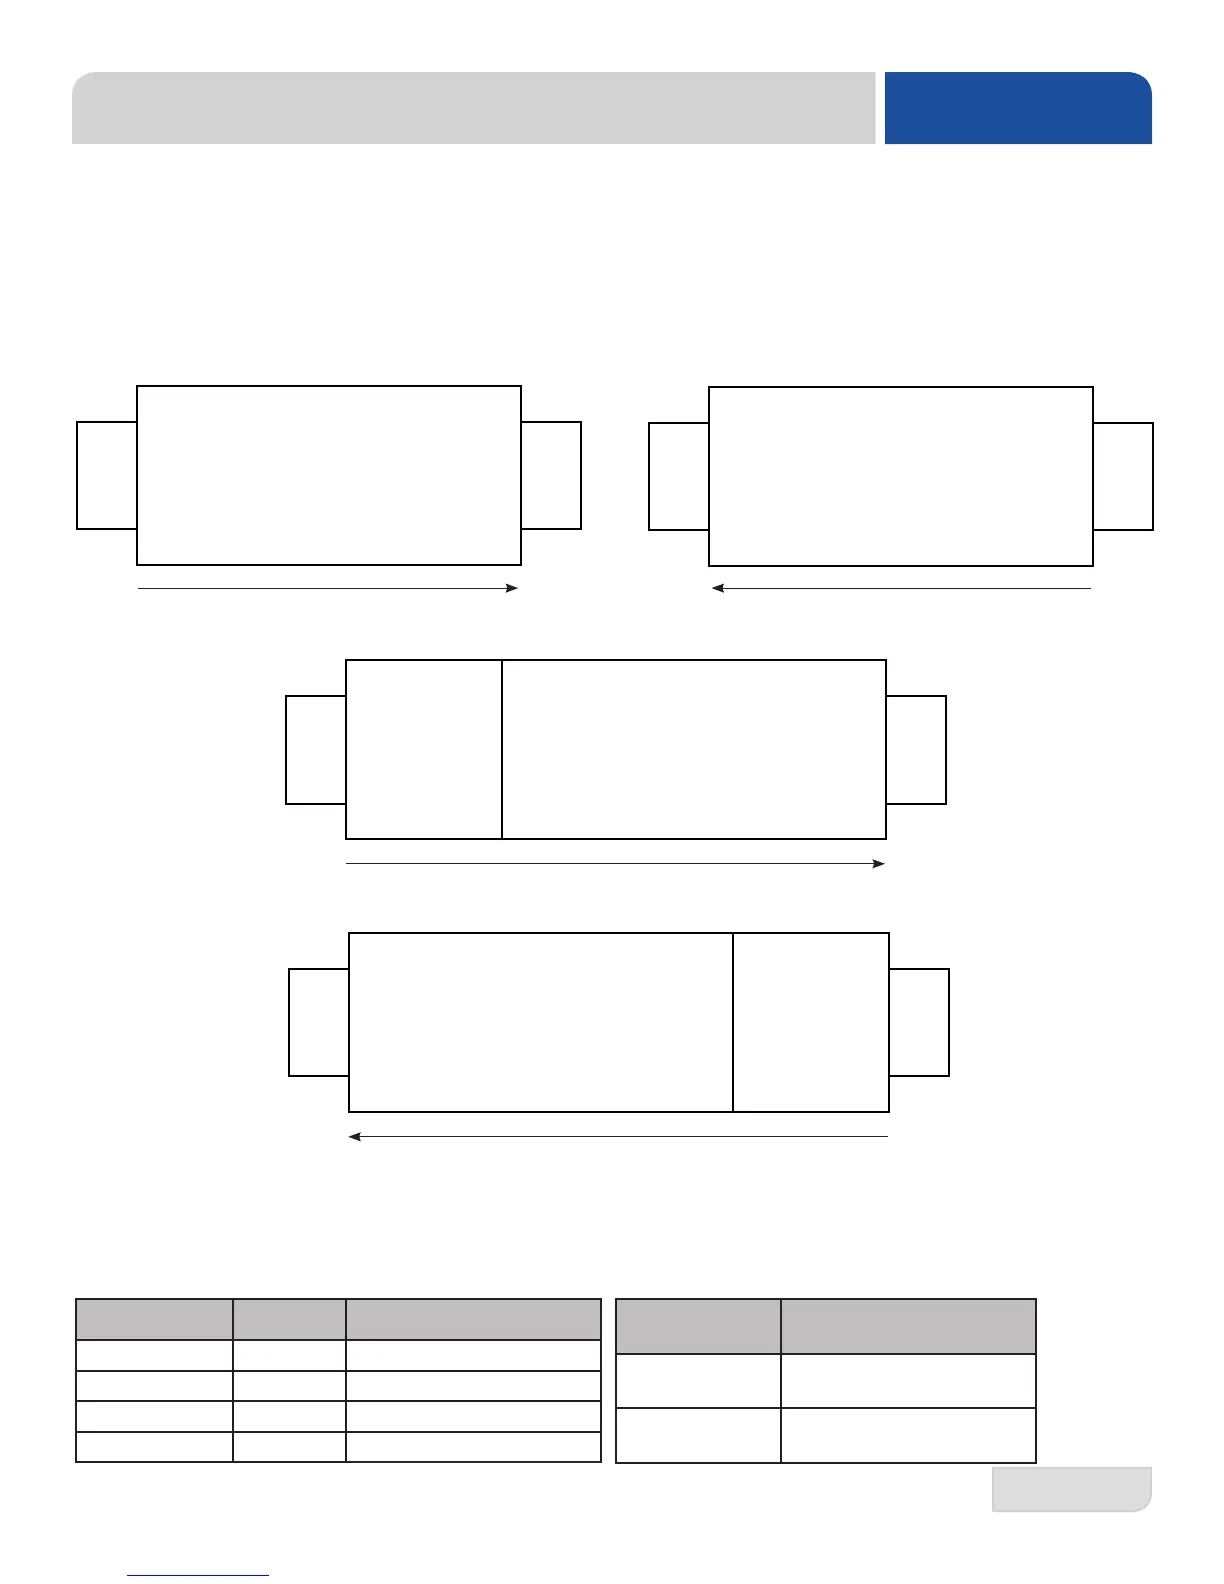
DETERMINING CONVEYER DIRECTION: The dishmachine will be congured for either Left-to-Right or Right-to-Left
operation. Direction is from the load end to the unload end, as shown below.
44" Left-to-Right 44" Right-to-Left
XL S L L XL
Load
XL L L S XL
Unload
Unload
Load
66" Left-to-Right
XL S L S L L XL
Load
Unload
66" Right-to-Left
XL L L S L S XL
Load
Unload
IMPORTANCE OF PROPER CURTAIN PLACEMENT: The curtains inside the dishmachine must be installed properly
for the machine to operate correctly. Curtains are used to control air currents inside the unit and assist in maintaining the heat
necessary to keep energy costs down. Note the approximate locations for each type of curtain in the above illustrations.
S = Short, L = Long, and XL = Extra Long. See the chart below for actual curtain lengths and part numbers. Note the
different part numbers for the curtain and curtain rod for the load end when a side-loader option is present.
Legend Length Part #
S 12" 08415-131-73-44
L 19" 08415-002-14-41
XL 24.25" 08415-002-47-37
Curtain Rod 20.50" 05700-003-77-52
Side-Loader
Option
Part #
XL
(Load End Only)
08415-003-84-88
Curtain Rod
(Load End Only)
05700-003-84-57
Pre-wash
Pre-wash