radio control system
EN
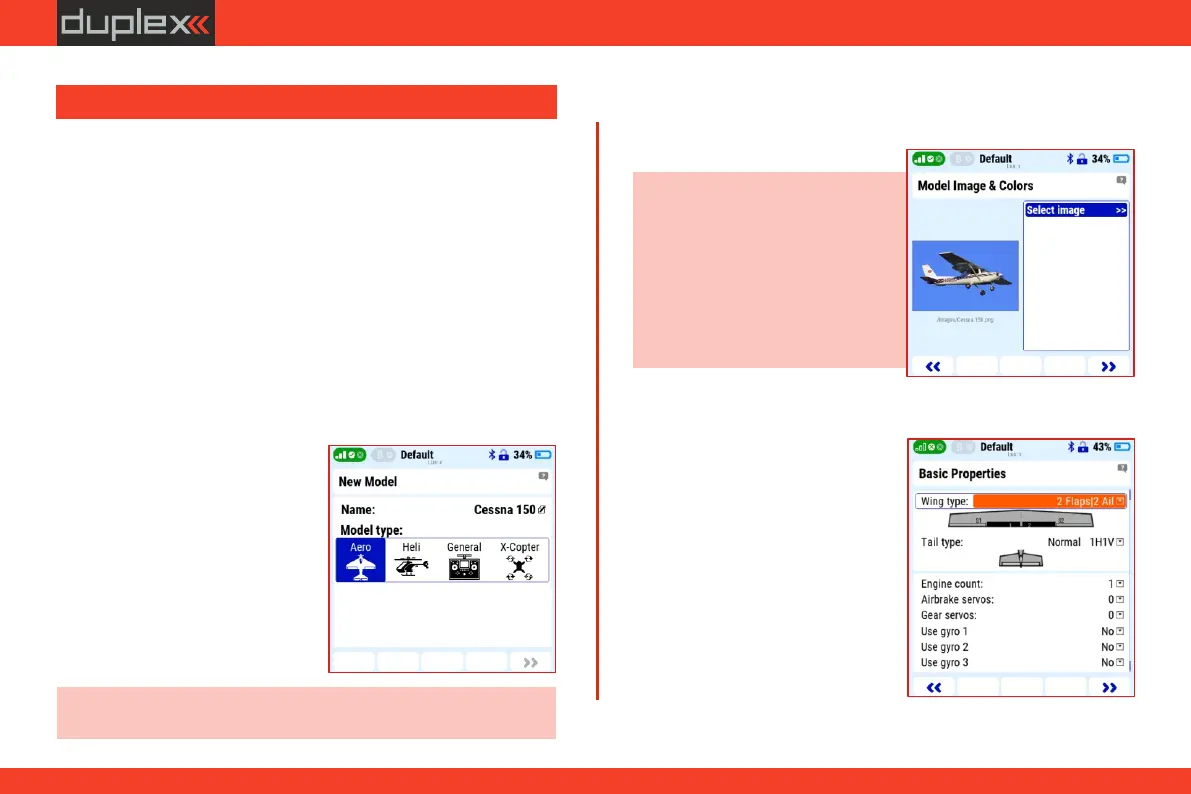
Engine count: 1
7. Basic properties
5. Choose the "Color Profile" of the graphic that suits you.
Tail type: "Normal 1H 1V" (the
model has one servo for rudder
and one for elevator).
Airbrake servos: 0
Wing type: "2 Flaps/ 2 Ail" (the
model has two servos for flaps
and two for ailerons).
Model image & colors
Note: you can find a suitable image
of the model on the Internet or take
a photo of your model. Supported
image format is *.png or *.jpg,
recommended size less than 100KB.
Copy the image to the "Img" folder
of the transmitter, see chapter 4.1.1.
Use gyro: no
4. If you want to have an image of the exact model on the display
screen for your better orientation, please select it from the menu
in the "Select image" item.
6. Press the "F5" button to enter
the next window of the wizard.
8. Press the "F5" button to enter the next window of the wizard.
Gear servos: 0
Note: we don't recommend creating multiple models with the
same name, high risk of confusion and mistake.
3. Choose the model type "Aero",
confirm and enter the next
wizard window with the "F5"
button.
Example model
ź installation components used: DUPLEX REX 10 receiver for band
2.4 GHz, backup satellite receiver DUPLEX Rsat 900MHz NG for
band 900 MHz, controller MEZON EVO 80 BEC.
3.11.1 New Model Creation Wizard
ź all digital HV servos.
New model
1. In the menu "Main menu/
Model/New model" start the
wizard.
2. To create a new model, enter the
model name "Cessna 150".
This chapter describes the step-by-step process of creating a new
aircraft model in the transmitter.
ź a model with one electric motor and flaps (such as the Cessna 150).
ź fixed landing gear with steerable front wheel.
ź functions: 2x ailerons, 2x flaps, 1x rudder, 1x elevator, 1x steering
front legs (landing gear).
3.11 Example of creating a new model
23