DP321 User's Manual
- 21 -
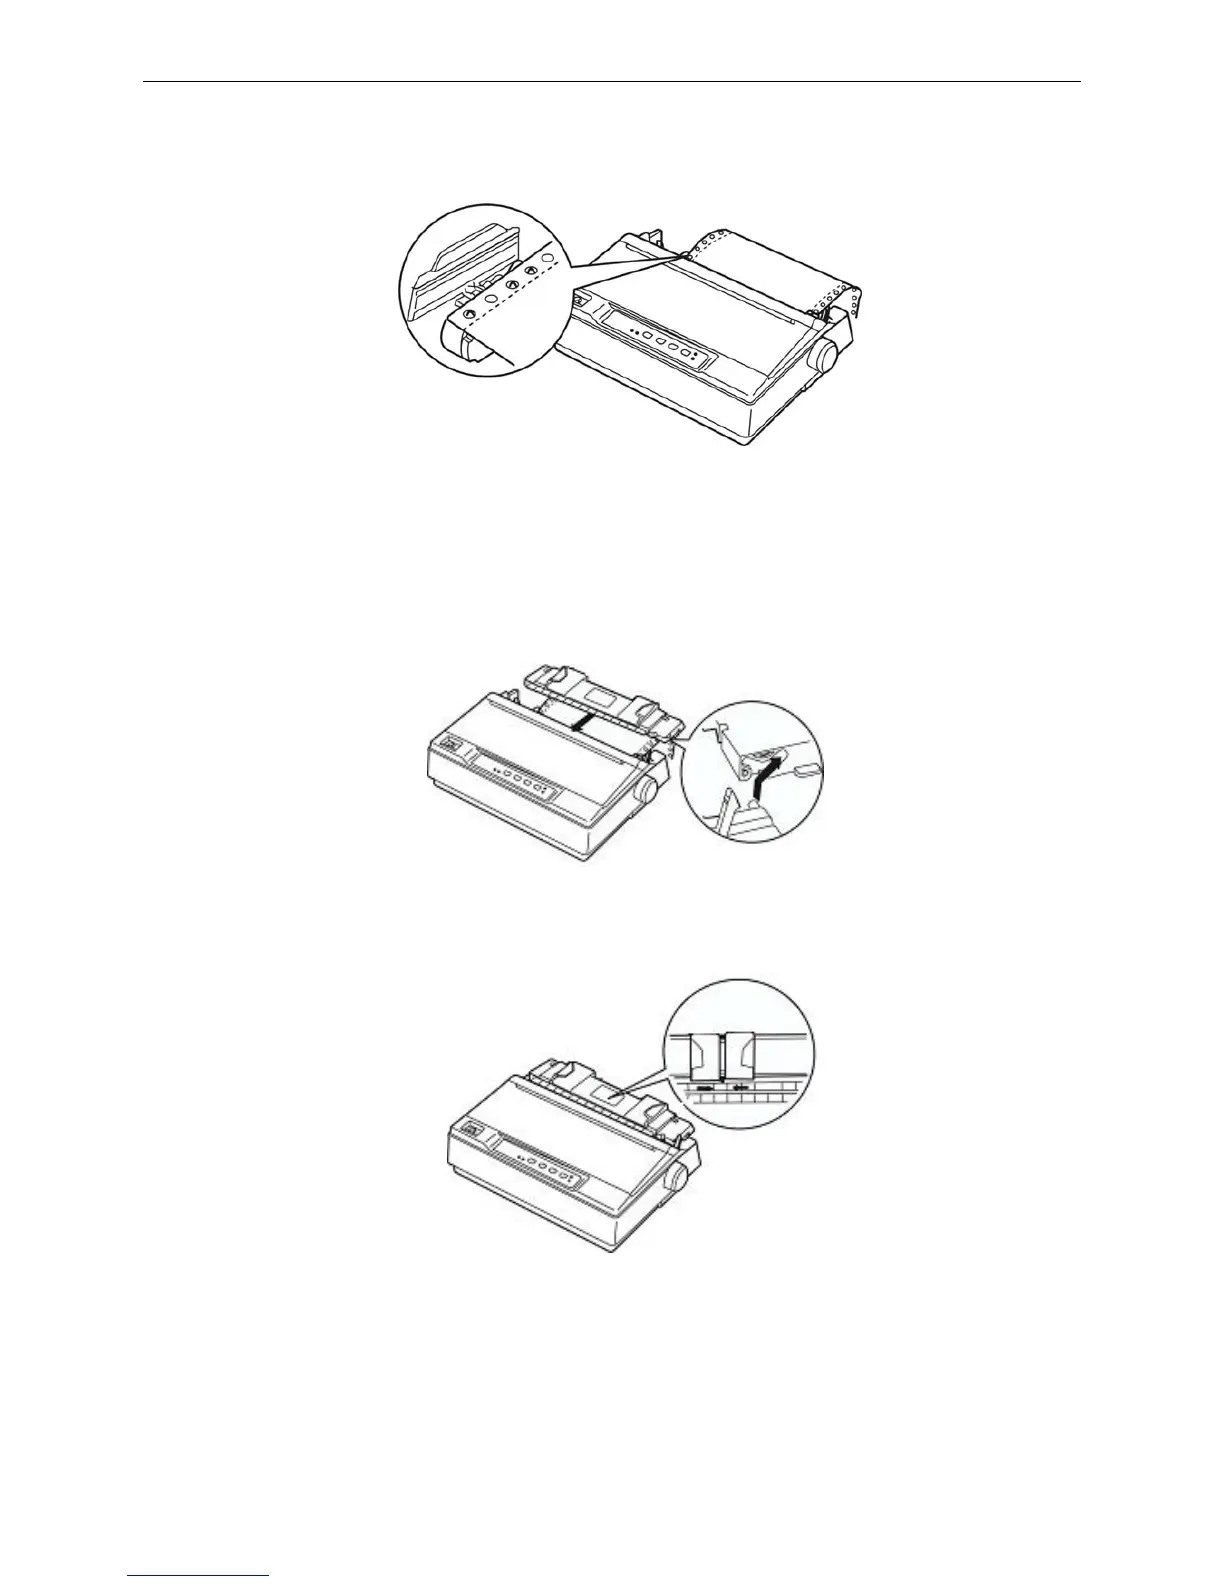
5. Make sure your paper has a clean, straight leading edge. Open the sprocket covers. Fit the first
holes of the paper over the sprocket pins and then close the sprocket covers. Slide the right
sprocket unit to remove any slack in the paper and lock it in place. Now the paper is in the ready
position.
Caution: Only paper jams are cleared when the printer is turned off, can use the knob on
the right side of the printer. Otherwise, you may damage the printer or change the
top-of-form position.
6. Hold the paper guide horizontally and install it according to the follow figure, then block it in the
direction shown by the arrow.
7. Slide the left and right edge guide to the center until they stops at the triangle shaped guide mark.
8. Make sure the printer cover is closed. Turn on the printer, and press LOAD/EJECT to feed paper.
You can adjust the printing home position of the page laypout according to Micro adjust of top of
form position and tear off position. When the printer receives data, it begins printing automatically.
Note: Do not use the knob to adjust the paper-in position due to the micro-range is limited.
When the adjustment exceeds the up-limit or down-limit, the beeper beeps and the
position can not be adjusted for a further time. The position is in effect before next
Figure 3-9 Load the continuous paper in the tractor
Figure 3-10 Install paper guide
Figure 3-11 Adjust the position of paper guide