EasyManua.ls Logo

JRC JFE-380 - User Manual

JRC JFE-380
80 pages
Print Icon
To Next Page IconTo Next Page
Loading...
01ETM ISO 9001, ISO 14001 Certified
Printed in Japan
Marine Service Department
+81-3-3492-1305
+81-3-3779-1420
tmsc@jrc.co.jp
Telephone :
Facsimile :
e-mail :
AMSTERDAM Branch
Telephone :
Facsimile :
e-mail :
+31-20-658-0750
+31-20-658-0755
service@jrceurope.com
SEATTLE Branch
Telephone :
Facsimile :
e-mail :
+1-206-654-5644
+1-206-654-7030
marineservice@jrcamerica.com
CODE No.7ZPNA2002FCODE No.7ZPNA2002F
DEC 2012 Edition 6 JRCDEC 2012 Edition 6 JRC
Not use the asbestos
For further information,contact:
URL http://www.jrc.co.jp
INSTRUCTIONINSTRUCTION
MANUALMANUAL
Echo SounderEcho Sounder
JFE-380JFE-380

Table of Contents

Other manuals for JRC JFE-380

Questions and Answers

  • C
    Christina HarringtonJul 31, 2025
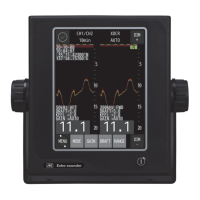
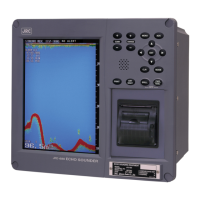
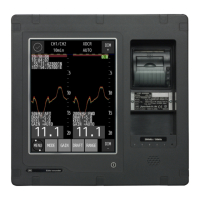
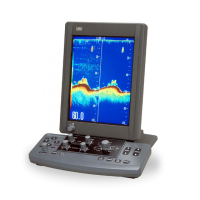
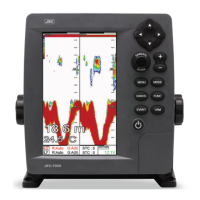
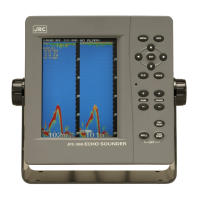
    Why is there so much noise on my JRC Marine Equipment?
    • A
      Amber ByrdJul 31, 2025
      Excessive noise records can stem from several sources. It could be noise generated by the dynamo, in which case you should check the dynamo. Another cause could be an imperfect main unit earth, so check the main unit earth connection. Finally, it might be external interference noise, possibly from underwater sonic prospecting equipment from another ship, which isn't a malfunction of your equipment.
  • M
    Monica WaltersAug 6, 2025
    What to do if the screen doesn't appear on my JRC Marine Equipment?
    • M
      Michael WarrenAug 6, 2025
      If the screen does not appear, there are several potential causes. First, ensure the ship's AC100-230V breaker is "ON". If it is off, turn it "ON". Second, check for disconnections in the power supply AC inboard cable or loose screws in the connecting terminal; repair the cable or tighten the screws. Lastly, a blown fuse could be the issue; in this case, replace the fuses.
  • J
    Jeffrey SalazarAug 11, 2025
    Why is my JRC Marine Equipment showing an incorrect depth value with false sea bottom records?
    • J
      Joseph WigginsAug 11, 2025
      An incorrect depth value, showing a false sea bottom in a middle layer, typically indicates that the sensitivity setting is too strong. This causes the equipment to record garbage, dirt, and plankton layers in the water as the sea bottom. To resolve this, set the sensitivity to AUTO or manually lower the sensitivity.
  • A
    Anthony ConleyAug 15, 2025
    What to do if my JRC Marine Equipment depth value is not displayed, but the sea bottom echo is slightly recorded?
    • A
      Amanda GriffithAug 15, 2025
      If the depth value isn't showing but the sea bottom echo is slightly recorded, the sensitivity setting may be too weak. Try setting the sensitivity to AUTO or manually raise the sensitivity. Also, if the sea bottom is mud (weak stratum), set the sensitivity to AUTO or raise sensitivity. Another possible reason might be that oysters and barnacles adhere to the transducer, so remove them at dry-dock. Finally, check the transducer cable for disconnections or loose screws in the connecting terminal, and tighten the screw in the connecting terminal.
  • R
    Rebecca Wilson MDAug 20, 2025
    How to fix a JRC Marine Equipment that only displays the oscillation line and no depth value?
    • A
      ashleyhenryAug 20, 2025
      If your equipment only shows the oscillation line, it could be due to the actual sea bottom being deeper than the set range. To fix this, set the range setting to AUTO or manually adjust the range. Another potential cause is a disconnected transducer cable, which would require cable repair.
  • D
    Debra ChavezAug 26, 2025
    How to correct the depth value on JRC Marine Equipment?
    • T
      traceypatelAug 26, 2025
      If the depth value is incorrect, it may be due to an incorrect draft adjustment setting. Set a correct value to resolve this issue.

Summary

Usage Hints

Electrical Shock Precautions

Warns about high voltage parts, dismantling, and wet hands to prevent electric shock.

Equipment Damage Warnings

Warnings against modifying, placing objects on, or damaging the equipment.

Electrical Safety and Component Warnings

Electrical Safety Precautions

Precautions regarding voltage, water, smoke, and unauthorized repairs.

Fuse Safety Guidelines

Guidelines for using correct fuses and handling internal components safely.

CAUTIONary Installation and Operation Notes

Installation Environment Cautions

Cautions regarding installation location, temperature, and surface stability.

Electrical and Condensation Cautions

Cautions on secure earthing and handling condensation in cold environments.

Operational Cautions and Interference

Operational Cautions and Interference

Cautions on power cord handling, ventilation, cable placement, and interference.

1.5 System Configuration

System Connection Diagram

Illustrates the complete system configuration and component interconnections.

2. Control Panel

Control Panel Layout and Functions

Identifies control panel buttons and their specific operational functions.

3. Display

3.1 Standard Display Mode

Explains the standard mode, its elements, and dual frequency display.

3.2 History Mode

History Mode Display and Elements

Describes the history mode, its data recording, and display elements.

3.3 Docking Mode

Docking Mode Display and Data

Explains the docking mode for depth data display and its elements.

4. Operation

4.1 Basic Operations

Covers power control, brightness adjustment, and range control.

Gain Control Operations

Adjusting Sensitivity (Gain)

How to set sensitivity manually or automatically for optimal seabed detection.

Display Mode and Color Settings

Selecting Display Mode and Color

How to change display modes and day/night colors.

Menu Navigation and Setting Registration

How to access menus, select items, and register settings.

Menu Navigation and Alarm Control

Cursor Control in Modes

How to use cursor keys in standard, history, and menu modes.

Cursor Control and Brightness Adjustment

Cursor Control in History and Menu Modes

Using left/right cursor keys for history and menu navigation.

4.2 Menu List

Menu Tree 1 (DISPLAY, ALARM, INITIAL)

Structure of the system menu for display, alarm, and initial settings.

Menu Tree for Printer and Communication

Menu Tree 2 (PRINTER CONT, COMMUNICATION, MAINTENANCE)

Structure of the system menu for printer, communication, and maintenance.

4.3 Display Settings

Image Scrolling, Noise, and Interference Settings

Adjusting scroll speed, noise suppression, and interference rejection.

Auto Gain and Range Settings

4.4 Alarm Settings

Depth Alarm Configuration

System Alarm Configuration

Transducer Configuration

Date and Time Adjustment

4.7 Communication Settings

4.8 Master Reset

Performing a Master Reset

Procedure to reset the unit to factory default settings.

5. Installation

Installation Safety Precautions

General safety cautions for installing the equipment.

5.1 Recorder Unit Installation

Wall-Mount Recorder Unit Installation

5.2 Transducer Installation

NKF-345 Transducer Installation

NKF-392 C Transducer Installation

5.3 Connecting Components

System Connection Diagram and Notes

Shows component connections and provides important notes on cabling and grounding.

6. Maintenance & Check

6.2 Maintenance Functions

Executing Self Tests

Performing self-tests on control unit, LCD, and key unit.

6.3 Replacing Printer Paper

6.4 Replacing Backup Battery

6.5 Troubleshooting

Troubleshooting Common Issues

Table of symptoms, causes, and solutions for common operational problems.

6.6 Replacing Fuses

Fuse Identification and Replacement

Guide to identifying fuses, their locations, and replacement procedures.

Fuse Replacement Details and Repair Parts

8. After-sales Service

10. Specifications

JRC JFE-380 Specifications

General IconGeneral
BrandJRC
ModelJFE-380
CategoryMarine Equipment
LanguageEnglish

Related product manuals