❼❻
❺
❽
A B C
– 29 –
4-5-3. Polygonal-shape stitching pattern
A polygonal-shape stitching pattern can be set.
As many as nine dierent patterns can be set.
In addition, nine steps of stitching can be set in one pattern.
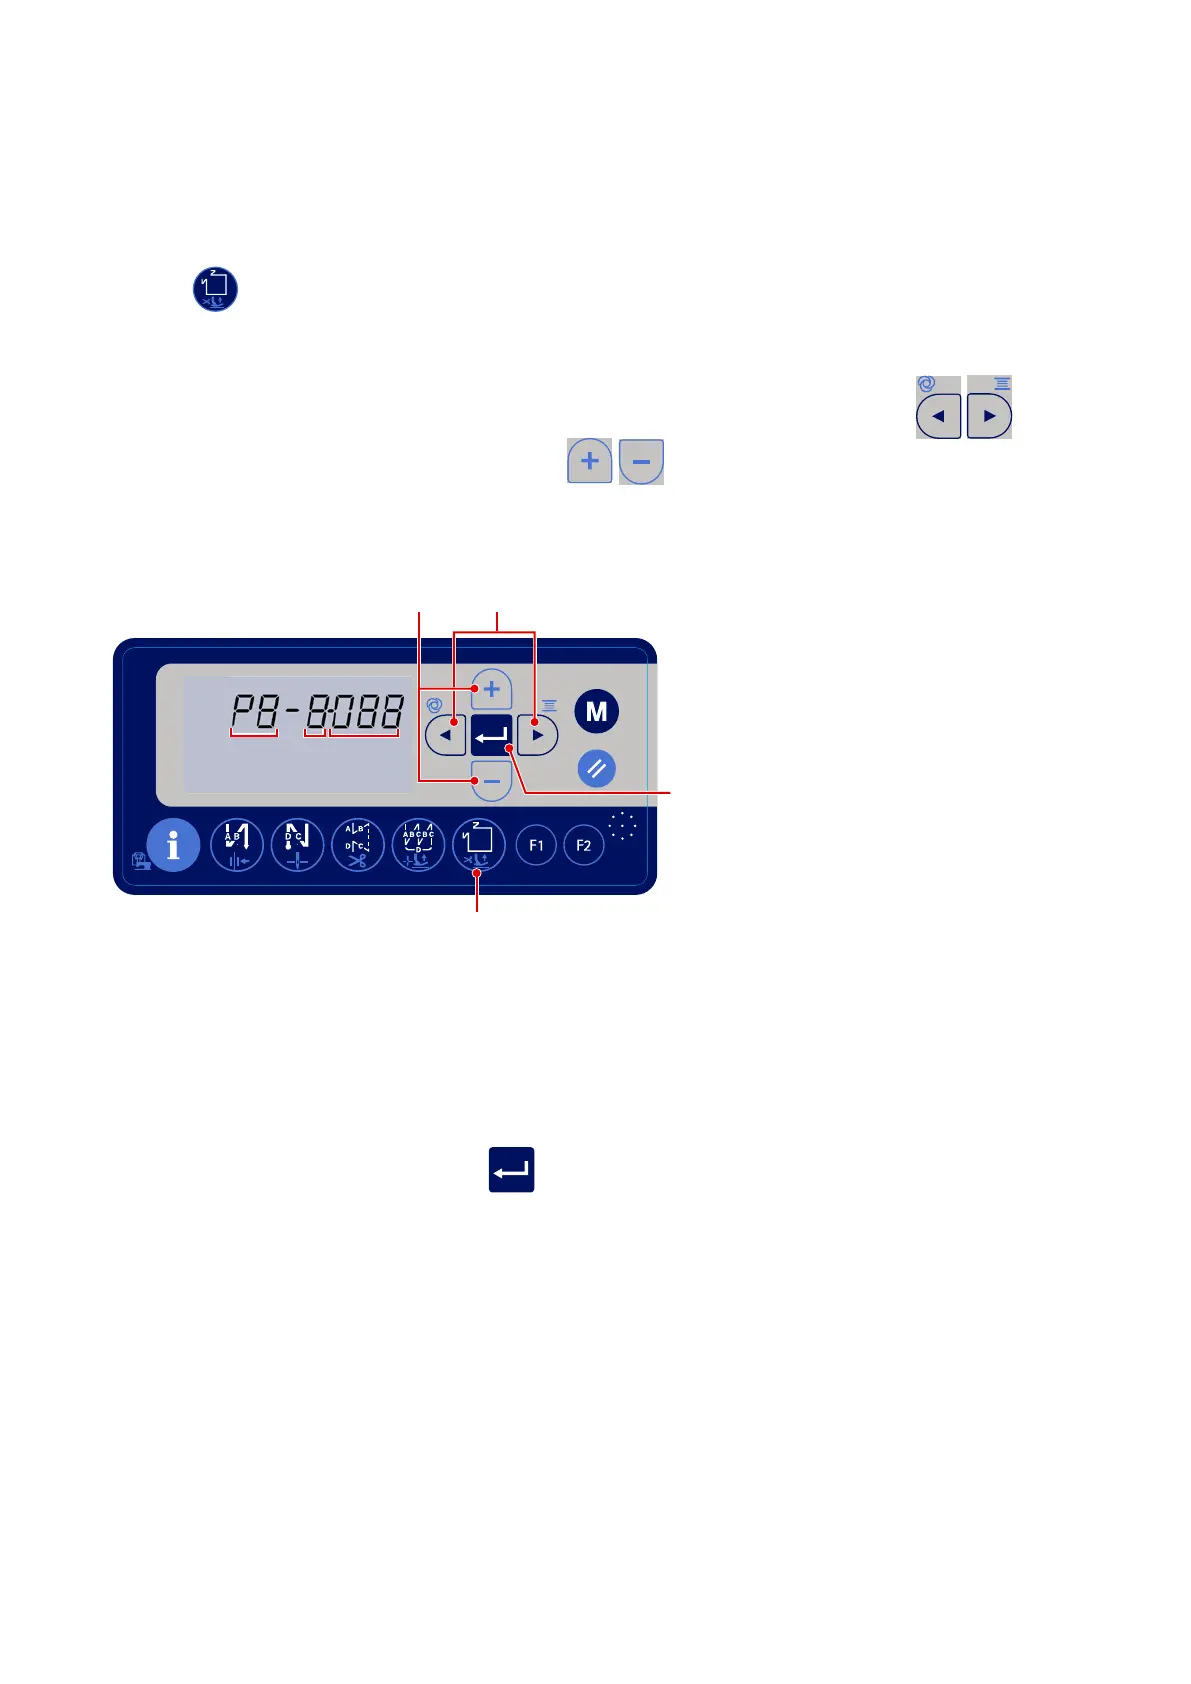
[How to set a polygonal-shape stitching pattern]
1) Press
❺
to put the sewing machine to the constant-dimension stitching pattern setting state. In this
state, one of the processes
A
,
B
and
C
ashes on and o.
2) Move the process that ashes on and o to the process (
A
,
B
or
C
) you want to set with
❼
.
Then, change the set value for that process with
❻
.
A
: Selection of the pattern number
B
: Select what number of the step
C
: Set number of stitches of B
* Constant-dimension stitching (Straight stitching)
(Example) Select the pattern number to
A
.
Set
B
to "1". Set the number stitches (1 - 999) of the rst step to
C
.
Set
B
to 2. Set
C
to 0 (zero).
* Setting
C
to "0" means the end of constant-dimension stitching. In this case, the number of seams to be
sewn using the constant-dimension stitching becomes "1".
After the completion of setting, press
❽
to determine the data.
* Polygonal-shape stitching (label sewing)
(Example) Select the pattern number to
A
.
Set
B
to "1". Set the number of stitches (1 - 999) in the rst step to
C
.
Similarly, set
B
to 2, to 3 and to 4 in sequence to set the number of stitches (1 to 999) of the second,
third and fourth seam line.
Set
B
to 5. Set
C
to 0 (zero).
* Setting
C
to 0 (zero) means the end of polygonal-shape stitching. In this case, the number of seams to
be sewn using the polygonal-shape stitching becomes "4".
* In the initial setting, a polygonal-shape stitching pattern consisting of four steps (each steps consist of
12 stitches) has been factory set.

 Loading...