– 7 –
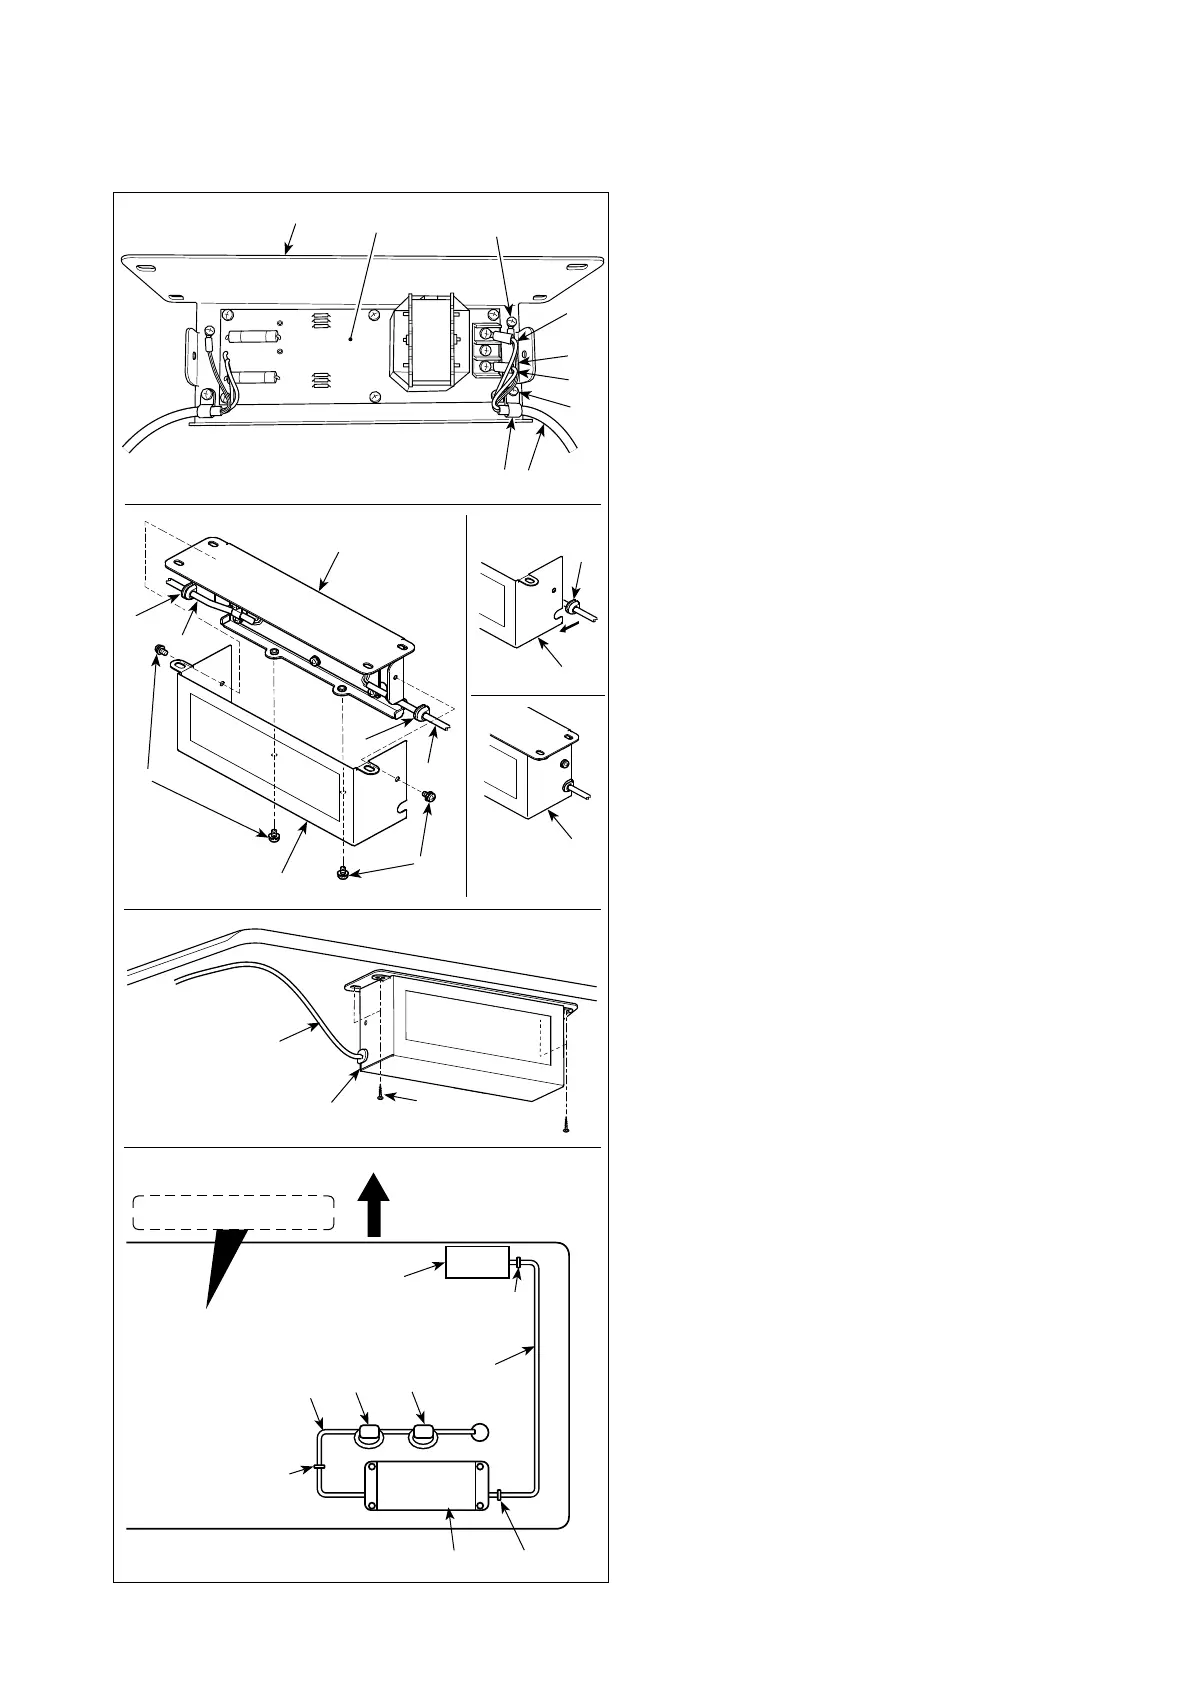
2-7. Installing the reactor box
* For the EU-type models, install the reactor box that is supplied with the sewing machine.
❽
1) Connect the terminals of power cord
❶
of the
electrical box to reactor-box PCB asm.
❷
and
to reactor box mounting plate
❸
.
Connect brown wire
A
to the rst connector
and blue wire
B
to the third connector respec-
tively from the top of terminal block on the
reactor box PCB asm. using screws. Connect
green/yellow wire
C
to reactor box mounting
plate
❸
with earth setscrew
❹
.
2) Attach cable clip
❺
to the power cord of elec-
trical box. Attach the power cord together with
the cable clip to reactor box mounting plate
❸
with cable clip setscrew
❻
.
3) Attach cord bushes
❽
to input/output cables
❶
and
❼
of the reactor box. Attach both
bushes in the same manner.
4) Attach reactor box cover
to reactor box
mounting plate
❸
with four reactor-box cover
setscrews
❾
.
At this time, x cord bushes
❽
attached to
input/output cables
❶
and
❼
in the concave
section on reactor box cover
to eliminate a
gap between reactor box
and cover
.
5) Install reactor box
on the table stand with
four accessory wood screws
.
Adjust the installing position according to
the size of table stand so that the reactor
box does not protrude from the edge of table
stand.
6) Install accessory ring cores
.
For two ring cores
, clamp the power cord
of the electrical box after winding the cable
round the torus of the ring core twice.
7) Fix input/output cables
❶
and
❼
of reactor
box
on the table stand using accessory
cord staple
.
At this time, take care not to cross the input-
and output-cables.
❼
❽
❽
❶
❾
❸
❾
❸
❶
A
B
❻
C
❷
❹
❺
❼
Operator's side
Power box
❼
❶
Undersurface of table

 Loading...