The app automacally claims the AP and adds it to your site. You'll see the new AP listed under the
Access Points tab.
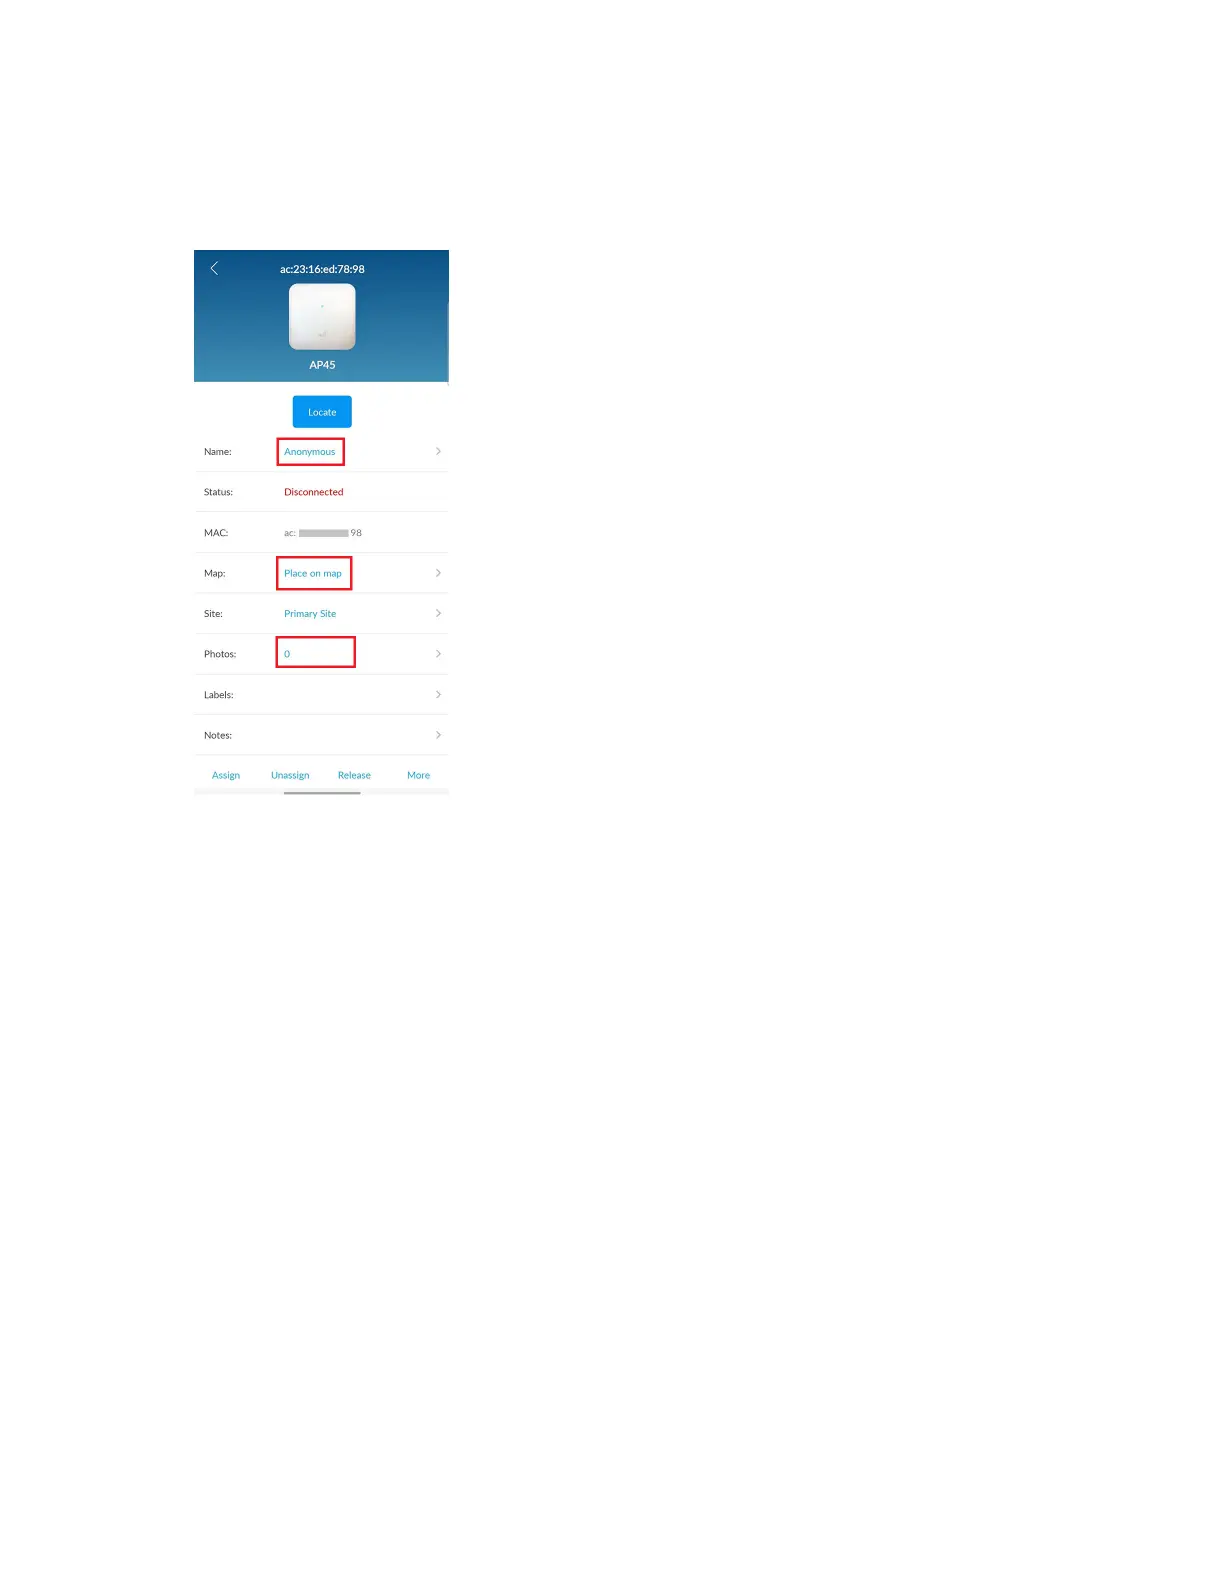
8. Tap the AP to view its details.
You can perform various tasks from the AP details screen such as renaming the AP, seng it on a
oor plan, releasing an AP, or even adding a photo. Simply tap the opon and you can update the
details. To rename an AP, tap the AP name and enter a new name.
To place an AP on a oor plan, tap Place on map. You need to have a oor plan already set up in
Locaon > Live View in the Mist to use this opon. See Adding and Scaling a Floorplan.
Aer you place the AP on the oor plan, you'll see more details such as the posion of the AP and
the height at which the AP is mounted (default value that you can modify).
14