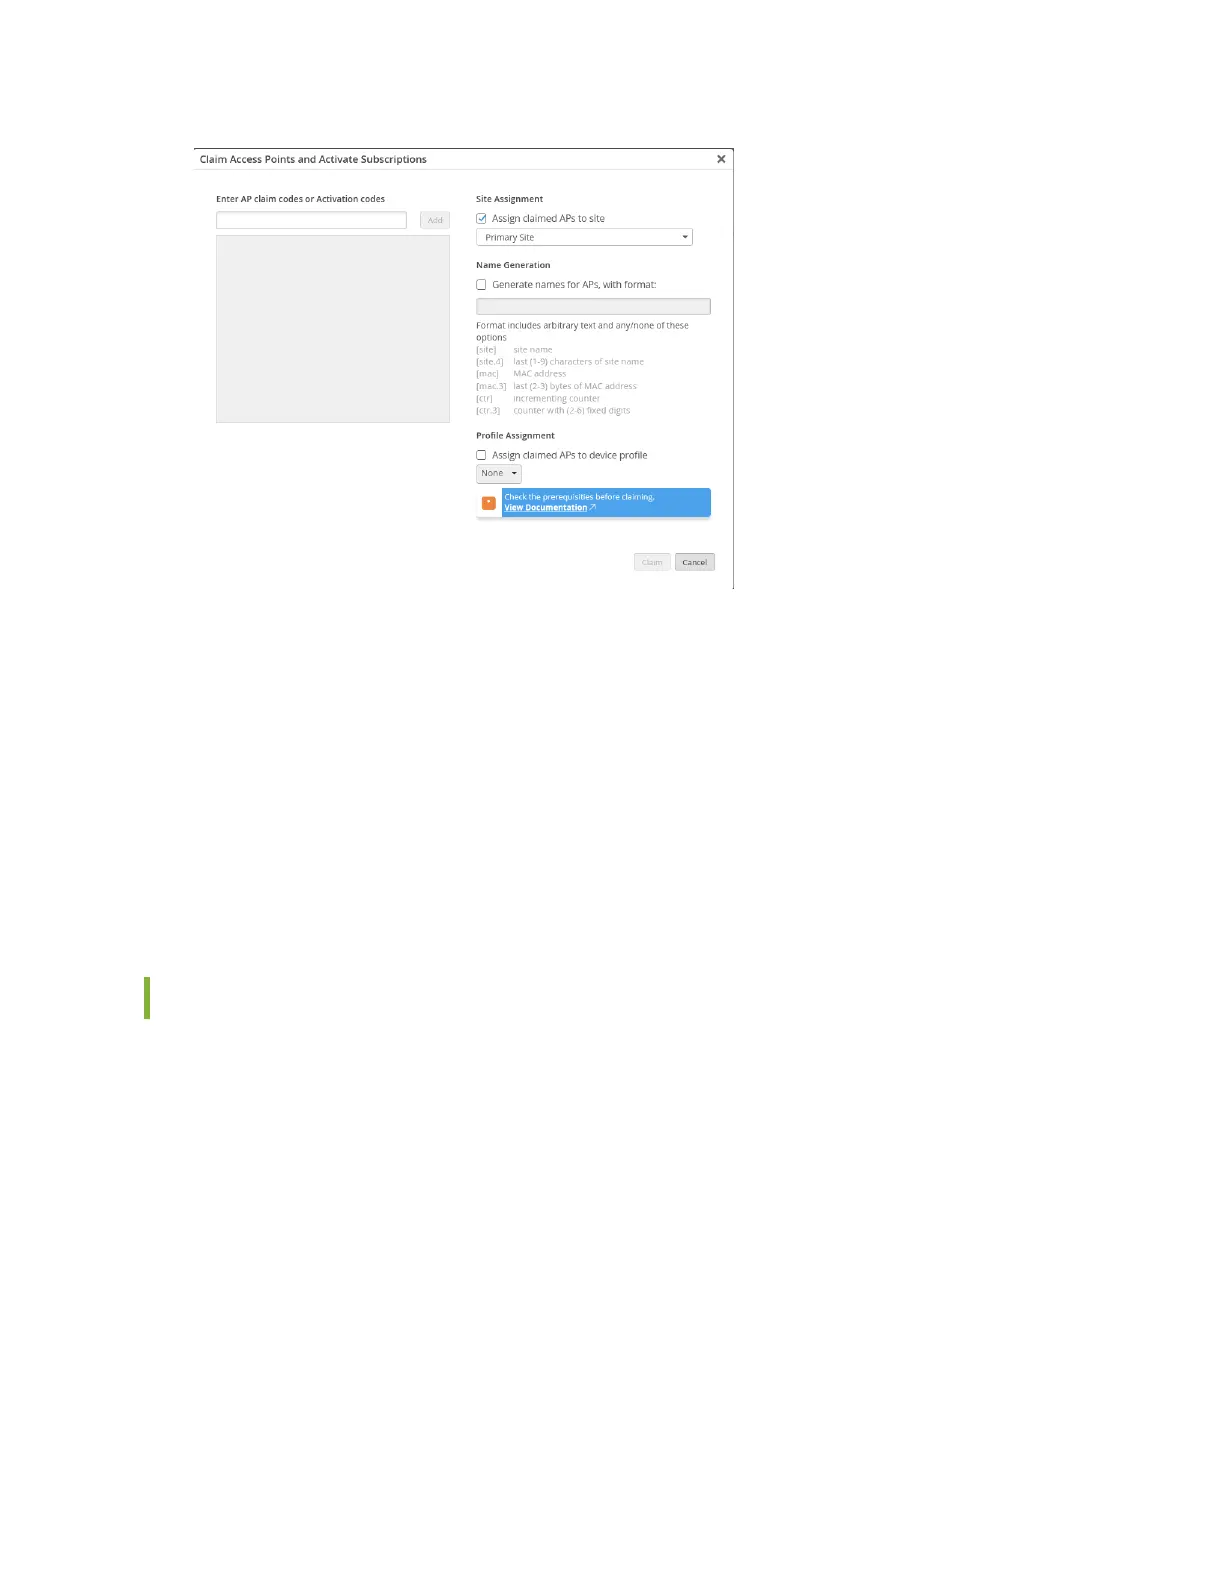
4. (Oponal) Select the site to which you want to assign the AP.
You can choose to assign the AP to a primary site (default) or any other site. If you want to assign the
AP to a site later, clear the Assigned claimed APs to site check box.
5. (Oponal) Select the Generate names for APs, with format: check box and enter a name format for
the AP.
You can use this opon only if you are assigning the AP to a site.
You can also choose to rename and assign an AP to a site aer you claim the AP.
6. Click Claim.
Review the informaon and close the window.
Claim an AP Using the Mist AI Mobile App
To onboard a single AP using the Mist AI mobile app from your mobile phone:
1. Download and install the Mist AI app from the Google Play Store or Apple App Store.
2. Open the Mist AI app and log in using your account credenals.
If you do not have an account, see Create a Mist Account and Organizaon for details about creang
one.
3. Select your organizaon.
4. Tap the site to which you want to assign the AP.
5. Ensure that the Access Points tab is selected and tap +.
6. Locate the QR code on the AP. The QR code is located on the rear panel of the AP.
7. Focus the camera on the QR code.
13