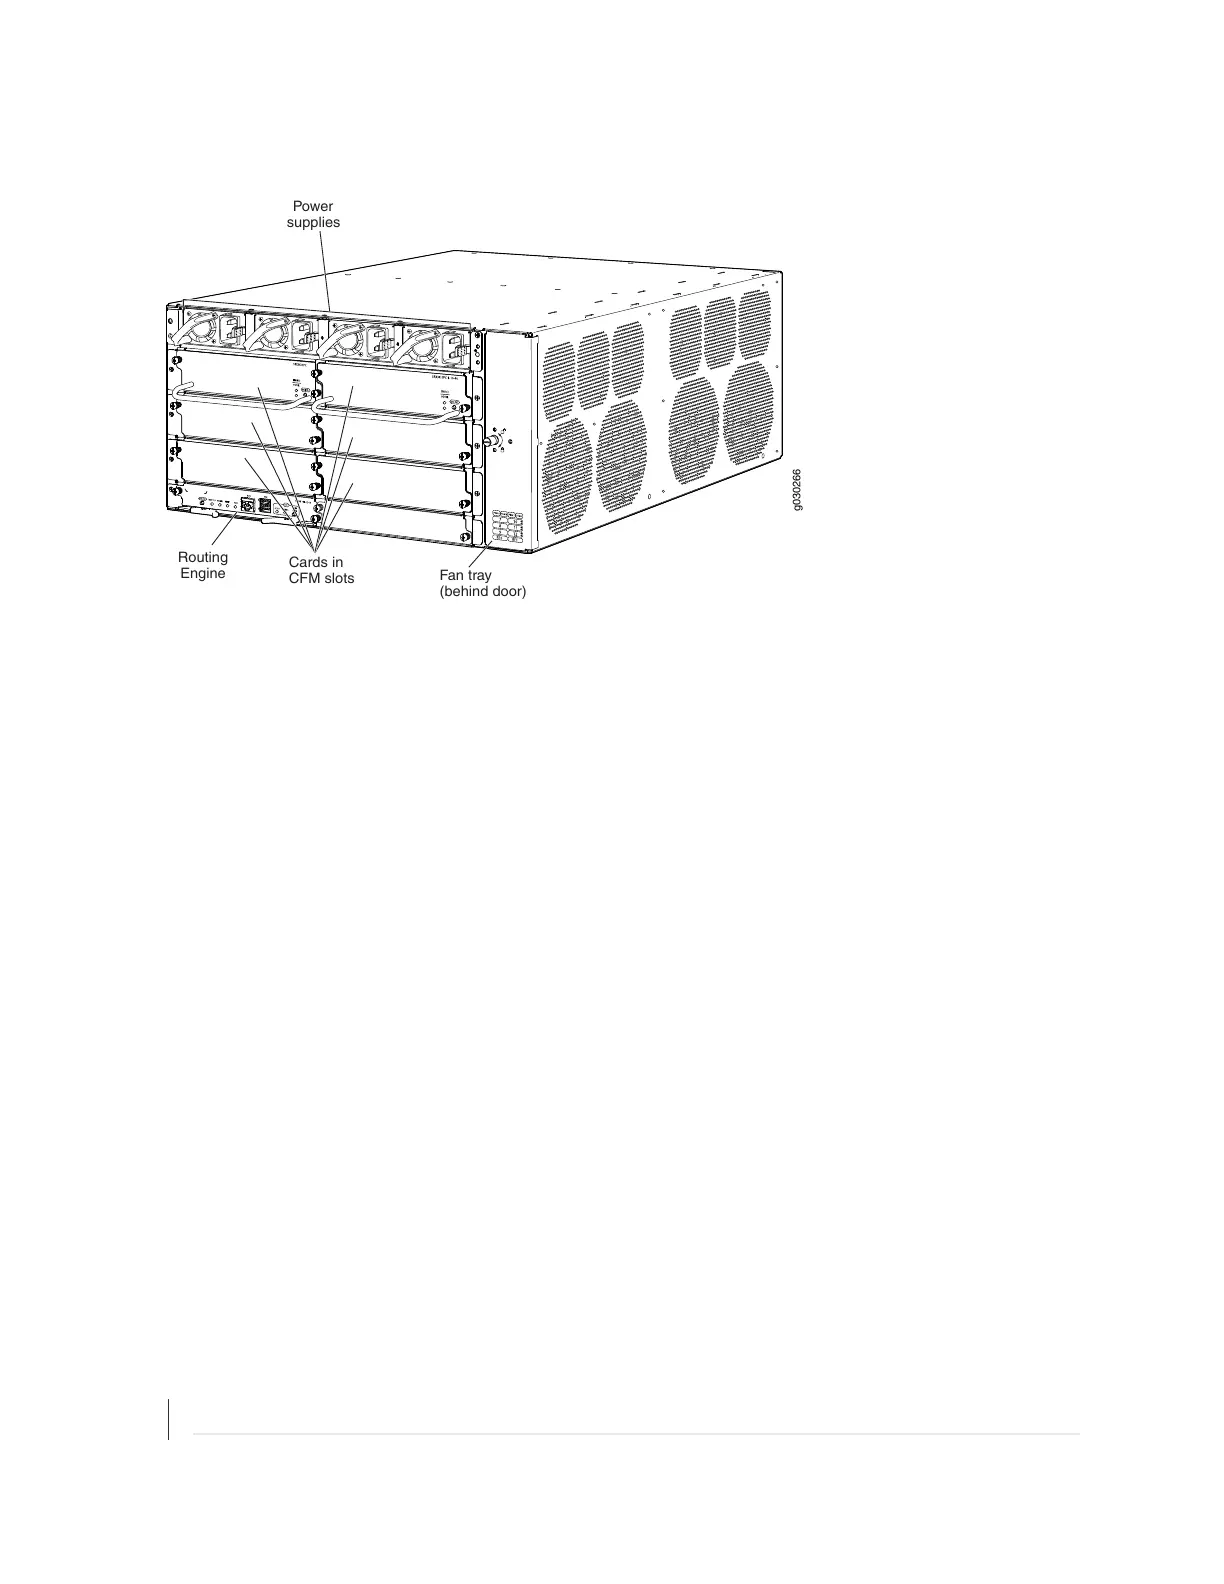
Figure 47: Components to Remove from the Rear of the Services Gateway
g030266
Fan tray
(behind door)
Routing
Engine
Power
supplies
Cards in
CFM slots
To remove the components from the services gateway:
1. Attach an ESD grounding strap to your bare wrist and connect the strap to one of the ESD points on
the chassis. For more information about ESD, see Preventing Electrostatic Discharge Damage to the
SRX3600 Services Gateway.
2. If you have not already done so, power off the services gateway by pressing the Power button on the
front panel of the SFB for three to five seconds. The PWR LED blinks to show you that the services
gateway is shutting down. Wait for the services gateway to shut down before you proceed to the next
step..
3. Release each component by loosening its retaining screws and unlatching its ejector handles as
appropriate.
4. Slide each component out of the chassis evenly so that it does not become stuck or damaged.
5. Label each component as you remove it so you can reinstall it in the correct location.
6. Immediately store each removed component in an electrostatic bag.
7. Do not stack removed components. Lay each one on a flat surface.
RELATED DOCUMENTATION
Required Tools for Installing the SRX3600 Services Gateway Without a Mechanical Lift | 119
121