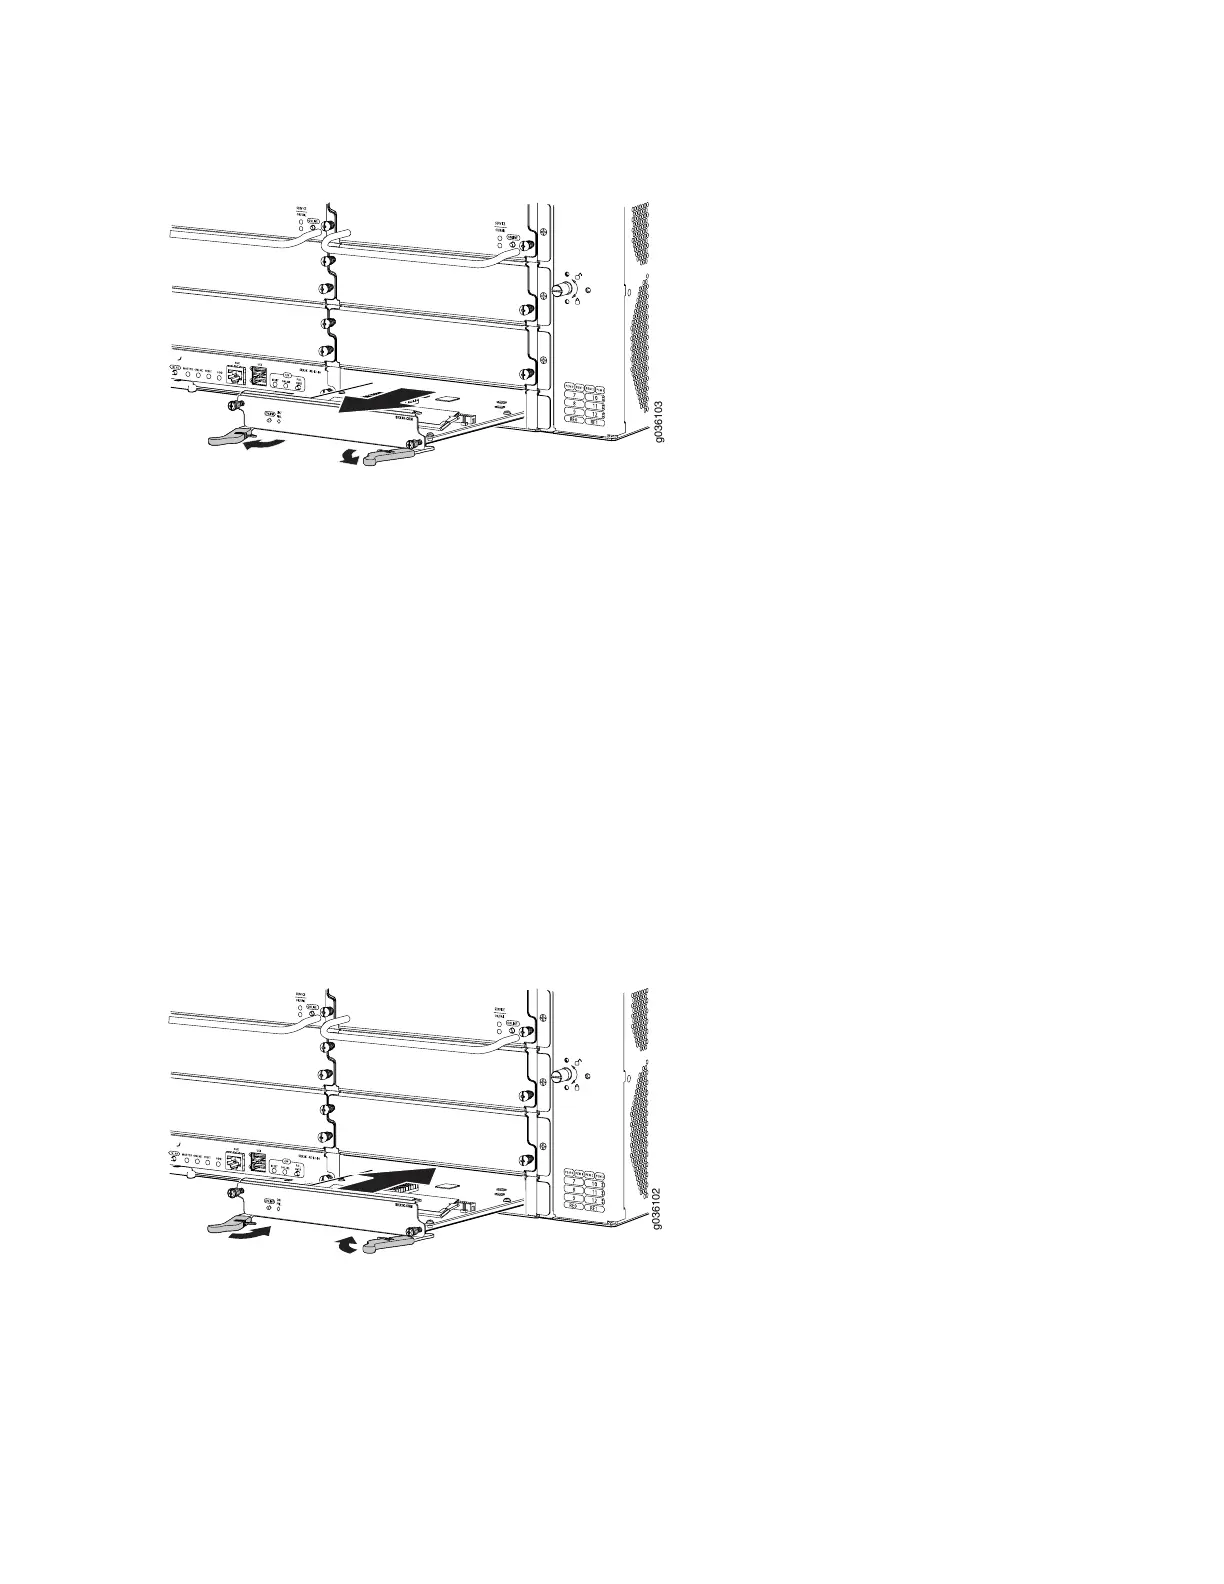
Figure 70: Removing an SCM
7. Place one hand underneath the SCM to support it and slide it completely out of the chassis.
8. Place the SCM on the antistatic mat.
9. Carefully align the sides of the replacement SCM with the guides inside the chassis.
10. Slide the SCM into the slot until you feel resistance, and then press the SCM faceplate until it engages
the connectors.
11. Press both of the ejector handles inward to seat the SCM.
12. Tighten the captive screws at either end of the SCM faceplate.
Figure 71: Installing an SCM
13. Power on the services gateway by pressing the Power button on the front panel of the SFB for three
to five seconds.
221

 Loading...


