16
Introduction
2
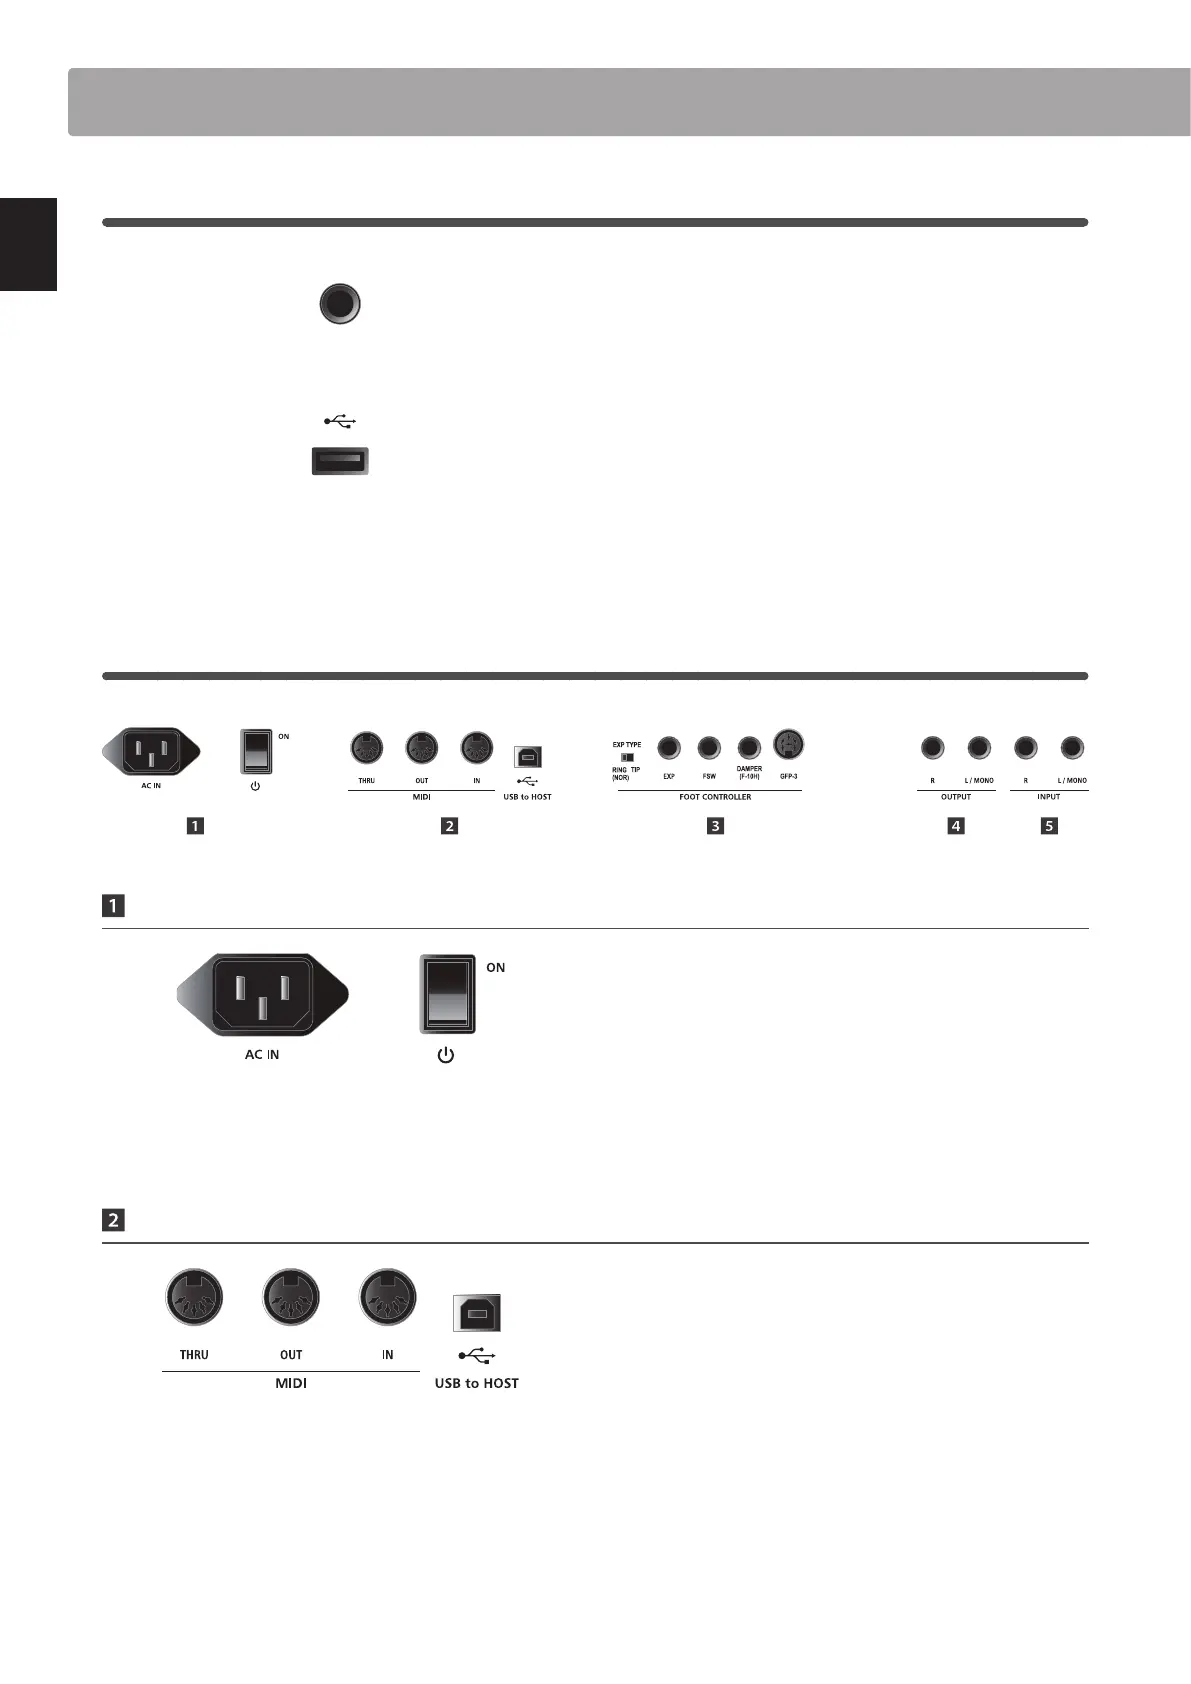
Front Panel: Jacks & Connectors
HEADPHONE jack
The headphone jack is located at the left end of the key slip and
used to connect a pair of headphones equipped with a standard
1/4” phone jack.
USB TO DEVICE port
The USB to Device port is located at the right end of the key
block and used to connect a FAT or FAT32 formatted USB
memory device to load and save data.
* Please note that wireless ash memory devices are not compatible with
the MP7SE.
3
Rear Panel: Jacks & Connectors
POWER Section
AC IN
Connect the power cable included with the MP7SE to this
receptacle.
POWER SWITCH
This switch turns the MP7SE ON and OFF.
* The MP7SE features a power saving mode that can turn o the instrument
automatically after a specied period of inactivity. For more information,
please refer to page 107.
MIDI Section
MIDI THRU/OUT/IN jacks
These jacks are used to connect the MP7SE to external MIDI
devices, and also to a computer with a MIDI interface as an
alternative to the ‘USB to Host’ port.
USB TO HOST port
This port is used to connect the MP7SE to a computer using a
USB cable. When connected, the instrument can be used as a
standard MIDI device, allowing it to send a receive MIDI data.
Connect a ‘B’ type USB connector to the instrument, and an ‘A’
type USB connector to the computer.
* When connecting the MP7SE to a computer using the ‘USB to Host’ port,
additional driver software may be required. For more information, please
refer to page 124.
Part Names & Functions
.
* The instrument’s USB MIDI port and MIDI IN/OUT jacks can be connected
and used simultaneously. To adjust MIDI routing, please refer to the MIDI
parameters in the SYSTEM menu, explained on page 110.