X5 FastMig
Operating manual - EN
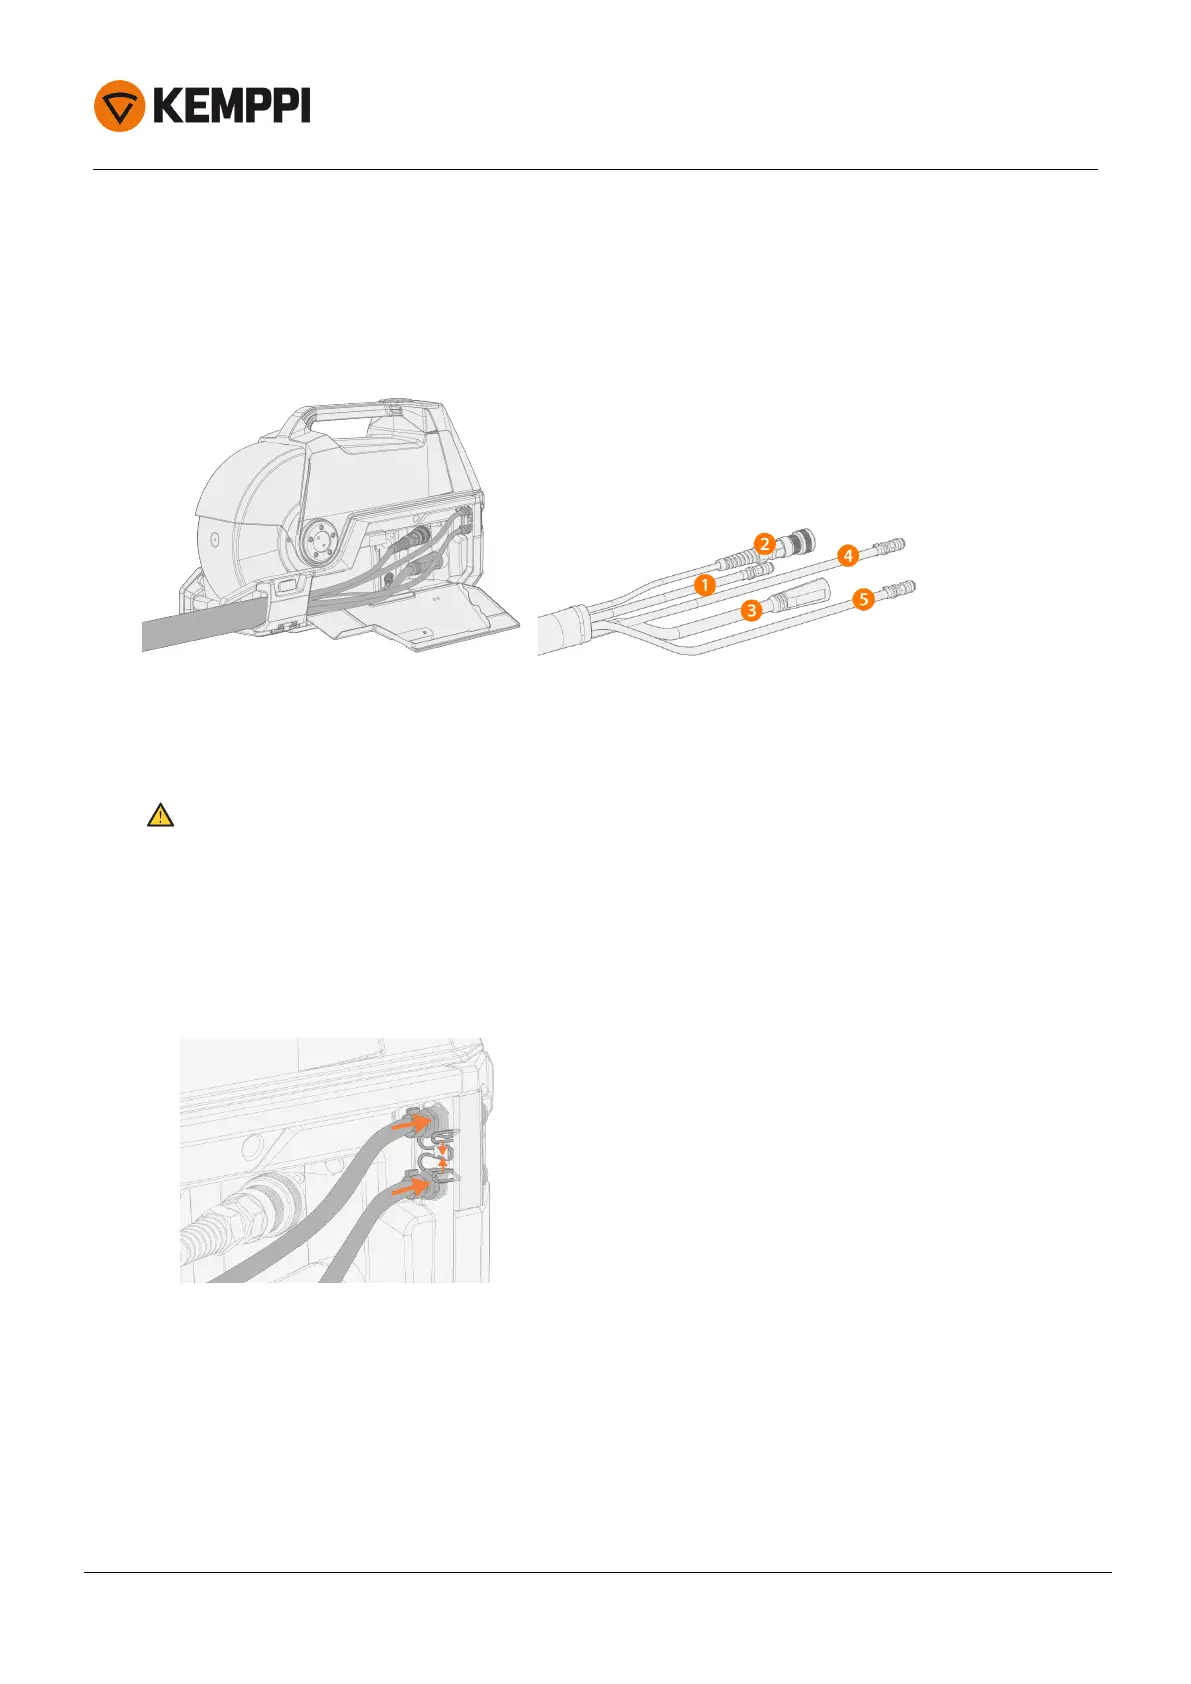
2.6 Installing cables
Connect the interconnection cable first to the wire feeder and then to the power source. For the connector descrip-
tions and their locations, refer to "X5 Wire feeder" on page11.
Connecting interconnection cable to wire feeder
1. Open the cable cabinet latch to reveal the connectors.
2. Connect the welding current cable (3) to the wire feeder. Push the cable as far as it goes and turn the connector
clockwise to tighten the cable to its place.
Tighten the welding current cable as much as you can by hand. If the welding current cable connection is loose, it may
overheat.
3. Push the shielding gas hose (1) to the shielding gas hose connector so that it locks down.
4. Connect the control cable (2) to the connector. Rotate the collar clockwise to lock it in place.
5. If you have the optional cooling unit, place the cooling liquid hose connectors (4, 5) into the slot and through
the aperture.
>> Compress the spring fastener to get the hose connectors in place. Once released, ensure that the spring
fastener locks in place into the hose connector grooves.
© Kemppi
34 1920960 / 2039
 Loading...