Keysight N5221A/22A Service Guide 7-13
Repair and Replacement Procedures
Removing and Replacing the A1–A3 and Other Front Panel Subassemblies
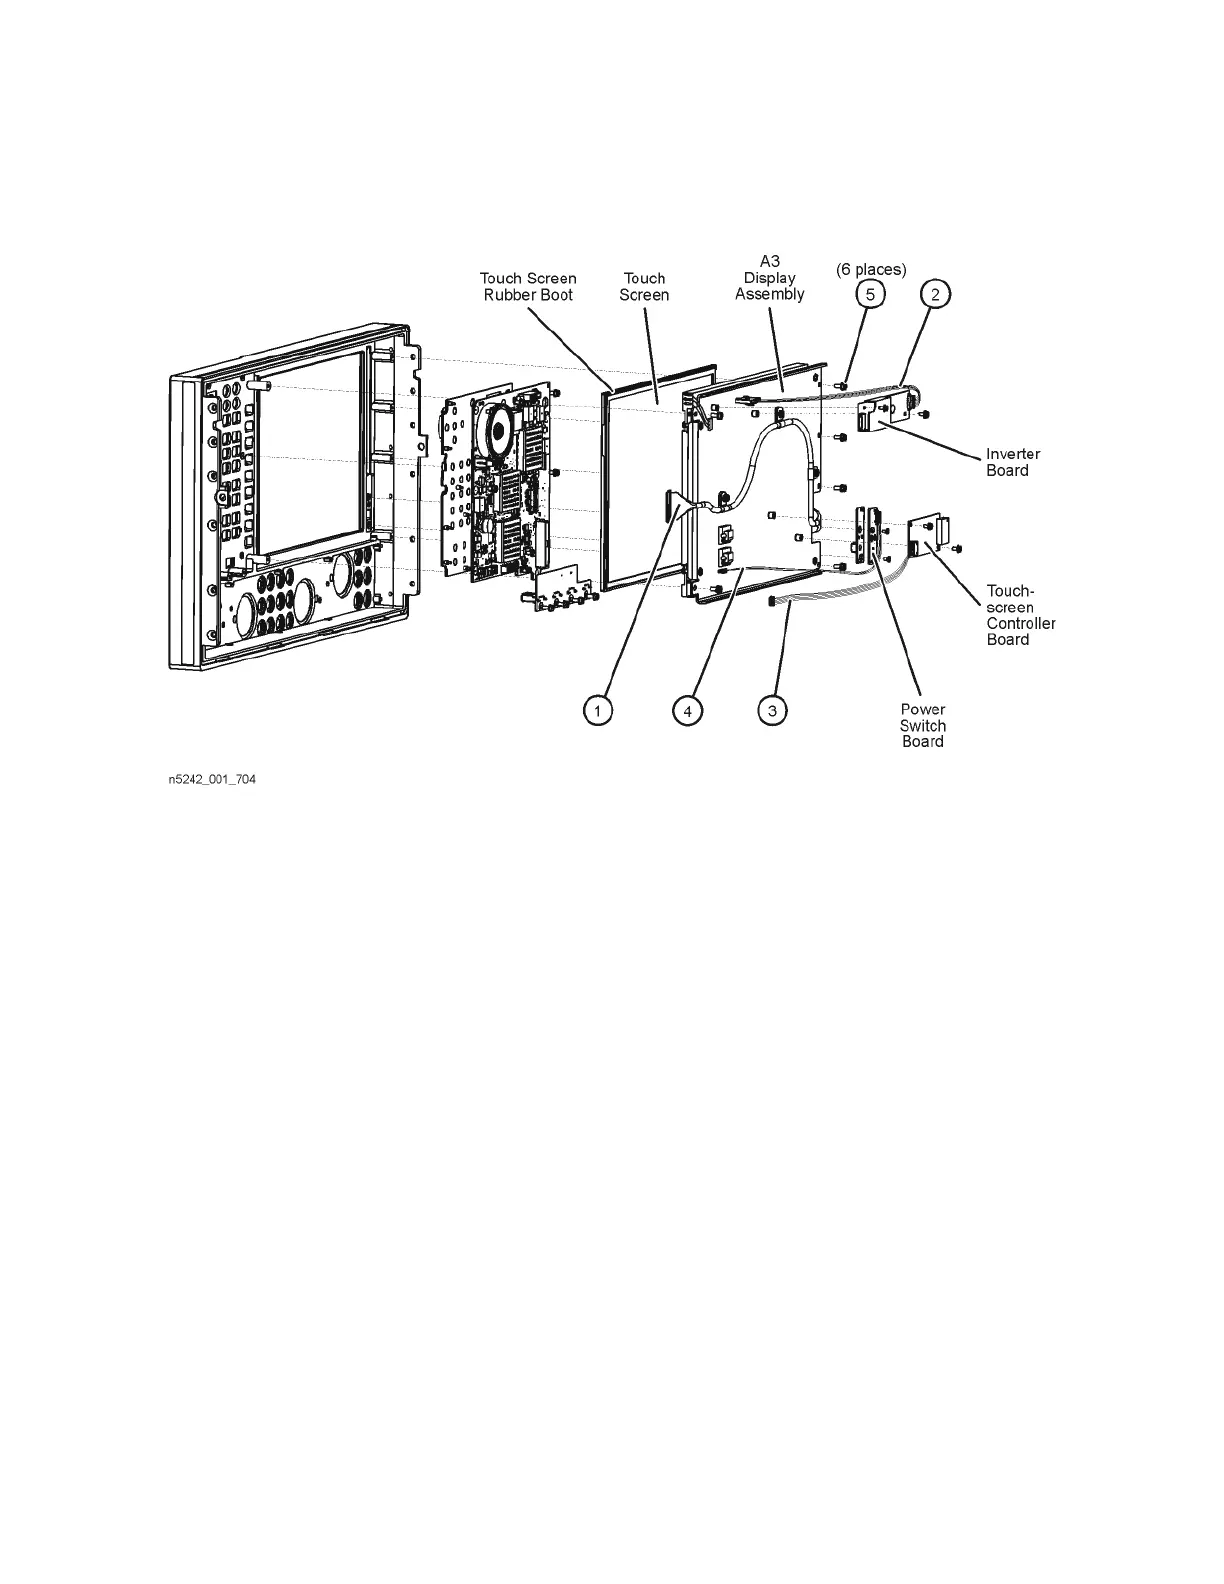
Figure 7-4 A3 Display Assembly and Touch Screen Removal
4. The display cable (item
⑥) can be removed by removing the three screws
(item
⑦) that attach it to the LCD display hold down bracket (item ⑧).
5. The LCD display can be removed by disconnecting the LCD cable from the
inverter board and then removing the four screws (item
⑨) that attach it to
the LCD display hold down bracket (item
⑧). Note the location of the four
spacers (item
⑩) before separating the LCD display from the hold down
bracket.