20
100°
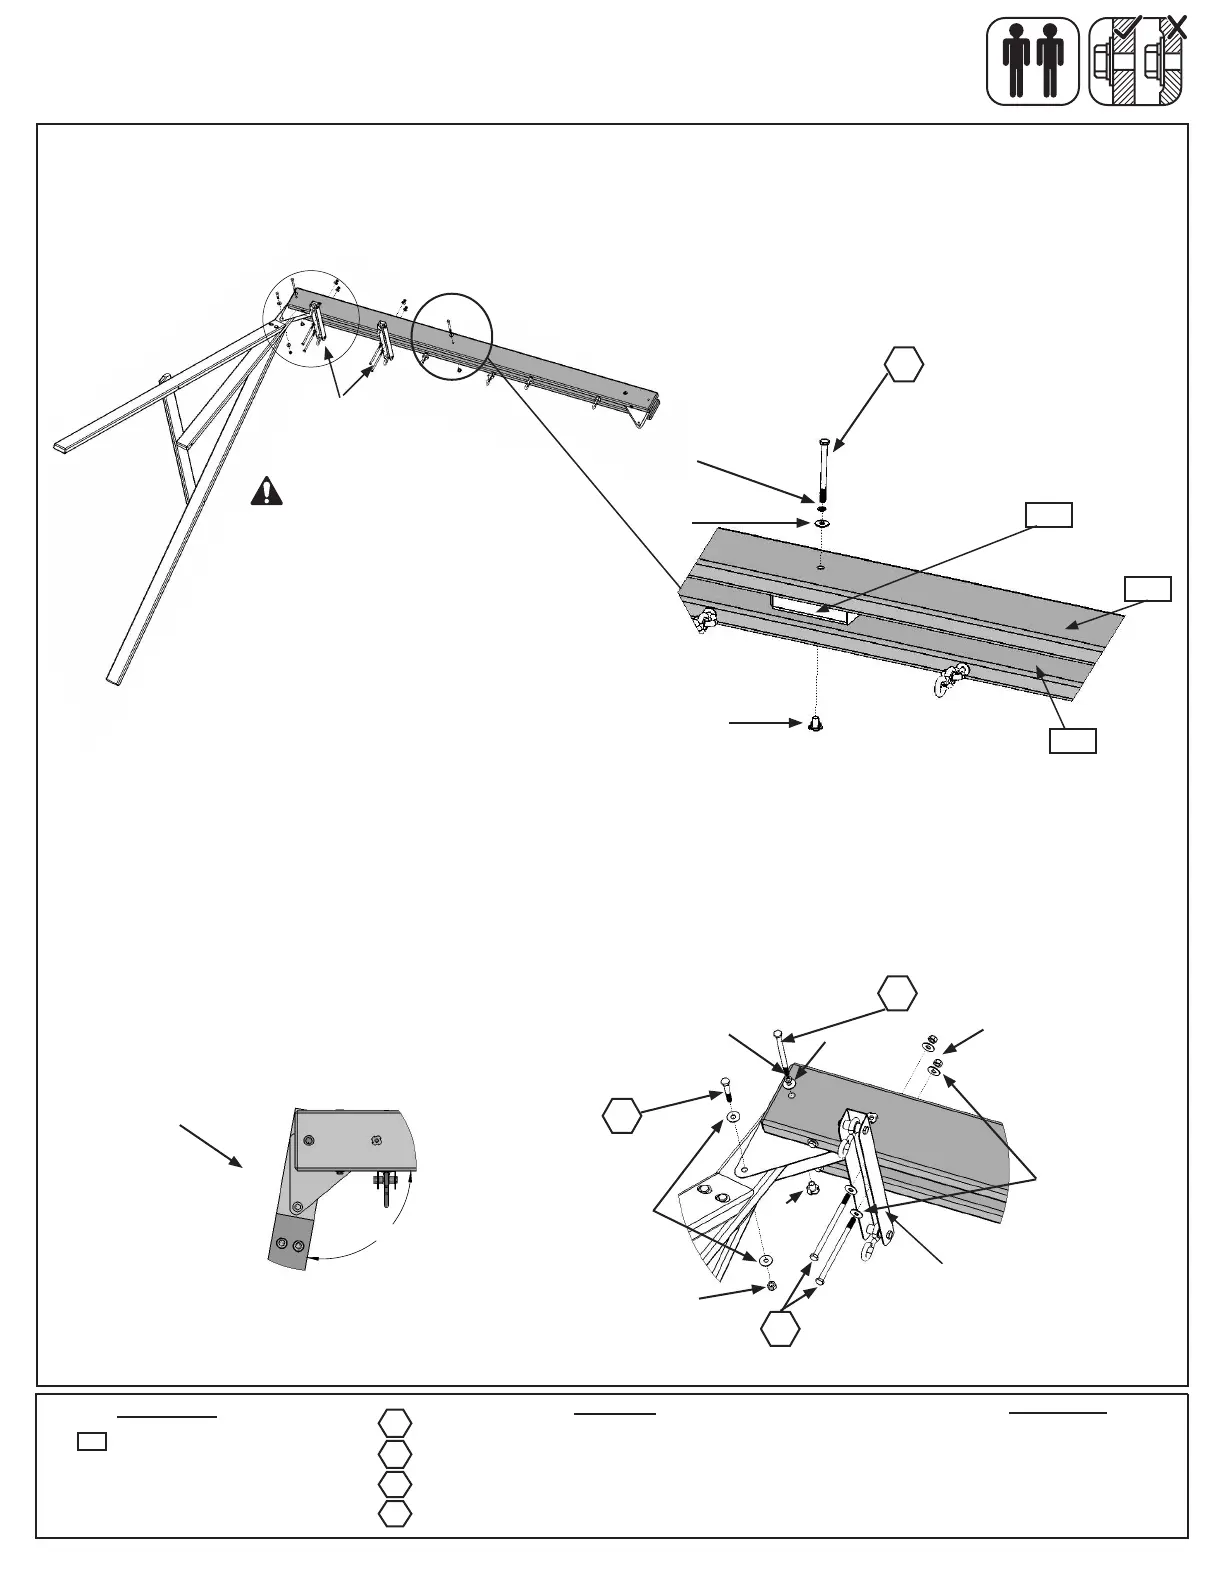
Step 5: Attach Swing End to Swing Beam
WARNING:
Glider Hangers must be tight
and secure to Swing Beams.
A: Place (4919) SW Rail Block in the centre between (1826) Front Beam and (1825) Back Beam and attach with
1 (H8) 1/4 x 4-1/4” Hex Bolt (with lock washer, at washer and t-nut). (g. 5.1 & 5.2)
B: Attach Swing End Assembly to the side of the Swing Beam Assembly with the overhang (g. 5.3 & 5.4) using
1 (G5) 5/16 x 4-1/2” Hex Bolt (with lock washer, at washer and t-nut) in the top hole of Triangle Plate and 1 (G8)
5/16 x 2” Hex Bolt (with 2 at washers and lock nut) in the bottom hole of Triangle Plate. (g. 5.3) Make sure
Swing End Assembly ares out at an angle. (g. 5.4)
C: Attach 2 Glider Hangers to the Swing Beam Assembly using 2 (G7) 5/16 x 5-1/2” Hex Bolt (with 2 at washers
& lock nut) per Glider Hanger. (g. 5.1 & 5.3)
Glider
Hangers
Glider
Hanger
Wood Parts
Other Parts
Side with
overhang
1 x SW Rail Block 2 x 4 x 5-3/8”
4919
2 x Glider Hangers
Fig. 5.1
Fig. 5.2
Fig. 5.3Fig. 5.4
1/4” Flat
Washer
1/4” Lock
Washer
1/4”
T-Nut
H8
4919
G5
5/16” Flat
Washer
5/16”
Lock Nut
Hardware
1 x 1/4 x 4-1/4” Hex Bolt (1/4” lock washer, 1/4” at washer, 1/4” t-nut)
1 x 5/16 x 4-1/2” Hex Bolt (5/16” lock washer, 5/16” at washer, 5/16” t-nut)
4 x 5/16 x 5-1/2” Hex Bolt (5/16” at washer x2, 5/16” lock nut)
1 x 5/16 x 2” Hex Bolt (5/16” at washer x2, 5/16” lock nut)
H8
G5
G8
5/16” Flat
Washer
5/16” Lock
Washer
5/16”
T-Nut
5/16” Flat
Washer
5/16”
Lock Nut
G7
G8
G7
1826
1825
 Loading...