28
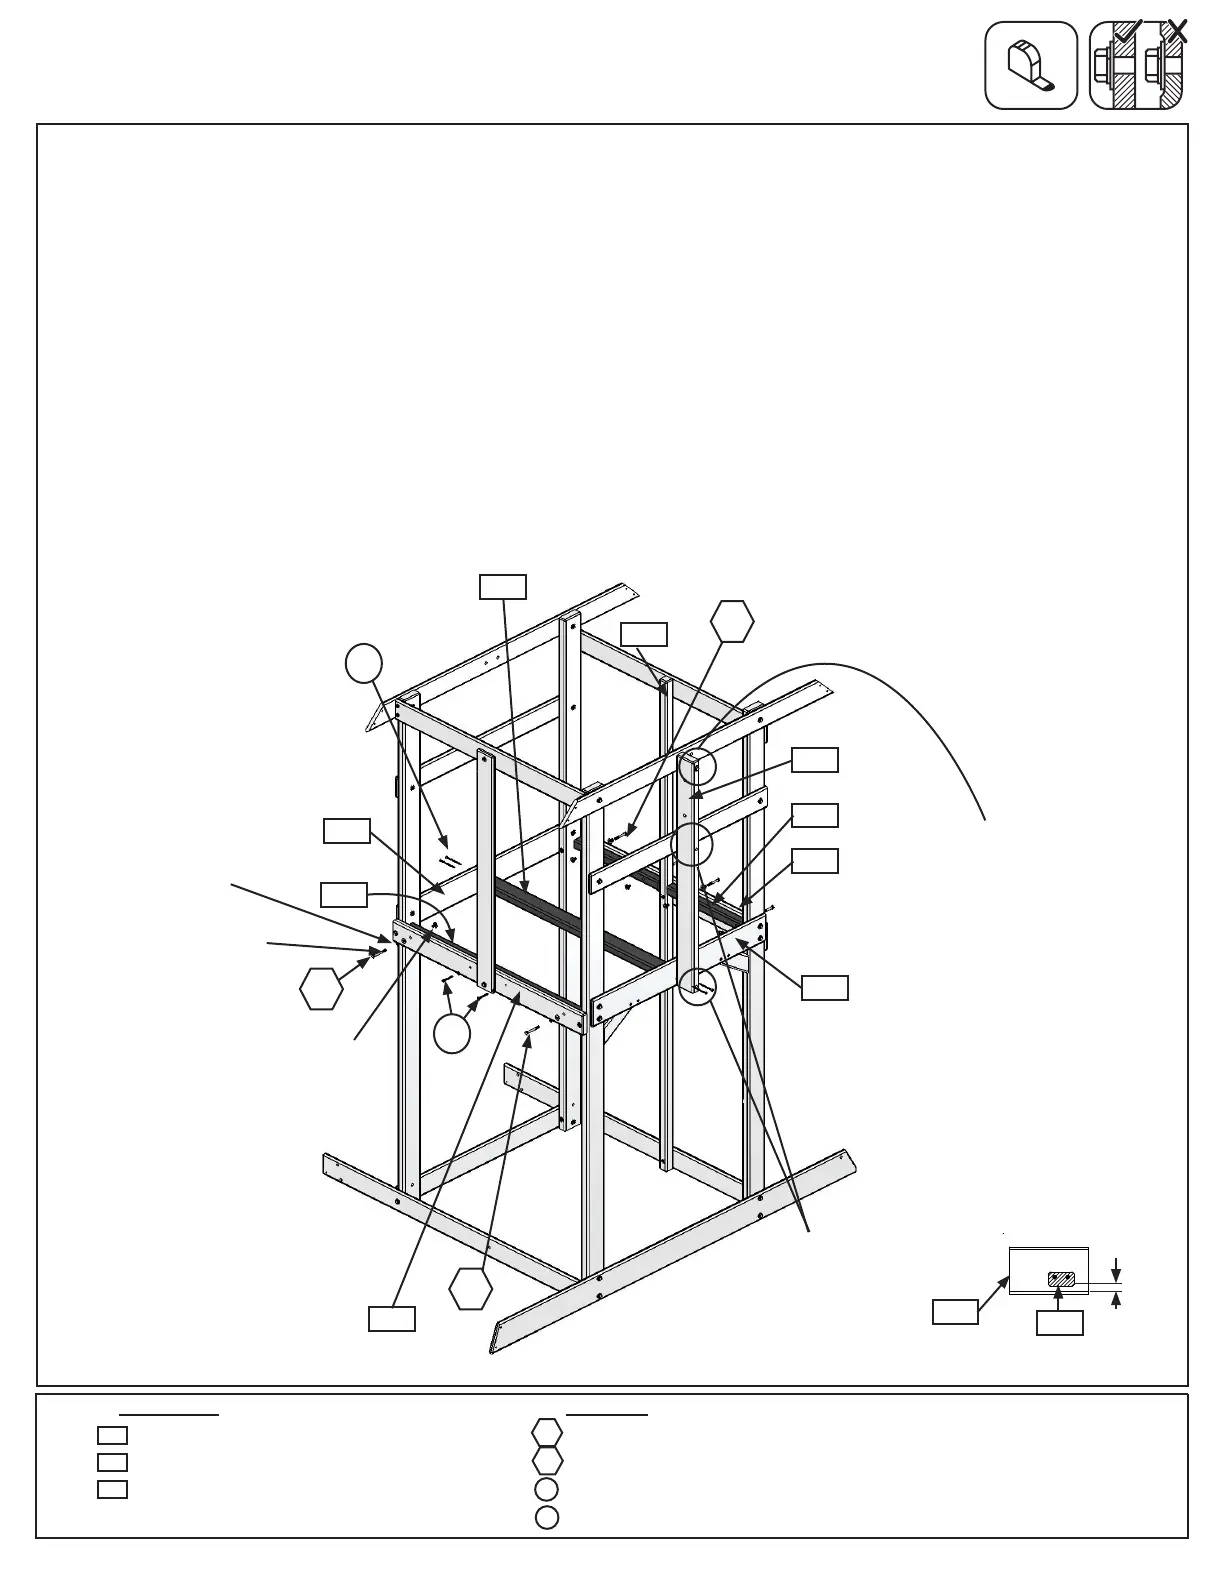
Step 12: Attach Joists
A: Loosen the top bolt and remove the middle and bottom bolts in (2228) Wall Mount. Do not discard these
bolts, you will re-install them after the (1903) Floor Joist is attached. (g. 12.1)
B: From inside of the assembly, measure 3/4” up from the bottom of (2211) Floor End and (1934) End Floor (g.
12.2) and then attach (1903) Floor Joist to each board using the pilot holes with 2 (S4) #8 x 3” Wood Screws per
end. (g.12.1)
C: Re-install the bolts in (2228) Wall Mount and tighten all three bolts. (g. 12.1)
D: On the Front Wall, on both sides of (2213) Front Divider, attach 2 (2218) Short Joists to (2212) Floor Front
with 2 (H2) 1/4 x 2” Hex Bolts (with lock washer, at washer and t-nut) per board. (g. 12.1)
E: On the Back Wall attach (1761) Side Joist to the inside of (1894) Back Floor with 2 (H3) 1/4 x 2-1/2” Hex Bolts
(with lock washer, at washer and t-nut) in the outside holes and 2 (S7) #12 x 2” Pan Screws in the inside holes
as shown in g. 12.1.
Wood Parts
Hardware
4 x 1/4 x 2” Hex Bolt (1/4” lock washer, 1/4” at washer, 1/4” t-nut)
2 x 1/4 x 2-1/2” Hex Bolt (1/4” lock washer, 1/4” at washer, 1/4” t-nut)
4 x #8 x 3” Wood Screw
2 x #12 x 2” Pan Screw
1 x Floor Joist 5/4 x 3 x 38-1/2”
1 x Side Joist 2 x 2 x 34-3/4”
2 x Short Joist 2 x 2 x 17”
1903
S7
1761
H3
2218
S4
H2
Fig. 12.1
Front Wall
S4
2211
1903
3/4”
H3
Back Wall
1761
1934
S7
H2
1903
2211
2212
2218
2228
2213
1894
H3
x 4
Loosen this bolt
Fig. 12.2
x 4
1/4” lock
washer
1/4” at
washer
1/4”
t-nut
Remove these
bolts
x 2