Service ManualService Manual
Operating Lights marLEDOperating Lights marLED
®®
E9 / E9i / E9 / E9i / E15E15
38 38 V V 1.01.0
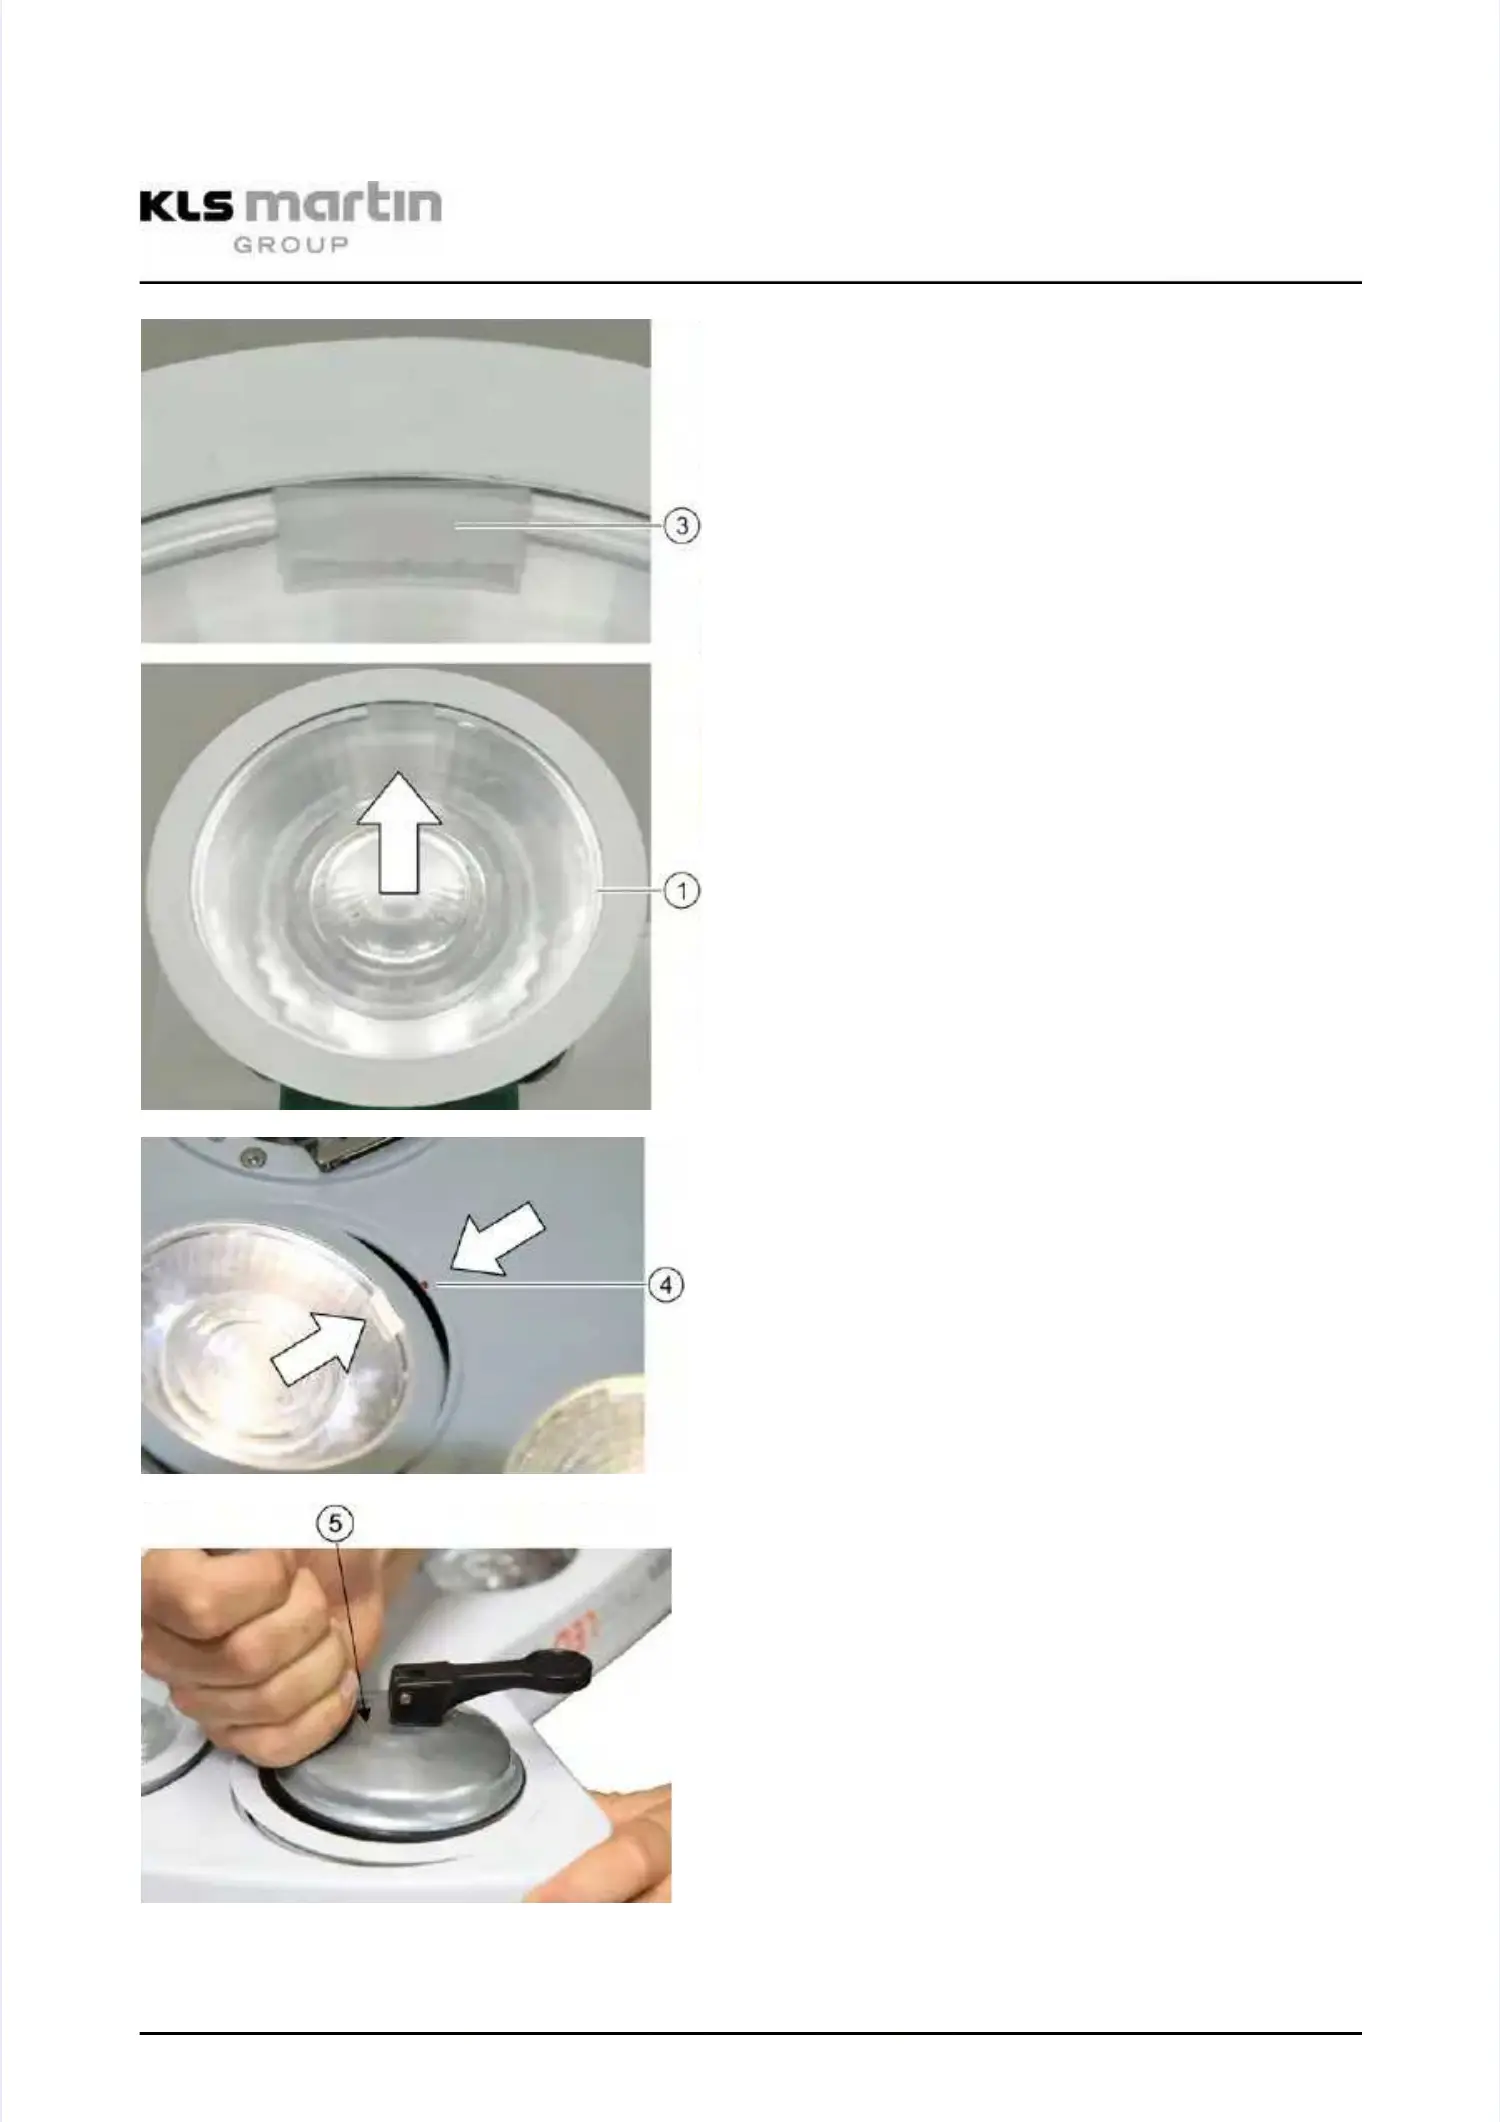
The gating (3) is used to correctly align theThe gating (3) is used to correctly align the
Light Engines (1) in the lamp body.Light Engines (1) in the lamp body.
••
Find gating (3) of the Light Engine (1).Find gating (3) of the Light Engine (1).
The arrow indicates the gating (3).The arrow indicates the gating (3).
NoteNote
For easy attachment, a silicone-based releasingFor easy attachment, a silicone-based releasing
agent can be used.agent can be used.
••
Slightly dampen a cloth and wipe theSlightly dampen a cloth and wipe the
opening of the lamp casing.opening of the lamp casing.
The illustration shows the correct orientation ofThe illustration shows the correct orientation of
the Light Engines (1) as seen from below (notthe Light Engines (1) as seen from below (not
visible from the outside).visible from the outside).
Using the assembly-disassembly tool, insert theUsing the assembly-disassembly tool, insert the
Light Engine (1) in a way that the gating (3)Light Engine (1) in a way that the gating (3)
points towards the lamp body in the direction ofpoints towards the lamp body in the direction of
the red dot (4).the red dot (4).
•• Push the glass cover into the opening inPush the glass cover into the opening in
direction (5) until it snaps into place.direction (5) until it snaps into place.
••
Check the seal of the glass lid for correct fit.Check the seal of the glass lid for correct fit.
The Light Engine (1) is fully assembled.The Light Engine (1) is fully assembled.