.
MAINTENANCE
MAINTENANCE PROCEDURE
REPLACE FUEL PRE-FILTER CARTRIDGE
WARNING
After the engine has been operated, all parts are at high temperature, so do not replace the filter immediately. Wait for all parts
to cool down before starting the operation.
High pressure is generated inside the engine fuel piping system when the engine is running.
When replacing the filter, wait for at least 30 seconds after stopping the engine to let the internal pressure go down before
replacing the filter.
Do not bring any fire or flame close.
NOTICE
Genuine Komatsu fuel filter cartridges use a special filter that has highly efficient filtering ability. When replacing the filter
cartridge, always use a genuine Komatsu part.
The common rail fuel injection system used on this machine consists of more precise parts than the conventional injection
pump and nozzle.
If any part other than a genuine Komatsu filter cartridge is used, dust or dirt may get in and cause problems with the injection
system. Always avoid using substitute parts.
When carrying out inspection or maintenance of the fuel system, pay more attention than normal to the entry of dirt. If dirt is
stuck to any part, use fuel to wash it off completely.
Prepare a container to catch drain fuel.
Prepare a filter wrench
1. Open the pump room door on the right side of the machine.
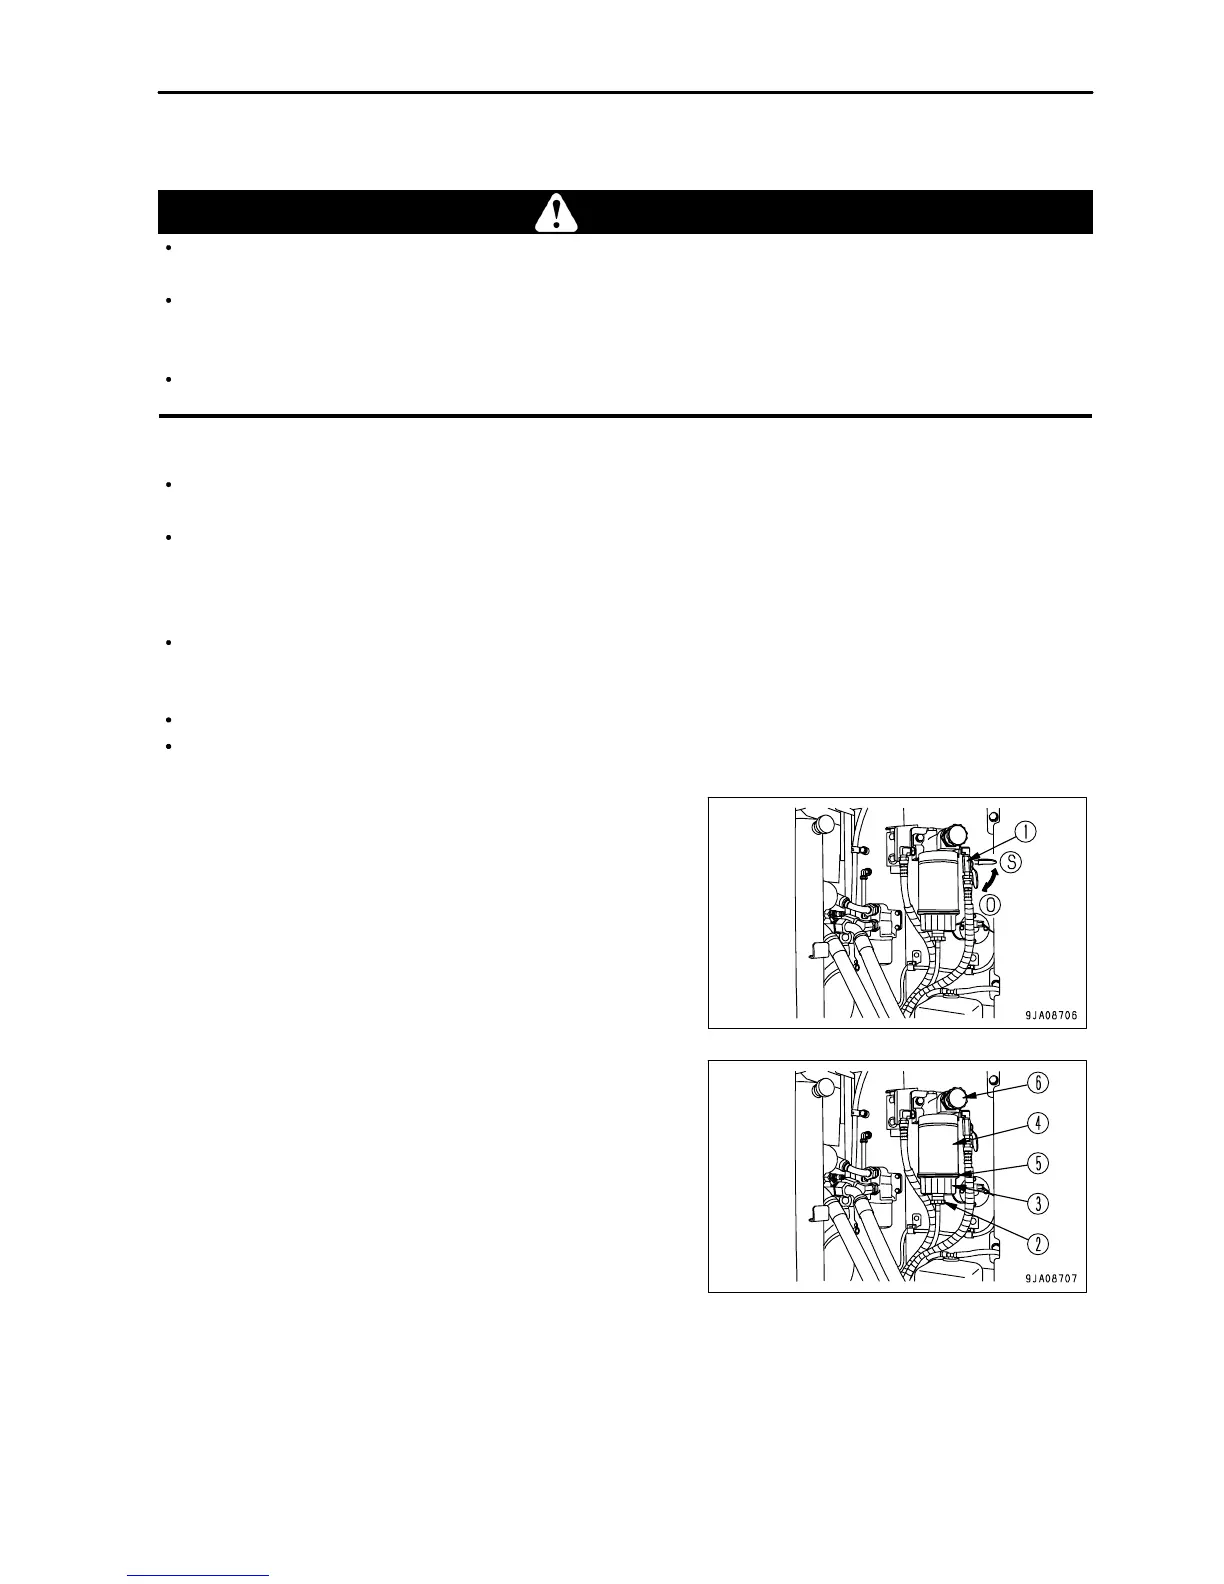
2.
Set valve (1) at the side of the fuel pre-filter cartridge to the shut
position (S).
3.
Set the container to catch the fuel under the pre-filter cartridge.
4.
Loosen drain valve (2), then drain all the water and sediment in
the transparent cap (3) and also the fuel accumulated in filter
cartridge (4).
5.
Using a filter wrench, turn transparent cap (3) to the left to
remove it. (This cap is used again.)
6.
Using a filter wrench, turn cartridge (4) to the left to remove it.
7. Install transparent cap (3) to the bottom of the new filter cartridge. (When doing this, always replace O-ring (5).)
4 - 59