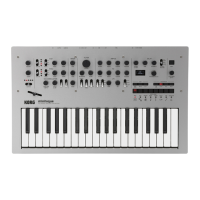
Wavetable Osc
20
Osc 1/2 Position
Position (POSITION)
[0.00…100.00]
Wavetables contain up to 64 waveforms. Position sweeps through all of the waveforms in the Wavetable. 0.00 always
selects the first waveform, and 100.00 selects the last waveform. The range between these extremes is divided between
the total number of waveforms in the selected Wavetable, as shown below.
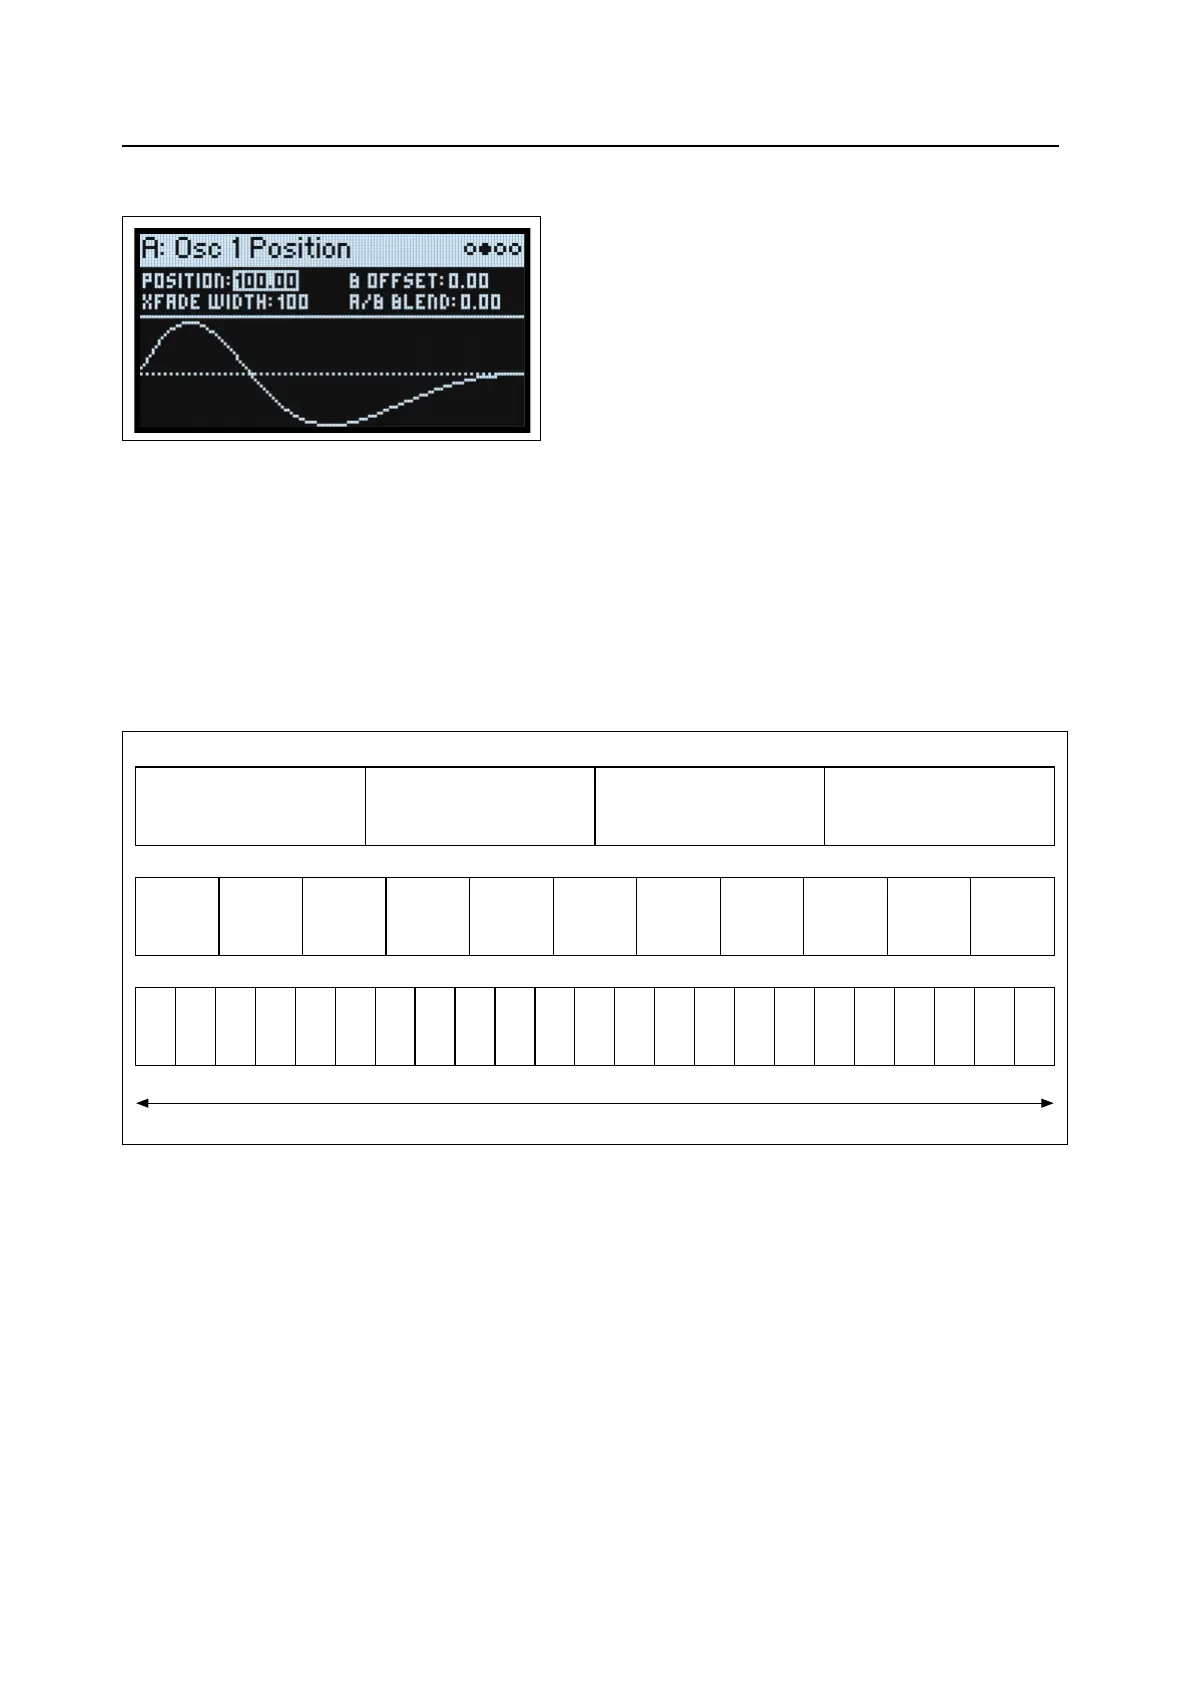
Note that when Mode is set to A/B, Wavetables A and B may have different numbers of waveforms. In this case,
Position will divide the range evenly for each Wavetable, just as if they were being used individually. For instance, if A
has four waveforms and B has 23 (see the graphic below), a Position just under 50 will play waveform 2 in A, and
waveform 12 in B.
Position
B Offset
[0.00…100.00]
This appears only if Mode is set to A/B. The position of Wavetable B is the sum of Position (above) and B Offset.
A/B Blend (A/B BLEND)
[0.00…100.00]
This appears only if Mode is set to A/B. It controls the balance between Waves A and B.
Xfade Width
[0.00…100.00]
As the Position changes, the Wavetable changes from one waveform to another. When changing between two adjacent
waveforms, the transition can be gradual or immediate. Xfade Width controls the amount of the Position range spent
interpolating between neighboring waveforms vs. the amount playing single waveforms. Note that this does not affect
A/B Blend.
0 Position 100
Waveform
1
Waveform
2
Waveform
3
Waveform
4
Waveform
1
Waveform
2
Waveform
3
Waveform
4
Waveform
5
Waveform
6
Waveform
7
Waveform
8
Waveform
9
Waveform
10
Waveform
11
Wave
1
Wave
2
Wave
3
Wave
4
Wave
5
Wave
6
Wave
7
Wave
8
Wave
9
Wave
10
Wave
11
Wave
12
Wave
13
Wave
14
Wave
15
Wave
16
Wave
17
Wave
18
Wave
19
Wave
20
Wave
21
Wave
22
Wave
23
Wavetable with 4 waveforms
Wavetable with 11 waveforms
Wavetable with 23 waveforms