Contents
1 Introduction 1
1.1 Getting Started 1
1.2 Overview 3
2 Defining VIA GO 6
3 Connecting VIA GO 7
4 Setting Up VIA GO 9
4.1 Running the Kramer VIA App 9
4.2 Logging in to VIA GO 11
4.3 Mirroring Using iOS/OS X Airplay Service 21
4.4 Mirroring Android Devices Using Kramer VIA 22
5 VIA GO Functions 24
5.1 Administrator Dashboard 25
5.2 User Dashboard 26
5.3 VIA GO Taskbar Menu 27
6 Using VIA GO 28
6.1 VIA GO User Dashboard 28
6.2 Handling Multimedia 29
7 Configuring VIA GO 36
7.1 Configuring Settings from the Kramer VIA App 36
7.2 Configuring Settings Using the Embedded Web Pages 44
8 Technical Specifications 87
Figures
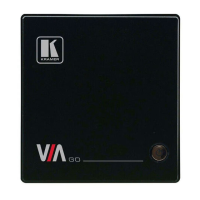
Figure 1: VIA GO Wireless Presentation Device 6
Figure 2: Connecting the VIA GO Wireless Presentation Device 7
Figure 3: VIA Web Interface Welcome Screen 9
Figure 4: Kramer VIA Login Screen 12
Figure 5: VIA Home Screen 12
Figure 6: VIA Home Screen with QR Code Icon 14
Figure 7: Client Preferences Screen 17
Figure 8: Room List Manager Window 18
Figure 9: Plain Text Room List File 19
Figure 10: Rename Room Text Box 20
Figure 11: iPhone Control Center 21
Figure 12: Apple AirPlay Toggle 22
Figure 13: Presenting (Mirroring) Confirmation Message 23
Figure 14: VIA GO Admin Dashboard 25
Figure 15: VIA GO User Dashboard 26
Figure 16: Example of Mobile Drawer Features Layout 26
Figure 17: Kramer VIA Taskbar Menu 27
Figure 18: VLC Media Menu 30
Figure 19: Open Media Window 31
Figure 20: Stream Output/Source Window 31
Figure 21: Stream Output/Destination Setup Window 32
Figure 22: Stream Output/Destination Setup RTSP Tab 32
Figure 23: Stream Output/ Transcoding Options Window 33