EasyManuals Logo

Kramer VIA GO User Manual

Kramer VIA GO
96 pages
To Next Page IconTo Next Page
To Previous Page IconTo Previous Page
Page #14 background imageLoading...
Page #14 background image
VIA GO - Connecting VIA GO
7
3 Connecting VIA GO
Always switch off the power to each device before connecting it to your
VIA GO. After connecting VIA GO, connect its power and then switch on
the power to each device.
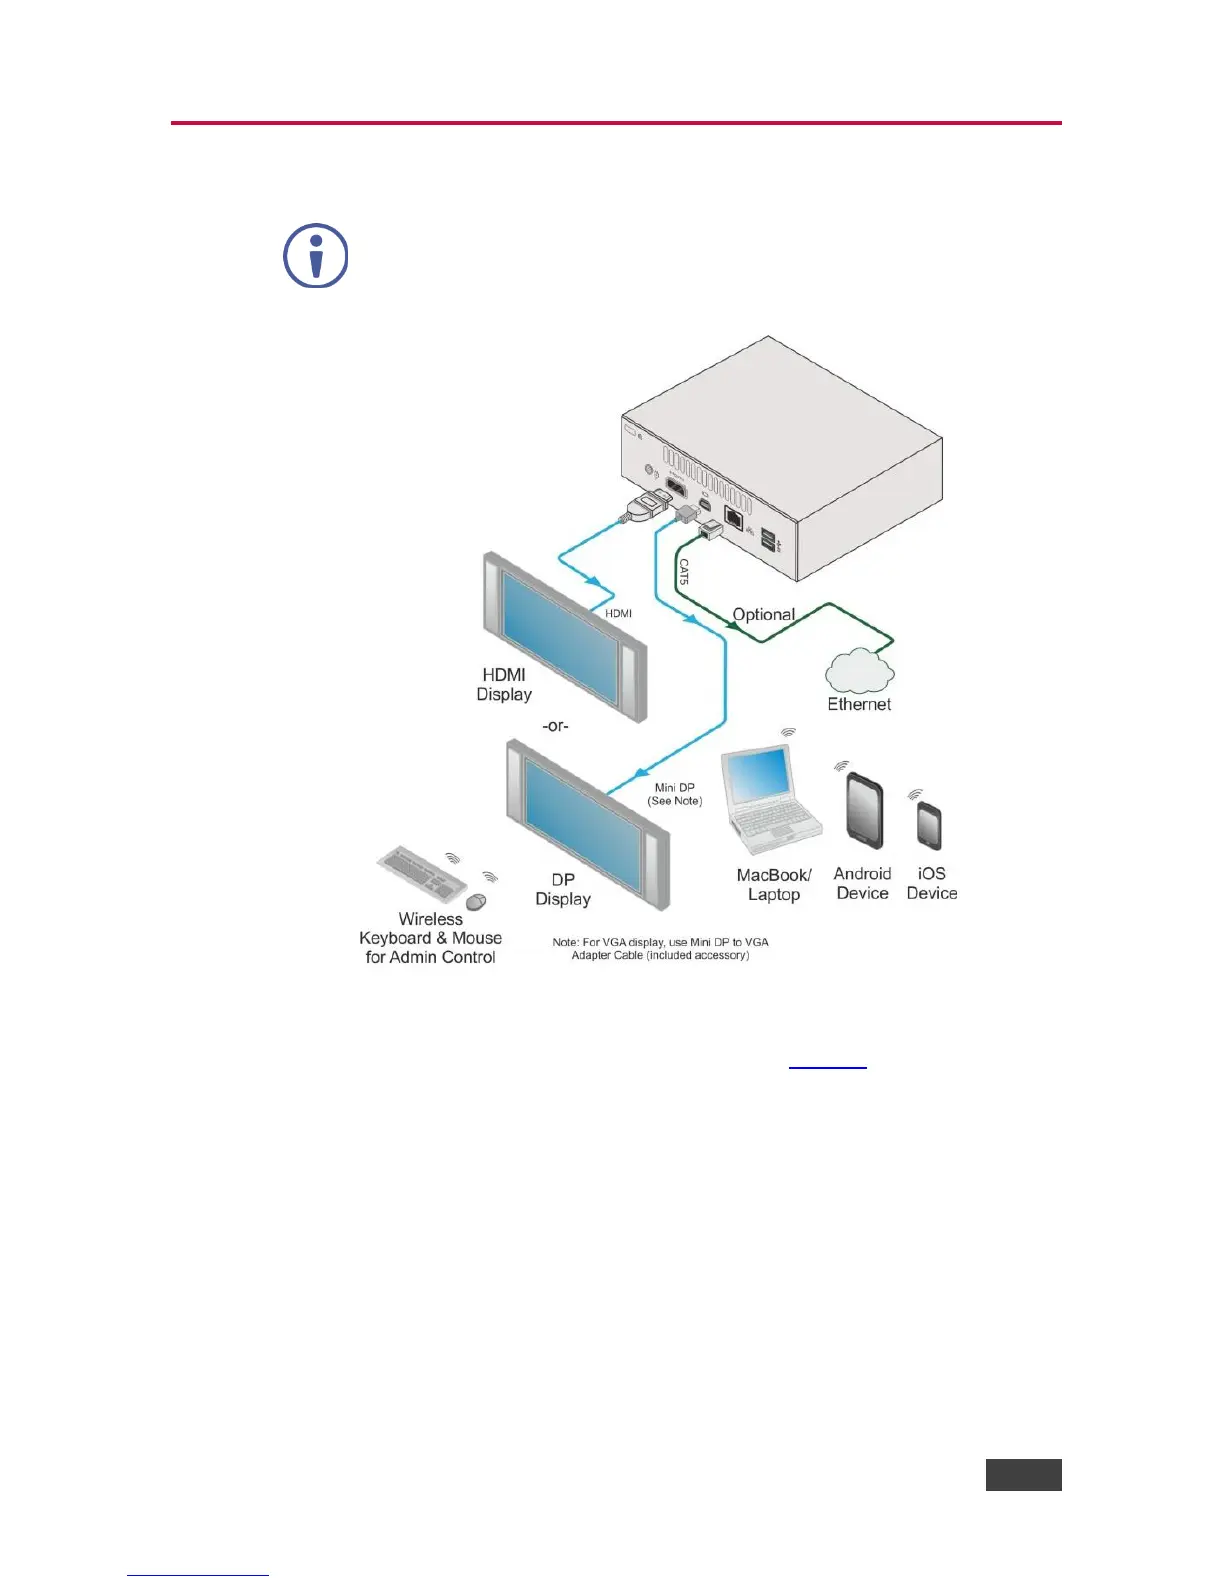
Figure 2: Connecting the VIA GO Wireless Presentation Device
To connect the VIA GO as illustrated in the example in Figure 2:
1. Connect one of the following types of displays:
HDMI connector to any compatible projection or direct-view display, such as
an LCD monitor. This connection carries embedded audio, and can also be
routed and switched just like any other HDMI connection.
Mini DisplayPort connector to a DisplayPort display.
Mini DisplayPort connector to a VGA display using the mini DP to VGA
adapter cable (included).

Table of Contents

Questions and Answers:

Question and Answer IconNeed help?

Do you have a question about the Kramer VIA GO and is the answer not in the manual?

Kramer VIA GO Specifications

General IconGeneral
Wireless PresentationYes
Ethernet10/100/1000 Mbps
Network ConnectionEthernet, Wi-Fi
Operating System CompatibilityWindows, macOS, Android, iOS
HDMI Output1
Audio3.5mm audio jack
Wi-Fi802.11 a/b/g/n
CompatibilityProjectors, Displays
Input PortsEthernet, USB
Power Supply5V DC
Operating Temperature0°C to 40°C
Storage Temperature-40 to +70°C (-40 to 158°F)
SecurityWPA & WPA2
Weight200 g

Related product manuals