Maintenance - Cutterbar 14
Check/change blades 14.3
EasyCut B 970
Original Operating Instructions 150000711_01_en 81
INFO: The blades for anti-clockwise and clockwise rotating cutting discs/mower drums differ.
When installing the blades, ensure that the direction of rotation is correct. The arrow on the
blade must match the direction of rotation of the corresponding cutting disc/mower drum.
Insert the new blade (5) between the wear skid (2) and the cutting disc (1).
Insert the retaining bolt (3) from below through the wear skid (2), the blade (5) and the
cutting disc (1).
INFO: Only use the locknut (4) once.
Screw the locknut(4) from above onto the retaining bolt(3) and tighten it; tightening torque
refer to page67.
Repeat the process for all blades.
Fold down the front guard, refer to page49.
INFORMATION
Clockwise rotating blades can be ordered by stating order number 00139889*.
Anticlockwise rotating blades can be ordered by stating order number 00139888*.
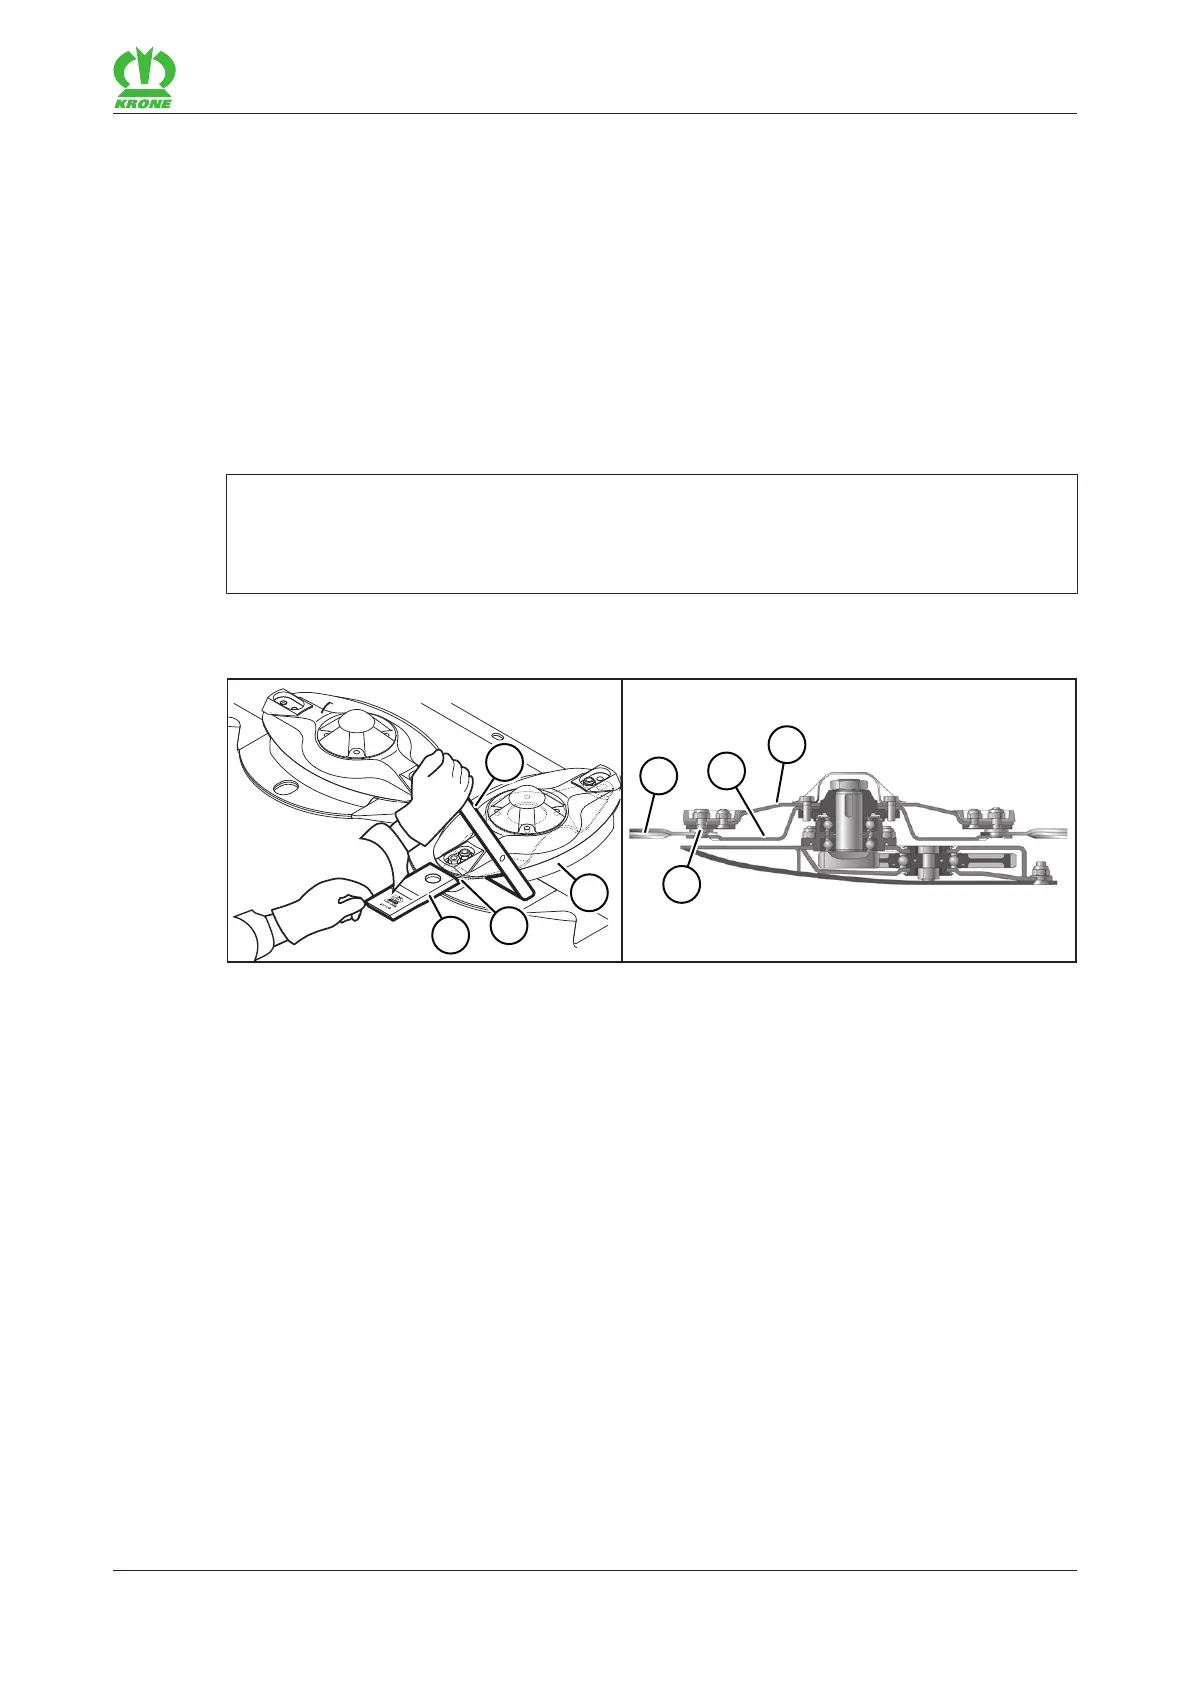
14.3.3 Changing blades for the “blade quick fastener” version
KM000-045
ü The machine is in the working position, refer to page52.
ü The machine is shut down and safeguarded, refer to page24.
Fold up the front guard, refer to page49.
WARNING!Risk of injury due to sharp blades! Wear suitable protective gloves.
Clean the area around the blades, cutting discs and mower drums.
To remove the blade(2), insert the blade wrench (1) between the cutting disc(4) and the
blade carrier(3) as far as it will go, press it down with one hand and hold it.
Check the fastening parts of the blade(2), refer to page82. Also replace worn or damaged
fastening parts.
INFO: The blades for anti-clockwise and clockwise rotating cutting discs/mower drums differ.
When installing the blades, ensure that the direction of rotation is correct. The arrow on the
blade must match the direction of rotation of the corresponding cutting disc/mower drum.
To insert the new blade(2), insert the blade key(1) between the cutting disc(4) and the
blade carrier(3) as far as it will go, press it down with one hand and hold it.
Guide the blade(2) onto the retaining bolt(5) and release the blade key(1) in a controlled
manner with your hand.
Repeat the process for all blades.
Fold down the front guard, refer to page49.