44 / 109 Issued: 11.10.2013 Version: KST VisionTech 2.1 V1
KUKA.VisionTech 2.1
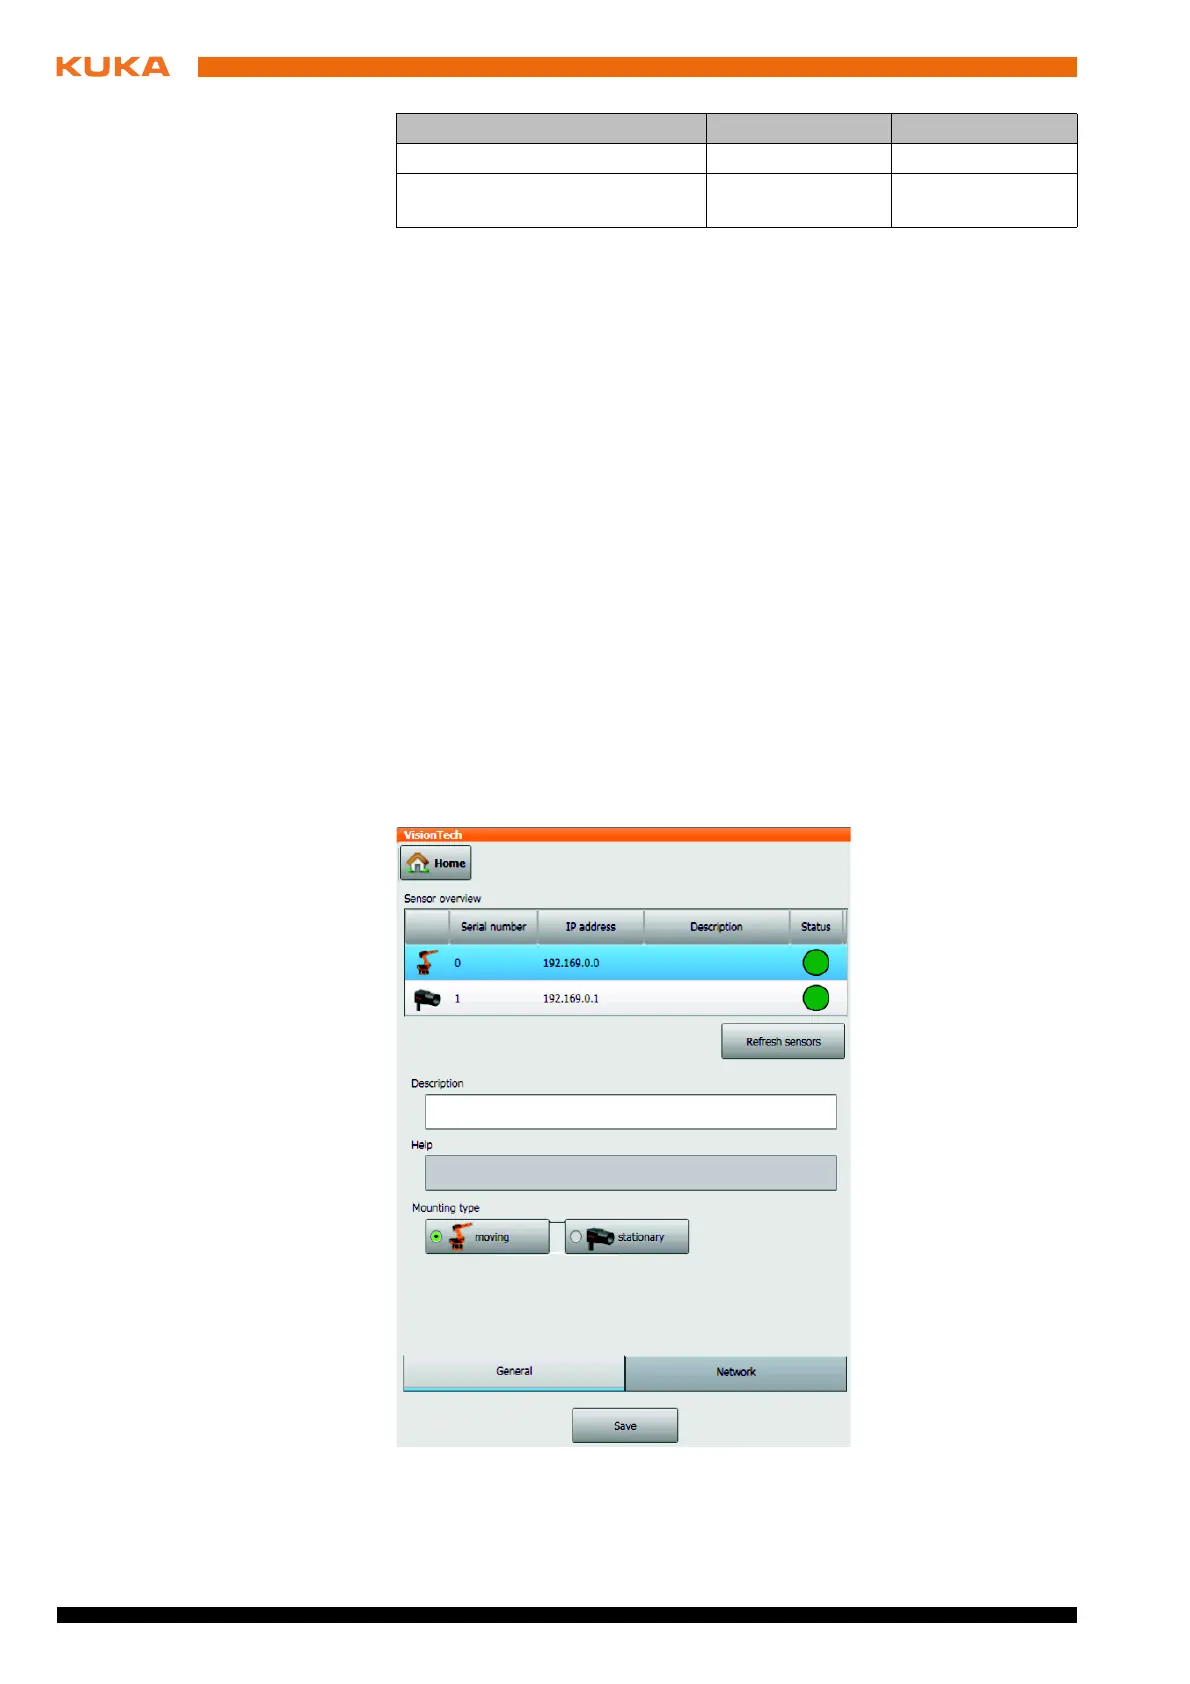
Procedure 1. In the main menu, select VisionTech > Sensor overview.
2. Select the camera that is to be configured.
3. On the Network tab, enter the IP address of the camera and the subnet
mask for the address range of the camera network.
4. Save the settings.
5. If necessary, repeat steps 2 to 4 for further cameras.
9.6 Configuring cameras
VisionTech can be used with both stationary and moving cameras. A station-
ary camera is fixed in its position, e.g. mounted on a stand or on the ceiling. A
moving camera is mounted on the robot flange.
Procedure 1. In the main menu, select VisionTech > Sensor overview.
2. Select the camera that is to be configured.
3. On the General tab, select the mounting type for the camera.
4. Optionally: Enter the name, e.g. “Camera on robot”, in the Description
box.
5. Press Save.
6. Repeat steps 2 and 3 for the other cameras.
Description
3rd GigE camera 192.169.2.103 255.255.0.0
GigE network card in the robot
controller
192.169.2.100 255.255.0.0
Device IP address Subnet mask
Fig. 9-15: Sensor overview