63 / 109Issued: 11.10.2013 Version: KST VisionTech 2.1 V1
10 Configuration
6. Select the tool block file and confirm with OK. The file is imported into Vi-
sionTech and can then be used for all tasks.
7. Repeat steps 5 to 7 for further tool block files used.
8. In the line for the desired camera in the Toolblocks column, select the im-
ported tool block file.
9. Press the camera icon. A window for setting the exposure time is dis-
played and the taking of images is displayed.
10. Optionally: Enter the exposure time or set it using the plus/minus keys or
the slider control.
11. Press Save picture. An image is made.
12. Press Save. The setting is saved.
Configuration of the task has been successfully completed when the icon
in the Status column changes to green.
Description
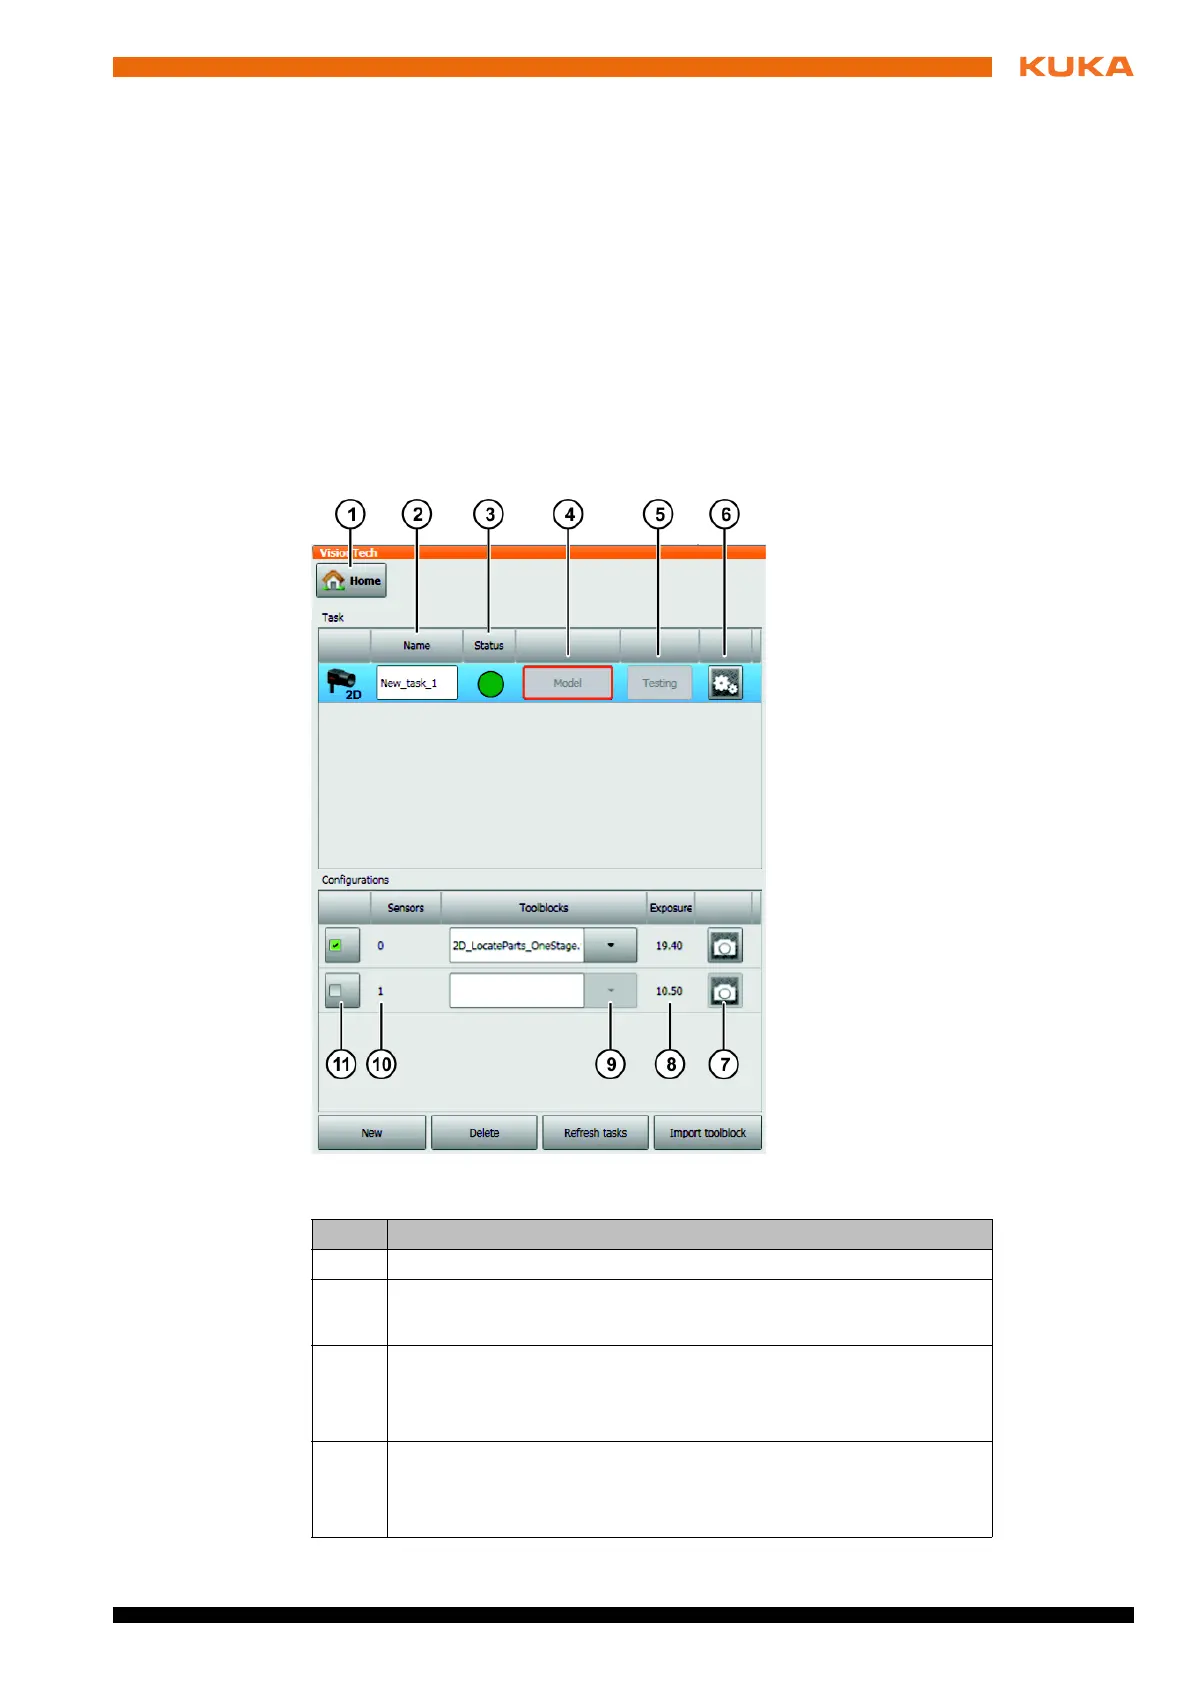
Fig. 10-6: Configuring a 3D task
Item Description
1 Back to Overview
2 Name of the task
The name is freely selectable.
3 State of the task
Green: Task has been successfully configured.
Red: Task is not configured.
4 Generate model
Green frame: Model has been successfully generated.
Red frame: No model has yet been generated.