2FT
1-6-28
(3) Detaching and refitting the ISU (reference)
Take the following procedure when the ISU is to be replaced.
Procedure
Detaching the ISU
1. Remove the contact glass (see page 1-6-
22).
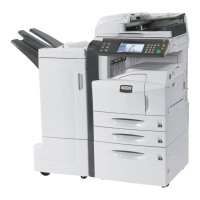
2. Remove the four screws holding the ISU
cover and then the cover.
Figure 1-6-51
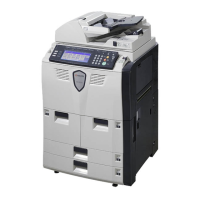
3. Detach the CCD wire from the CCD PCB.
4. Remove the four screws holding the ISU
and then the ISU.
5. Replace the ISU.
Figure 1-6-52
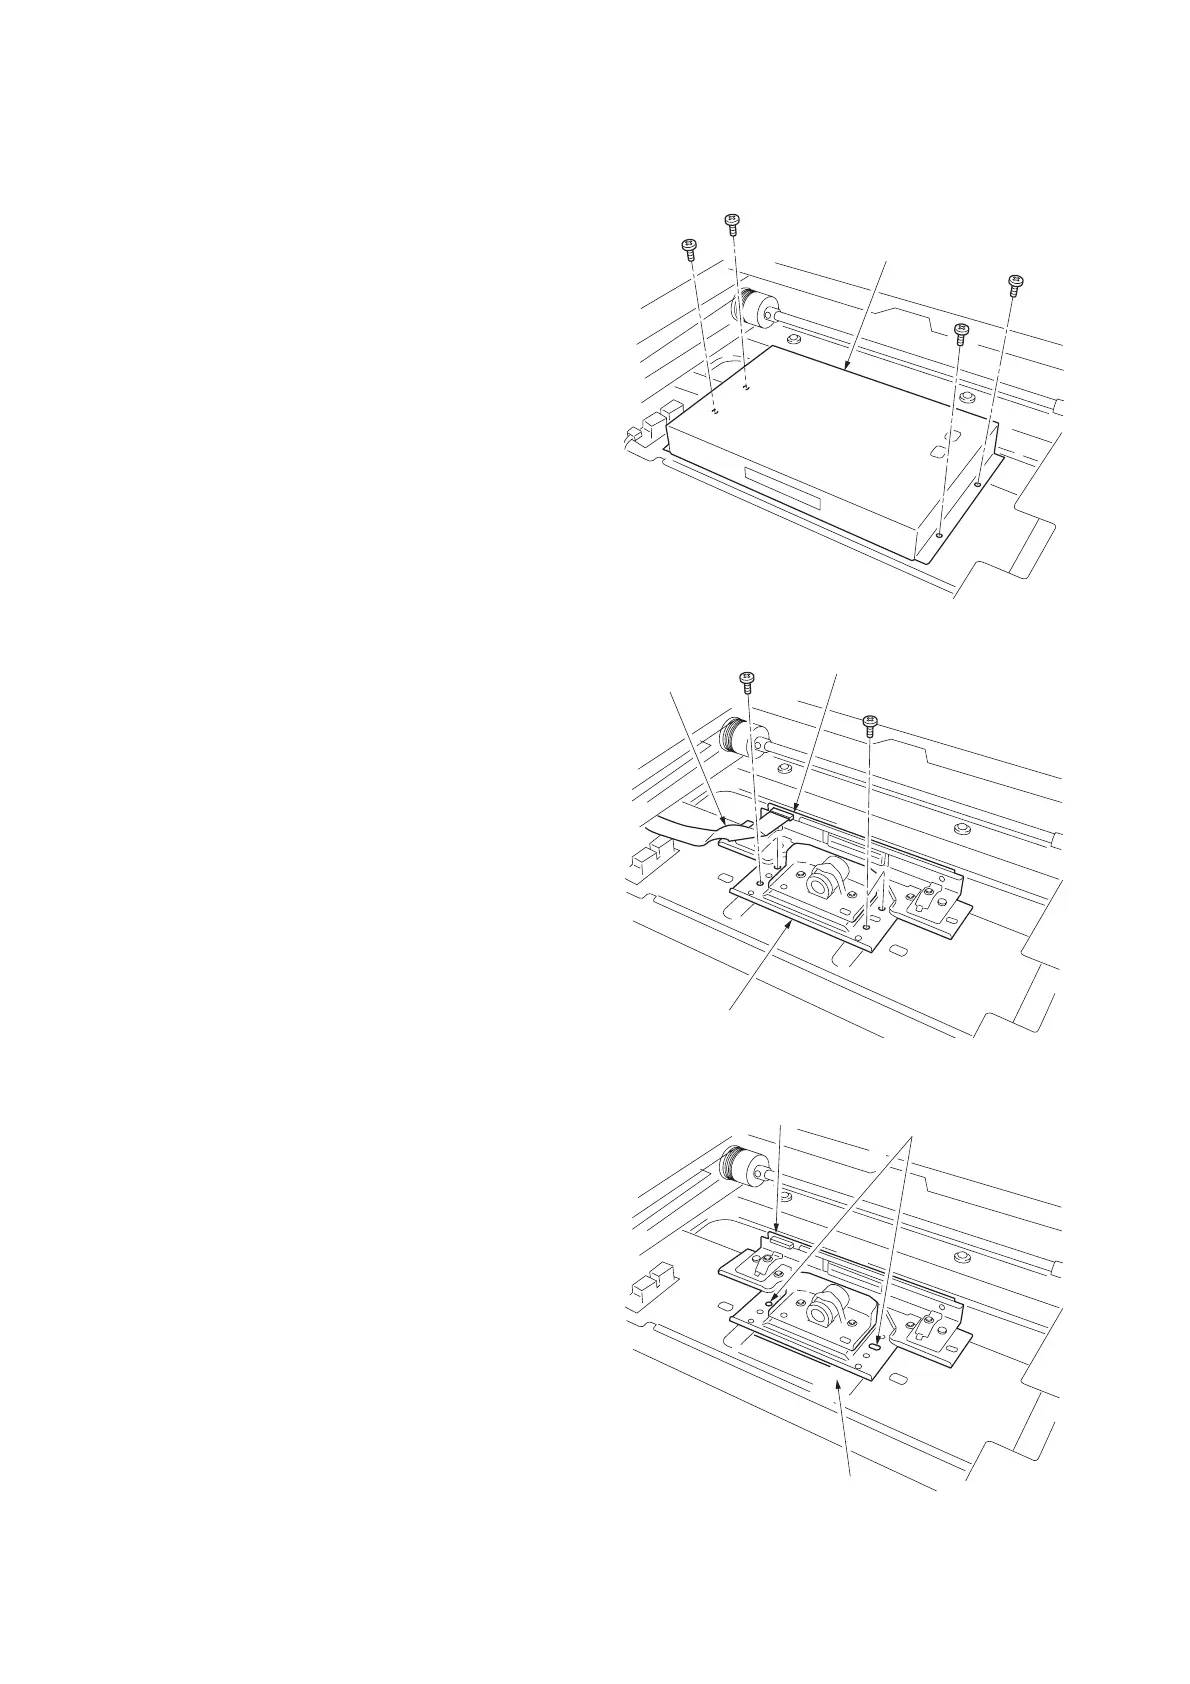
Refitting the ISU
1. Align the positioning holes of the ISU by
pushing it a little and attach the ISU to the
scanner unit.
* Attach the ISU with reference to marking
"C".
2. Secure the ISU using the four screws.
3. Refit the CCD wire to CCD PCB.
4. Refit all the removed parts.
Figure 1-6-53
ISU cover
ISU
CCD PCB
CCD wire
ISU
Marking
Positioning holes
C
M

 Loading...