KARA
KARAKARA
KARA
®
®®
®
M
MM
MO
OO
ODULAR
DULARDULAR
DULAR WST
WST WST
WST
®
®®
®
SYSTEM
SYSTEM SYSTEM
SYSTEM
rigging procedures using
rigging procedures using rigging procedures using
rigging procedures using
kara
karakara
kara-
--
-minibu
minibuminibu
minibu
VERSION 1.0
KARA_SRM_EN_1-0
w w w . l - a c o u s t i c s . c o m
12
1212
12
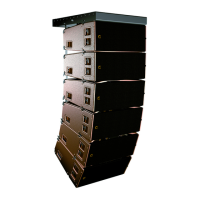
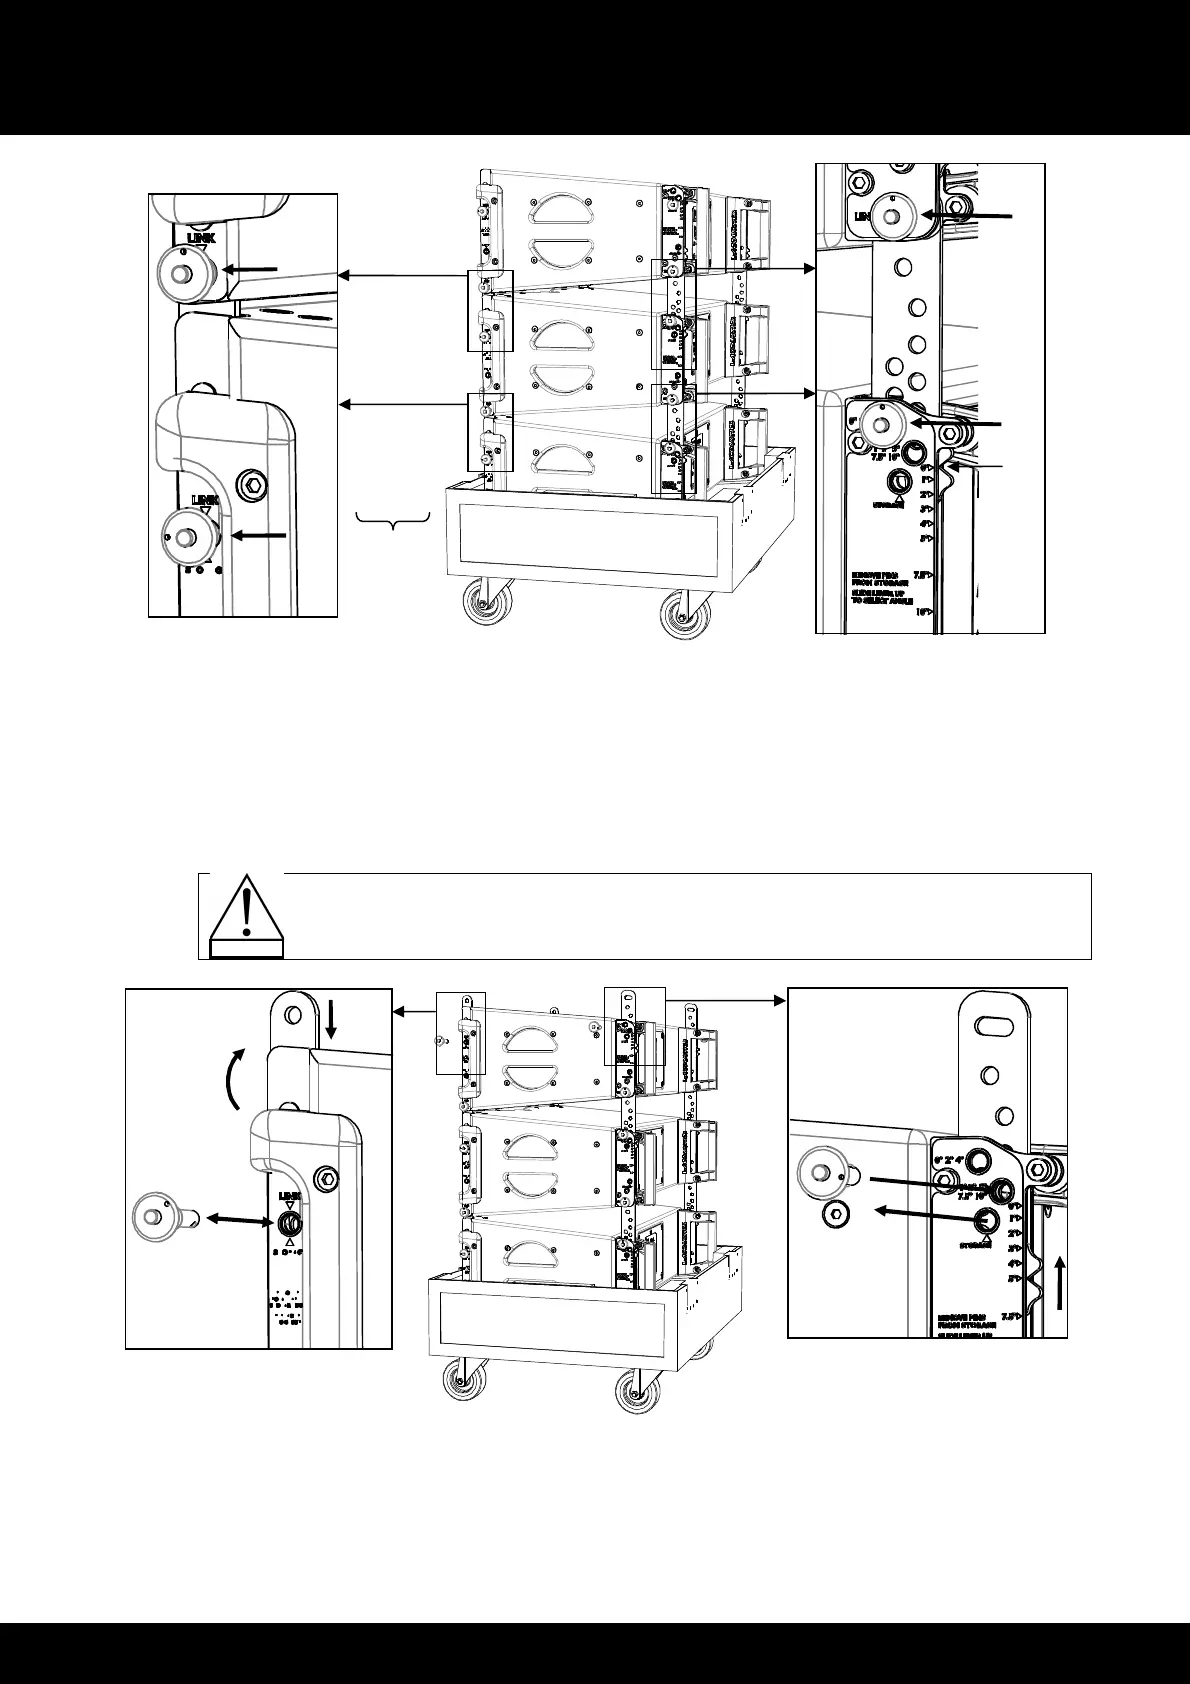
Figure 7: Checking the ARRAY#1 inter-enclosure attachments
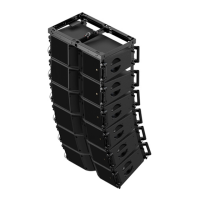
3. Open the four KARA#1 arms as follows (repeat on both sides of the enclosure):
a. Remove the front top R-BLP from its storage hole, rotate the front arm up, slide it down, and lock it in place
by re-inserting the R-BLP into its link hole. Note: The front top storage and link holes are the same.
b. Remove the rear top R-BLP from its storage hole, slide the angle arm so as to align the cursor with angle
label 5°, and lock it in place by re-inserting the R-BLP into angle hole 1°/3°/5°/7.5°/10°.
It is recommended to select the 5° angle on the KARA intended to be attached to the KARA-
MINIBU; in that way the KARA#1 axis will be parallel to the KARA-MINIBU.
Figure 8: Opening the KARA#1 arms
 Loading...